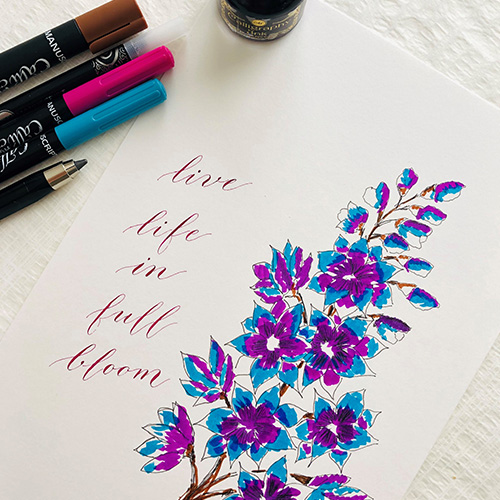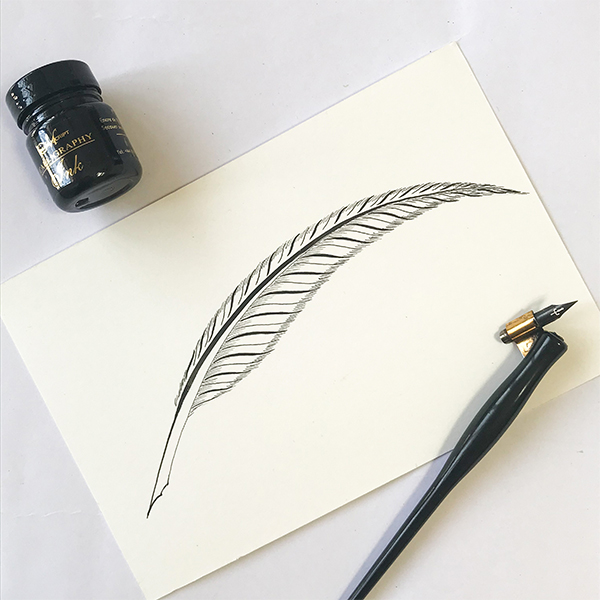
Hi, this is Kanika from @klikbykanika. I am sharing the step by step process to make a quill flourish design. To make this design I have used the following products fromManuscript's Range.
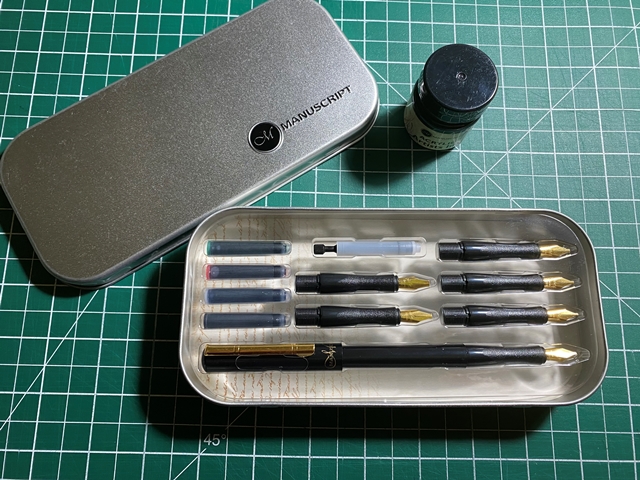
- Modern Calligraphy Set Oblique with the EF Principal Nib
- Manuscript Black Calligraphy Ink
- Hotpressed watercolour paper. You can also use any other paper suitable for calligraphy. It is always better to use smooth paper for pointed pen work.
- A Pencil
- An Eraser
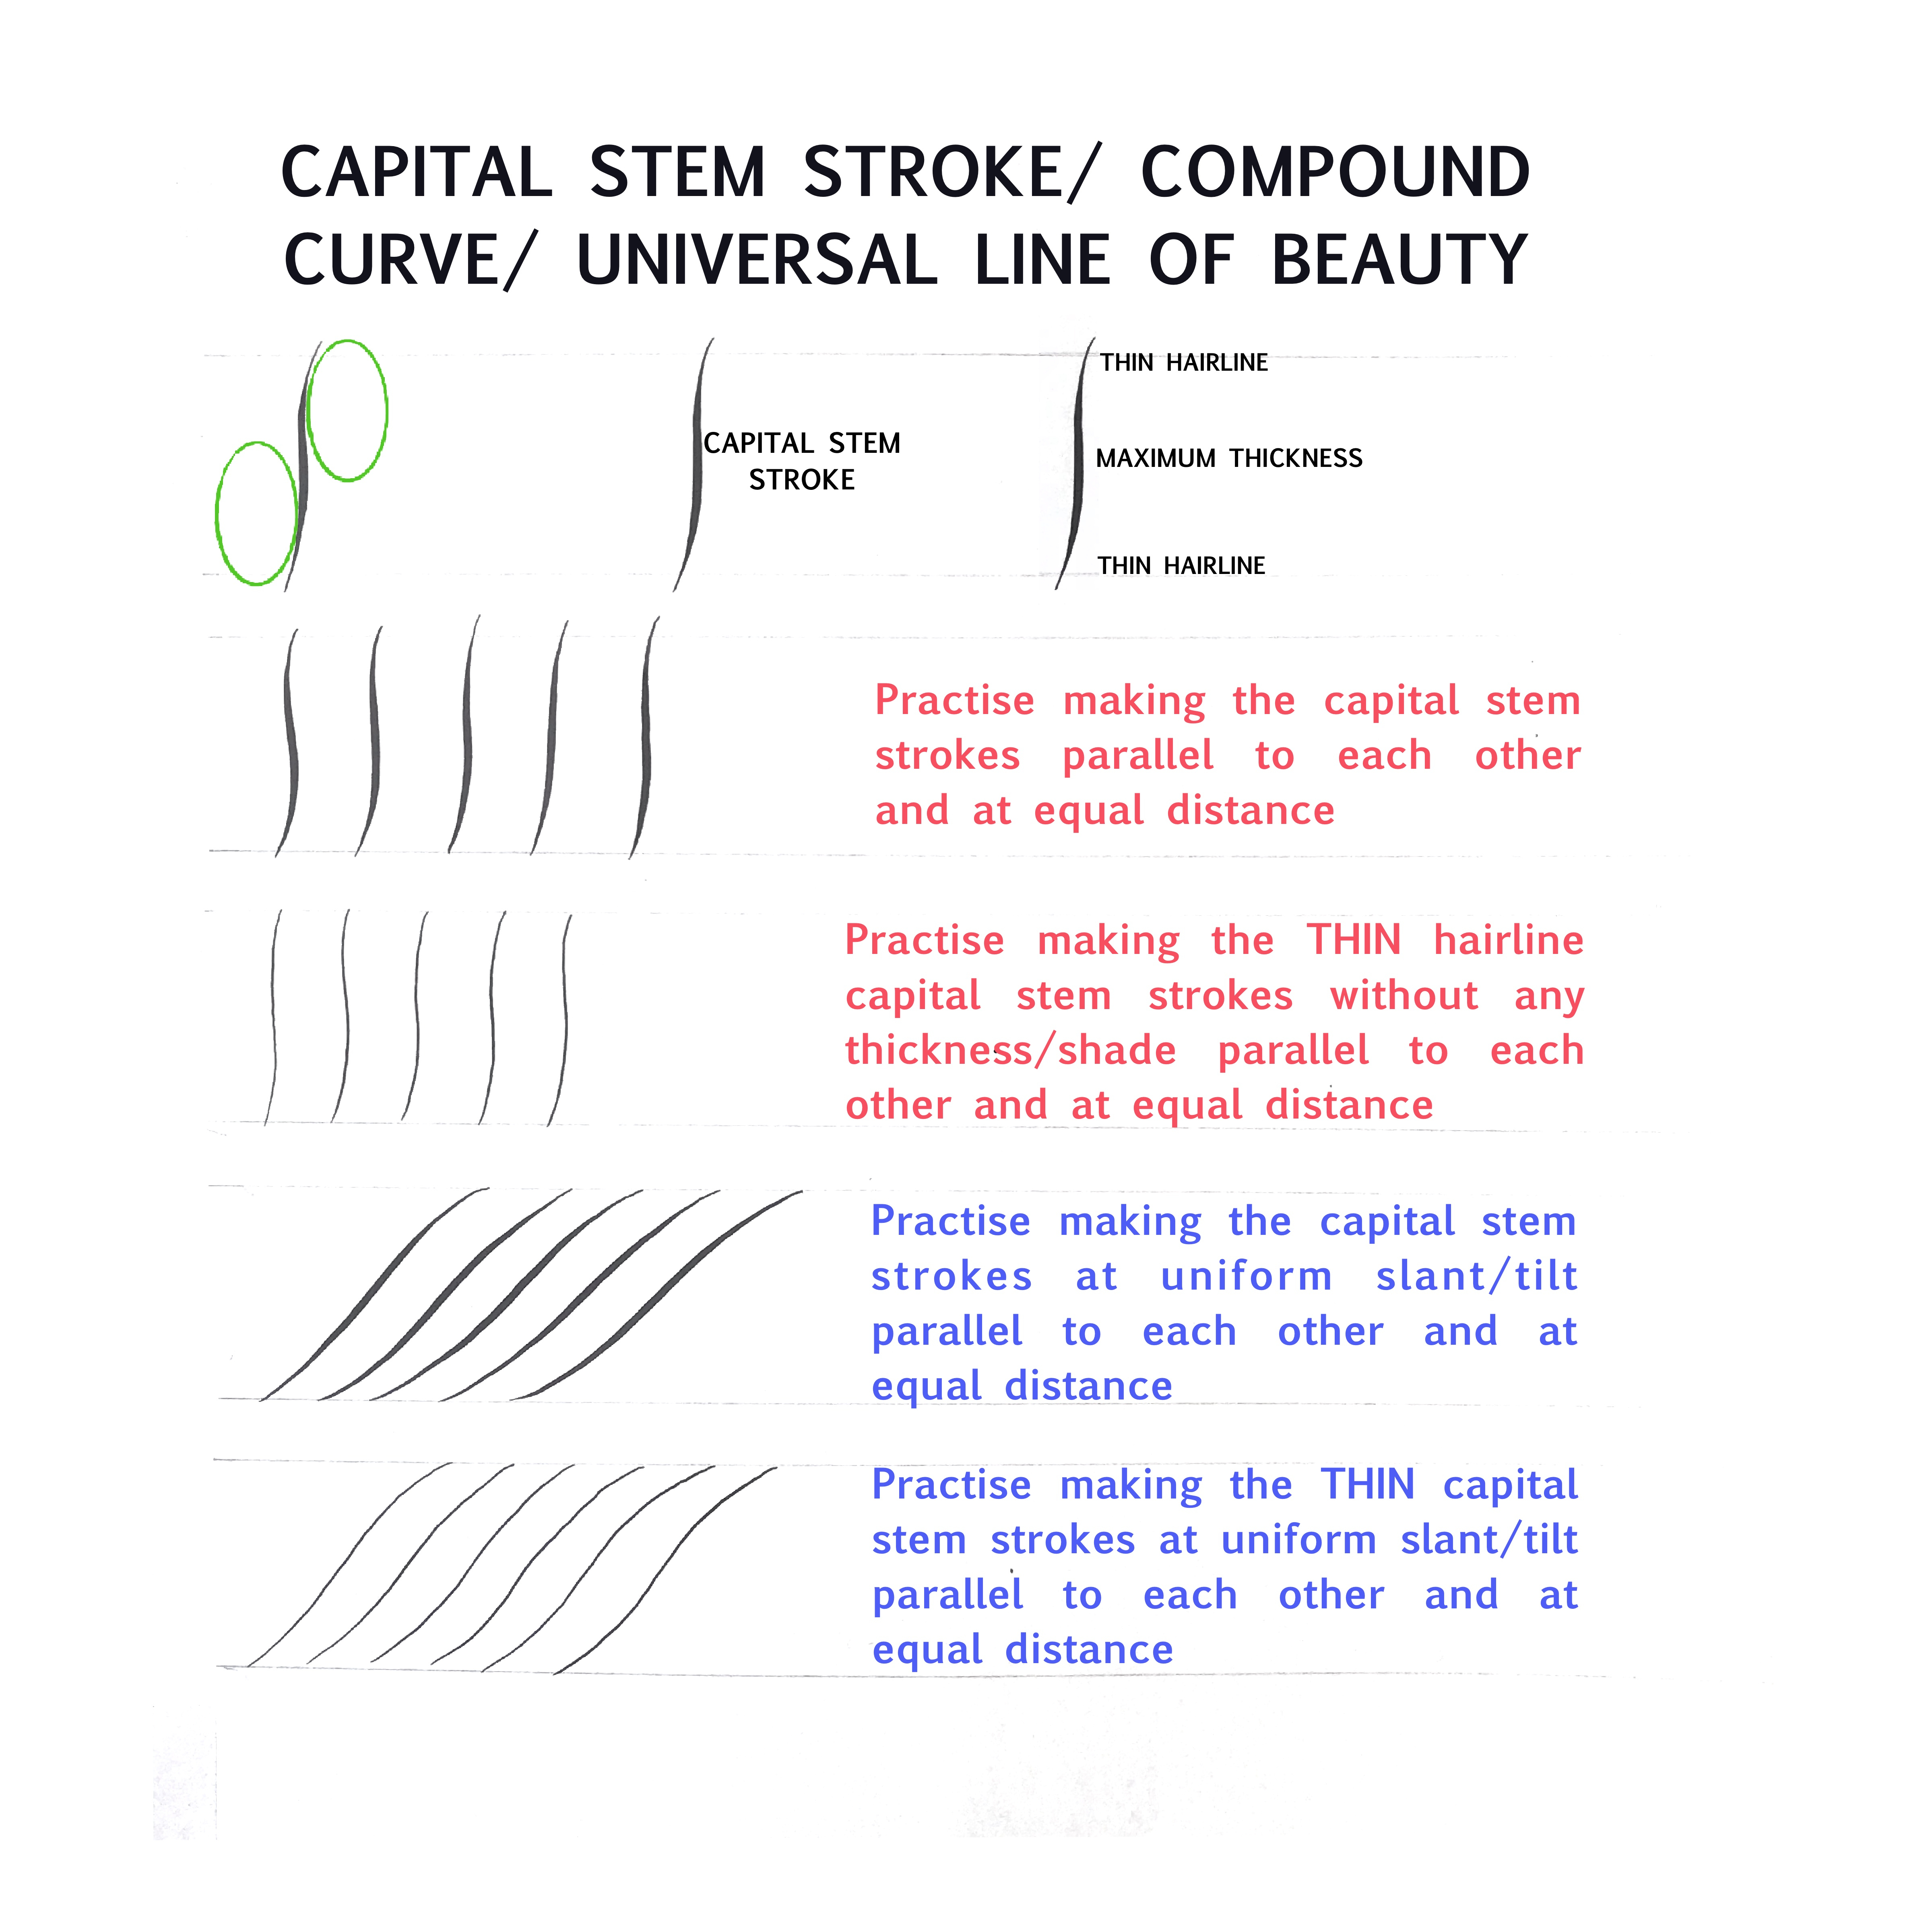
In this design the stroke which is being continuously repeated is the Capital Stem Stroke, also known as Universal Line of Beauty/Compound curve.
Before attempting this design one should be able to make the capital stem stroke. As shown in the image above both the edges of this stroke are based on the sides of ovals. From the Image 1 we can see that this stroke starts as a thin hairline, attains maximum thickness in the centre and then again decreases in thickness to a hairline. The ends of this stroke should be slightly curved, and not rounded and highly curved.
We will also be using the Thin Monoline Capital Stem Stroke which is made without putting any pressure on the nib while writing.
Practise making consecutive parallel and equally spaced capital stem strokes, both slanted and vertical as shown in Image 1. Now as we have become familiar with this stroke we can start making the quill pen design by following the steps mentioned ahead.
Step 1
Make a pencil drawing of the quill as shown in Image 2. We have to draw the central stem of the quill and the outline of the projections of the feather on both the sides. The right side (the side nearest to us) of the quill should be around 2/3rds and the left side (furthest from us) should be around 1/3rd of the total width of the quill. The outside edge of the right side of the quill has a compound curve shape as highlighted in Image 2.
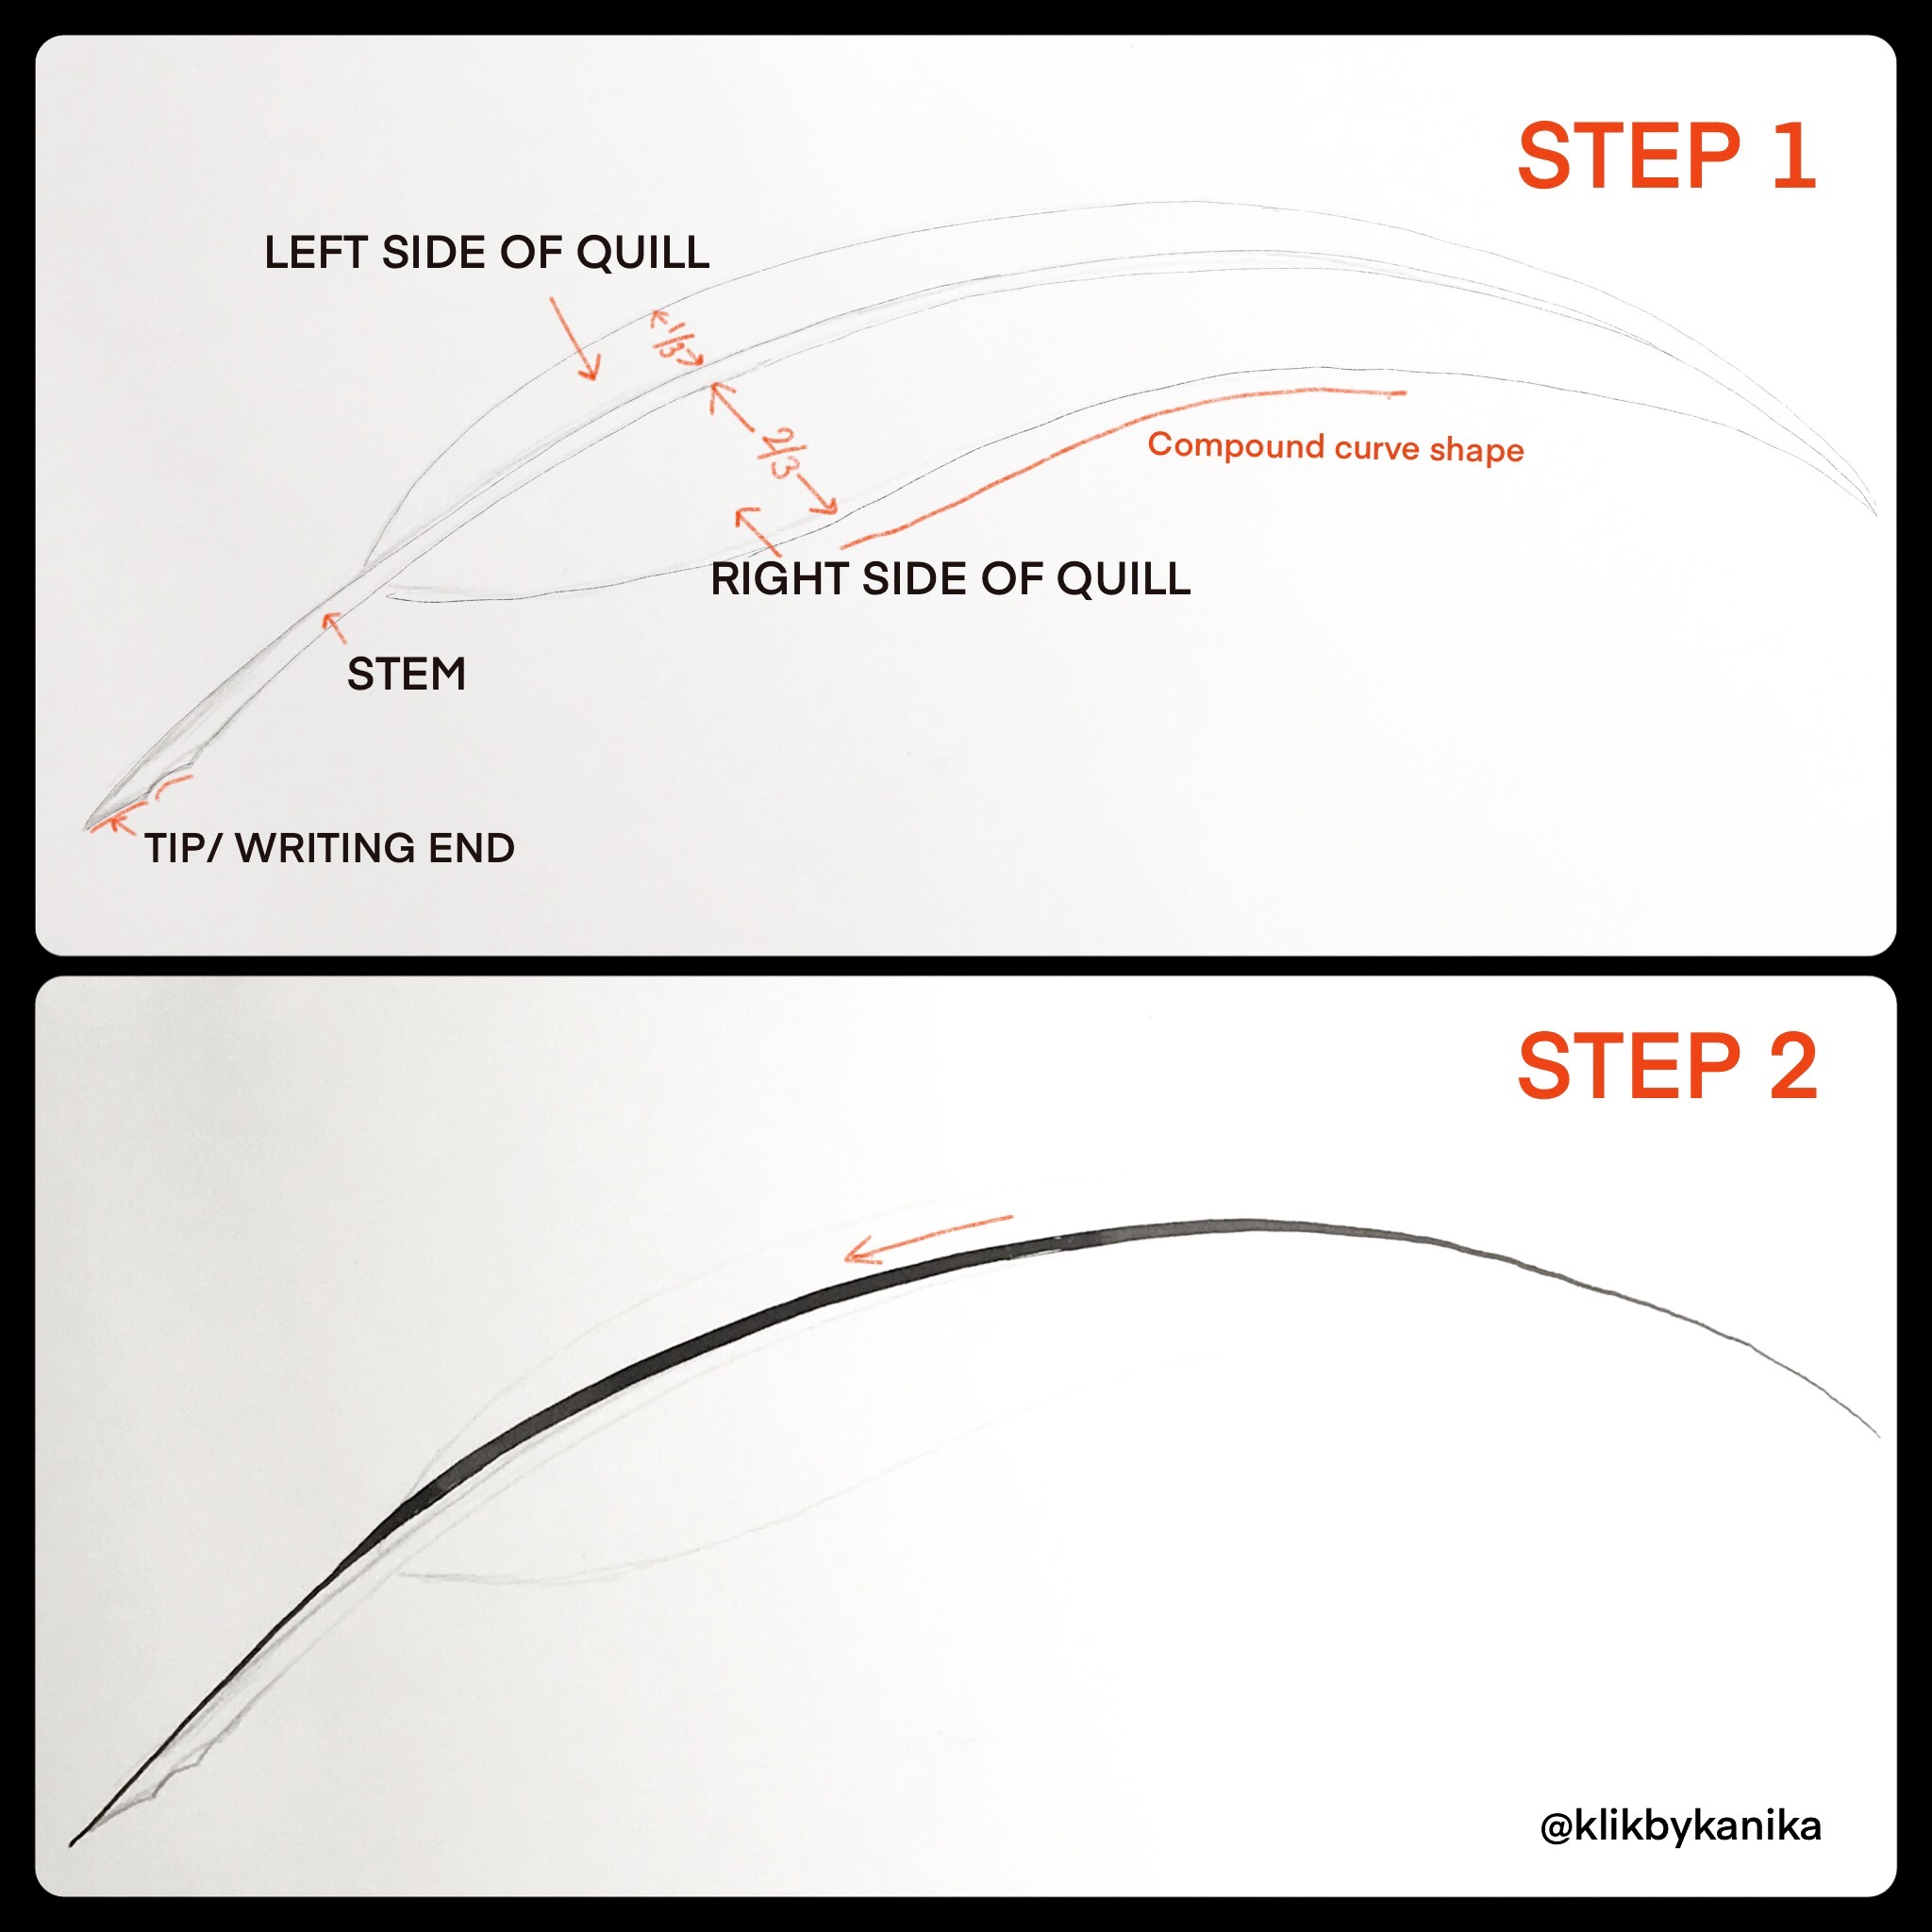
Step 2
We don’t have to trace exactly over the pencil lines. Use it just to guide movement of your hand on the paper. As shown in Image 2 first make the long shaded curve of the outer edge of the stem of quill using the wholearm movement, keeping the paper perpendicular to your body and moving the hand towards yourself starting from the far edge.
Step 3
Make the tip and inward edge of the stem of quill as shown in Image 3. The thickness of stem is decreasing as we move away from the writing end of quill.
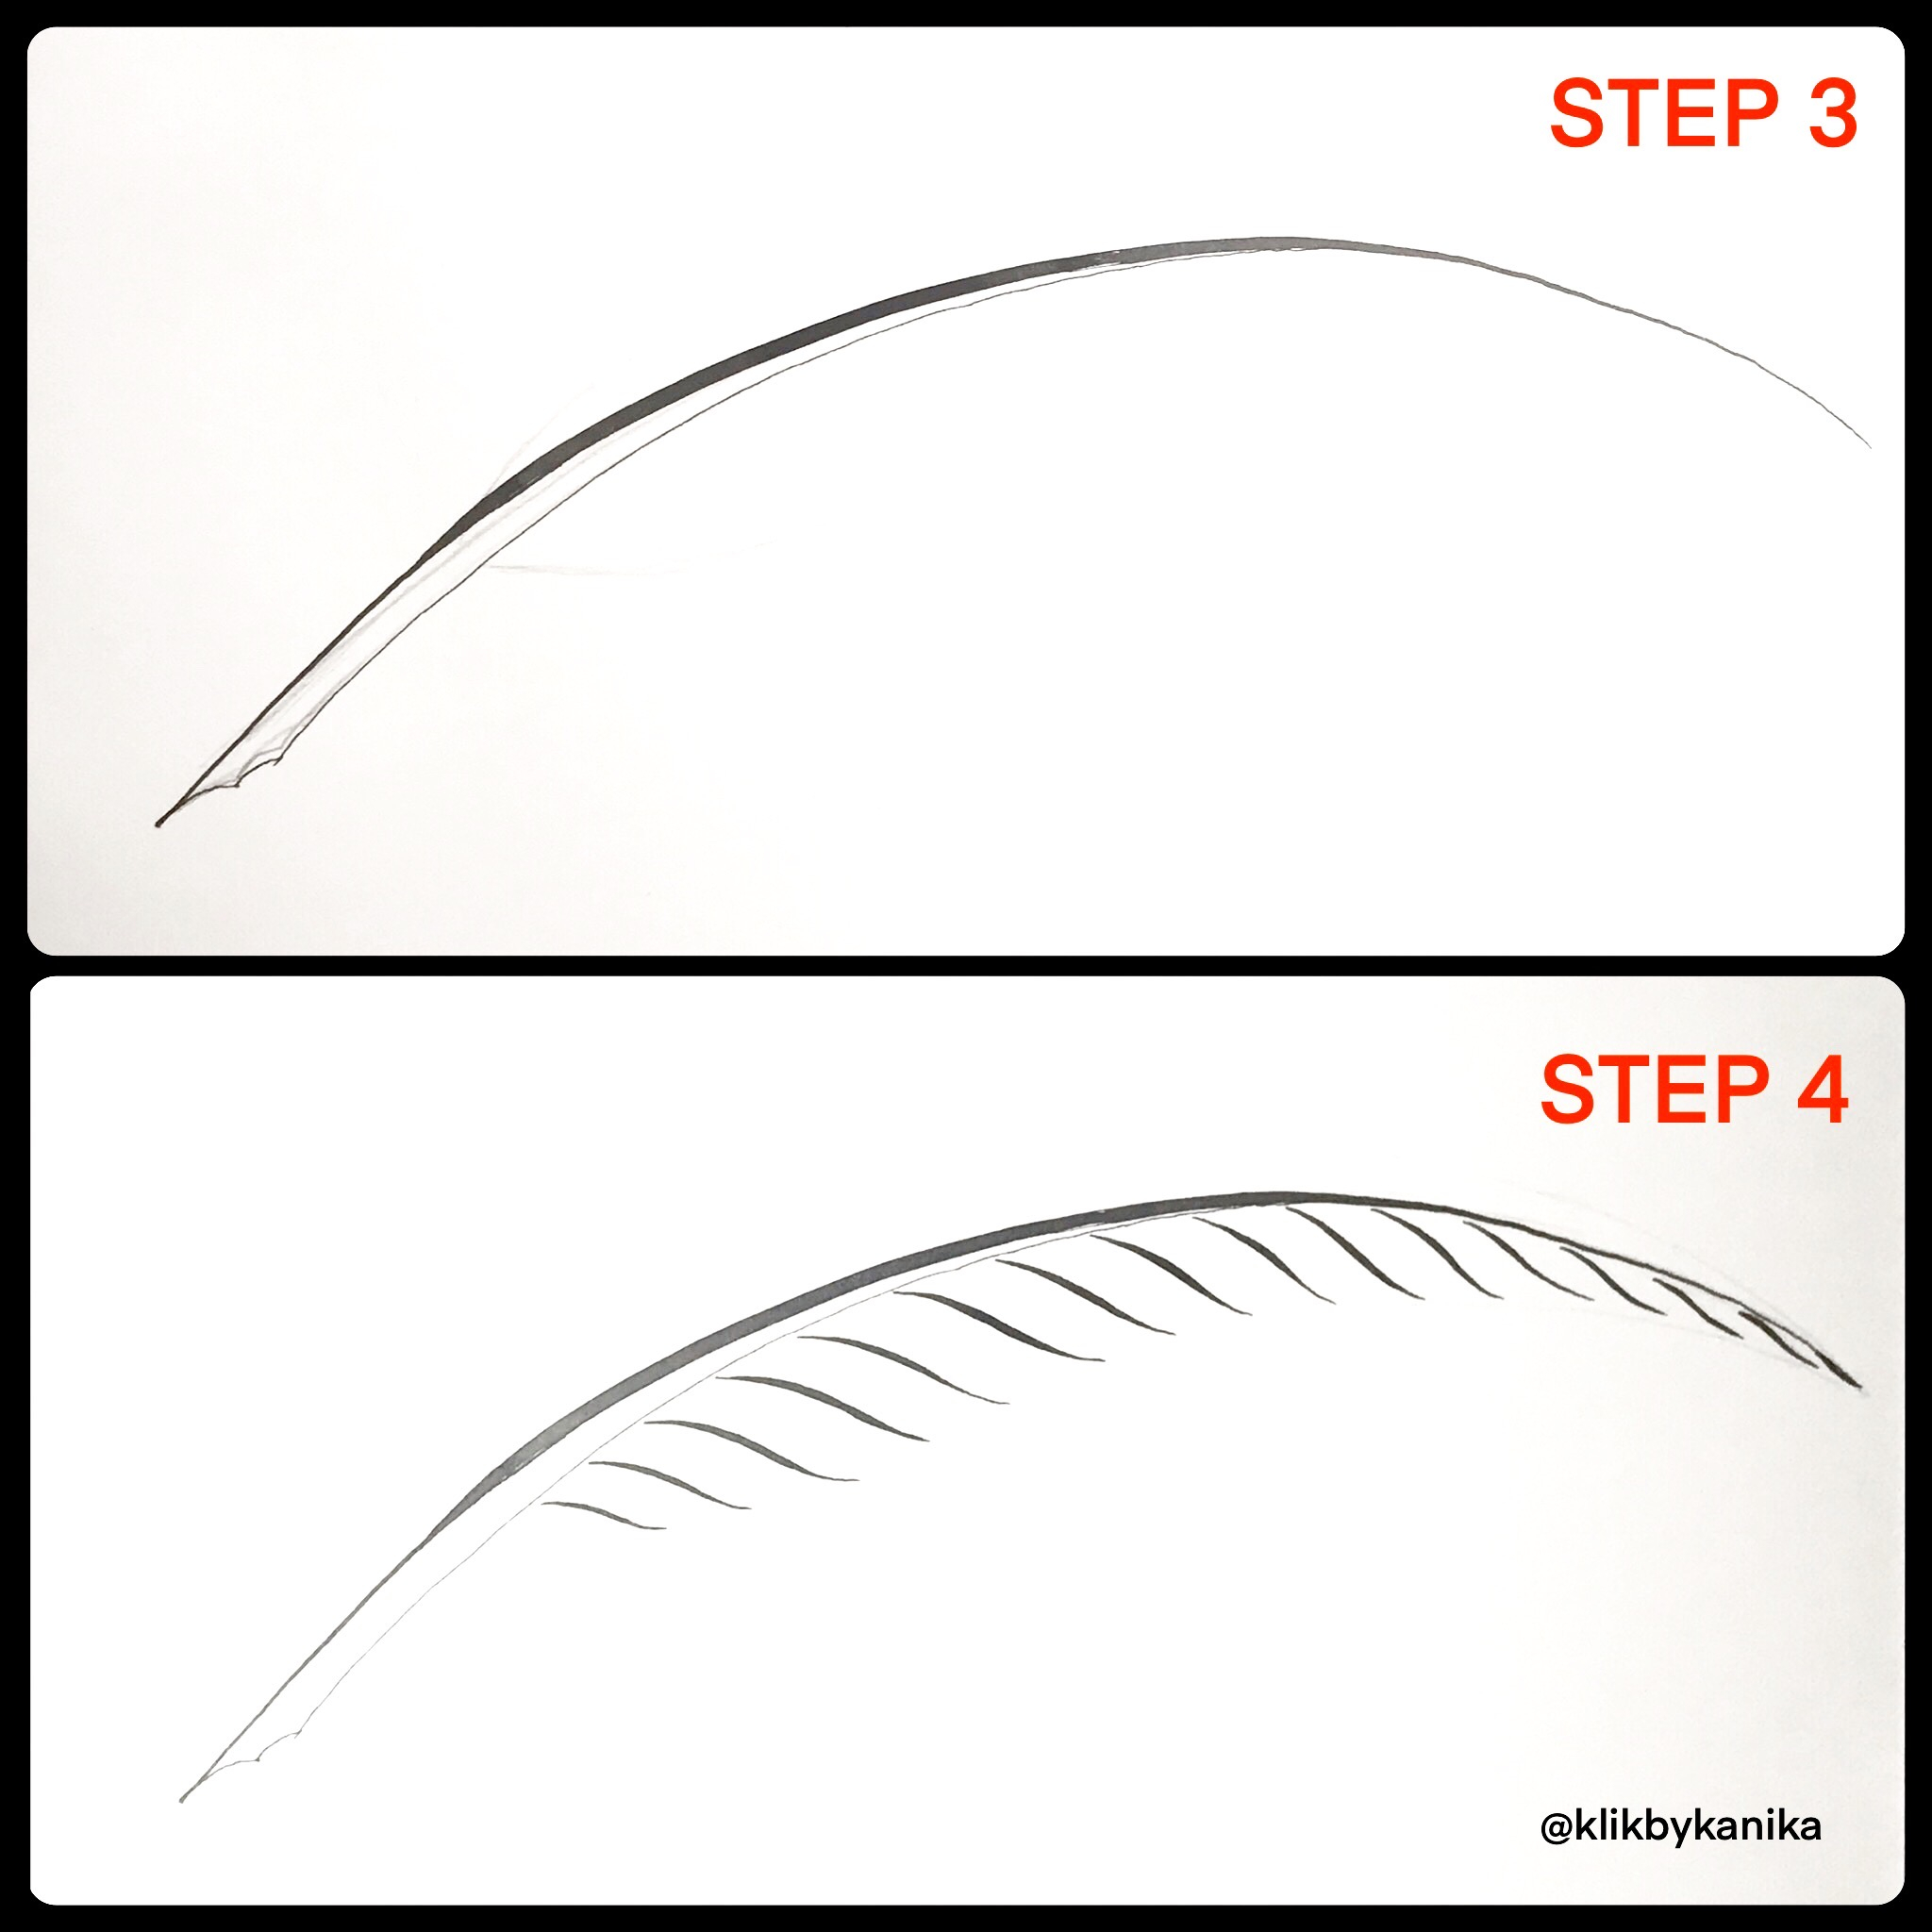
Step 4
Make consecutive uniformly spaced capital stem strokes as shown in Image 3. These strokes should be parallel to each other with a gradual decrease in size, slant and spacing as we move from the writing end of quill to the far end. These strokes should stop slightly away from the central stem of the quill. They should not touch the central stem. Try to keep these strokes in the space between the stem of quill and the pencil outline of the right side of quill.
Step 5
As shown in Image 4, make consecutive thin capital stem strokes in the middle of the strokes made in step 4. These strokes should gradually decrease in size and spacing. Consecutive thick and thin strokes bring in the element of contrast in design.
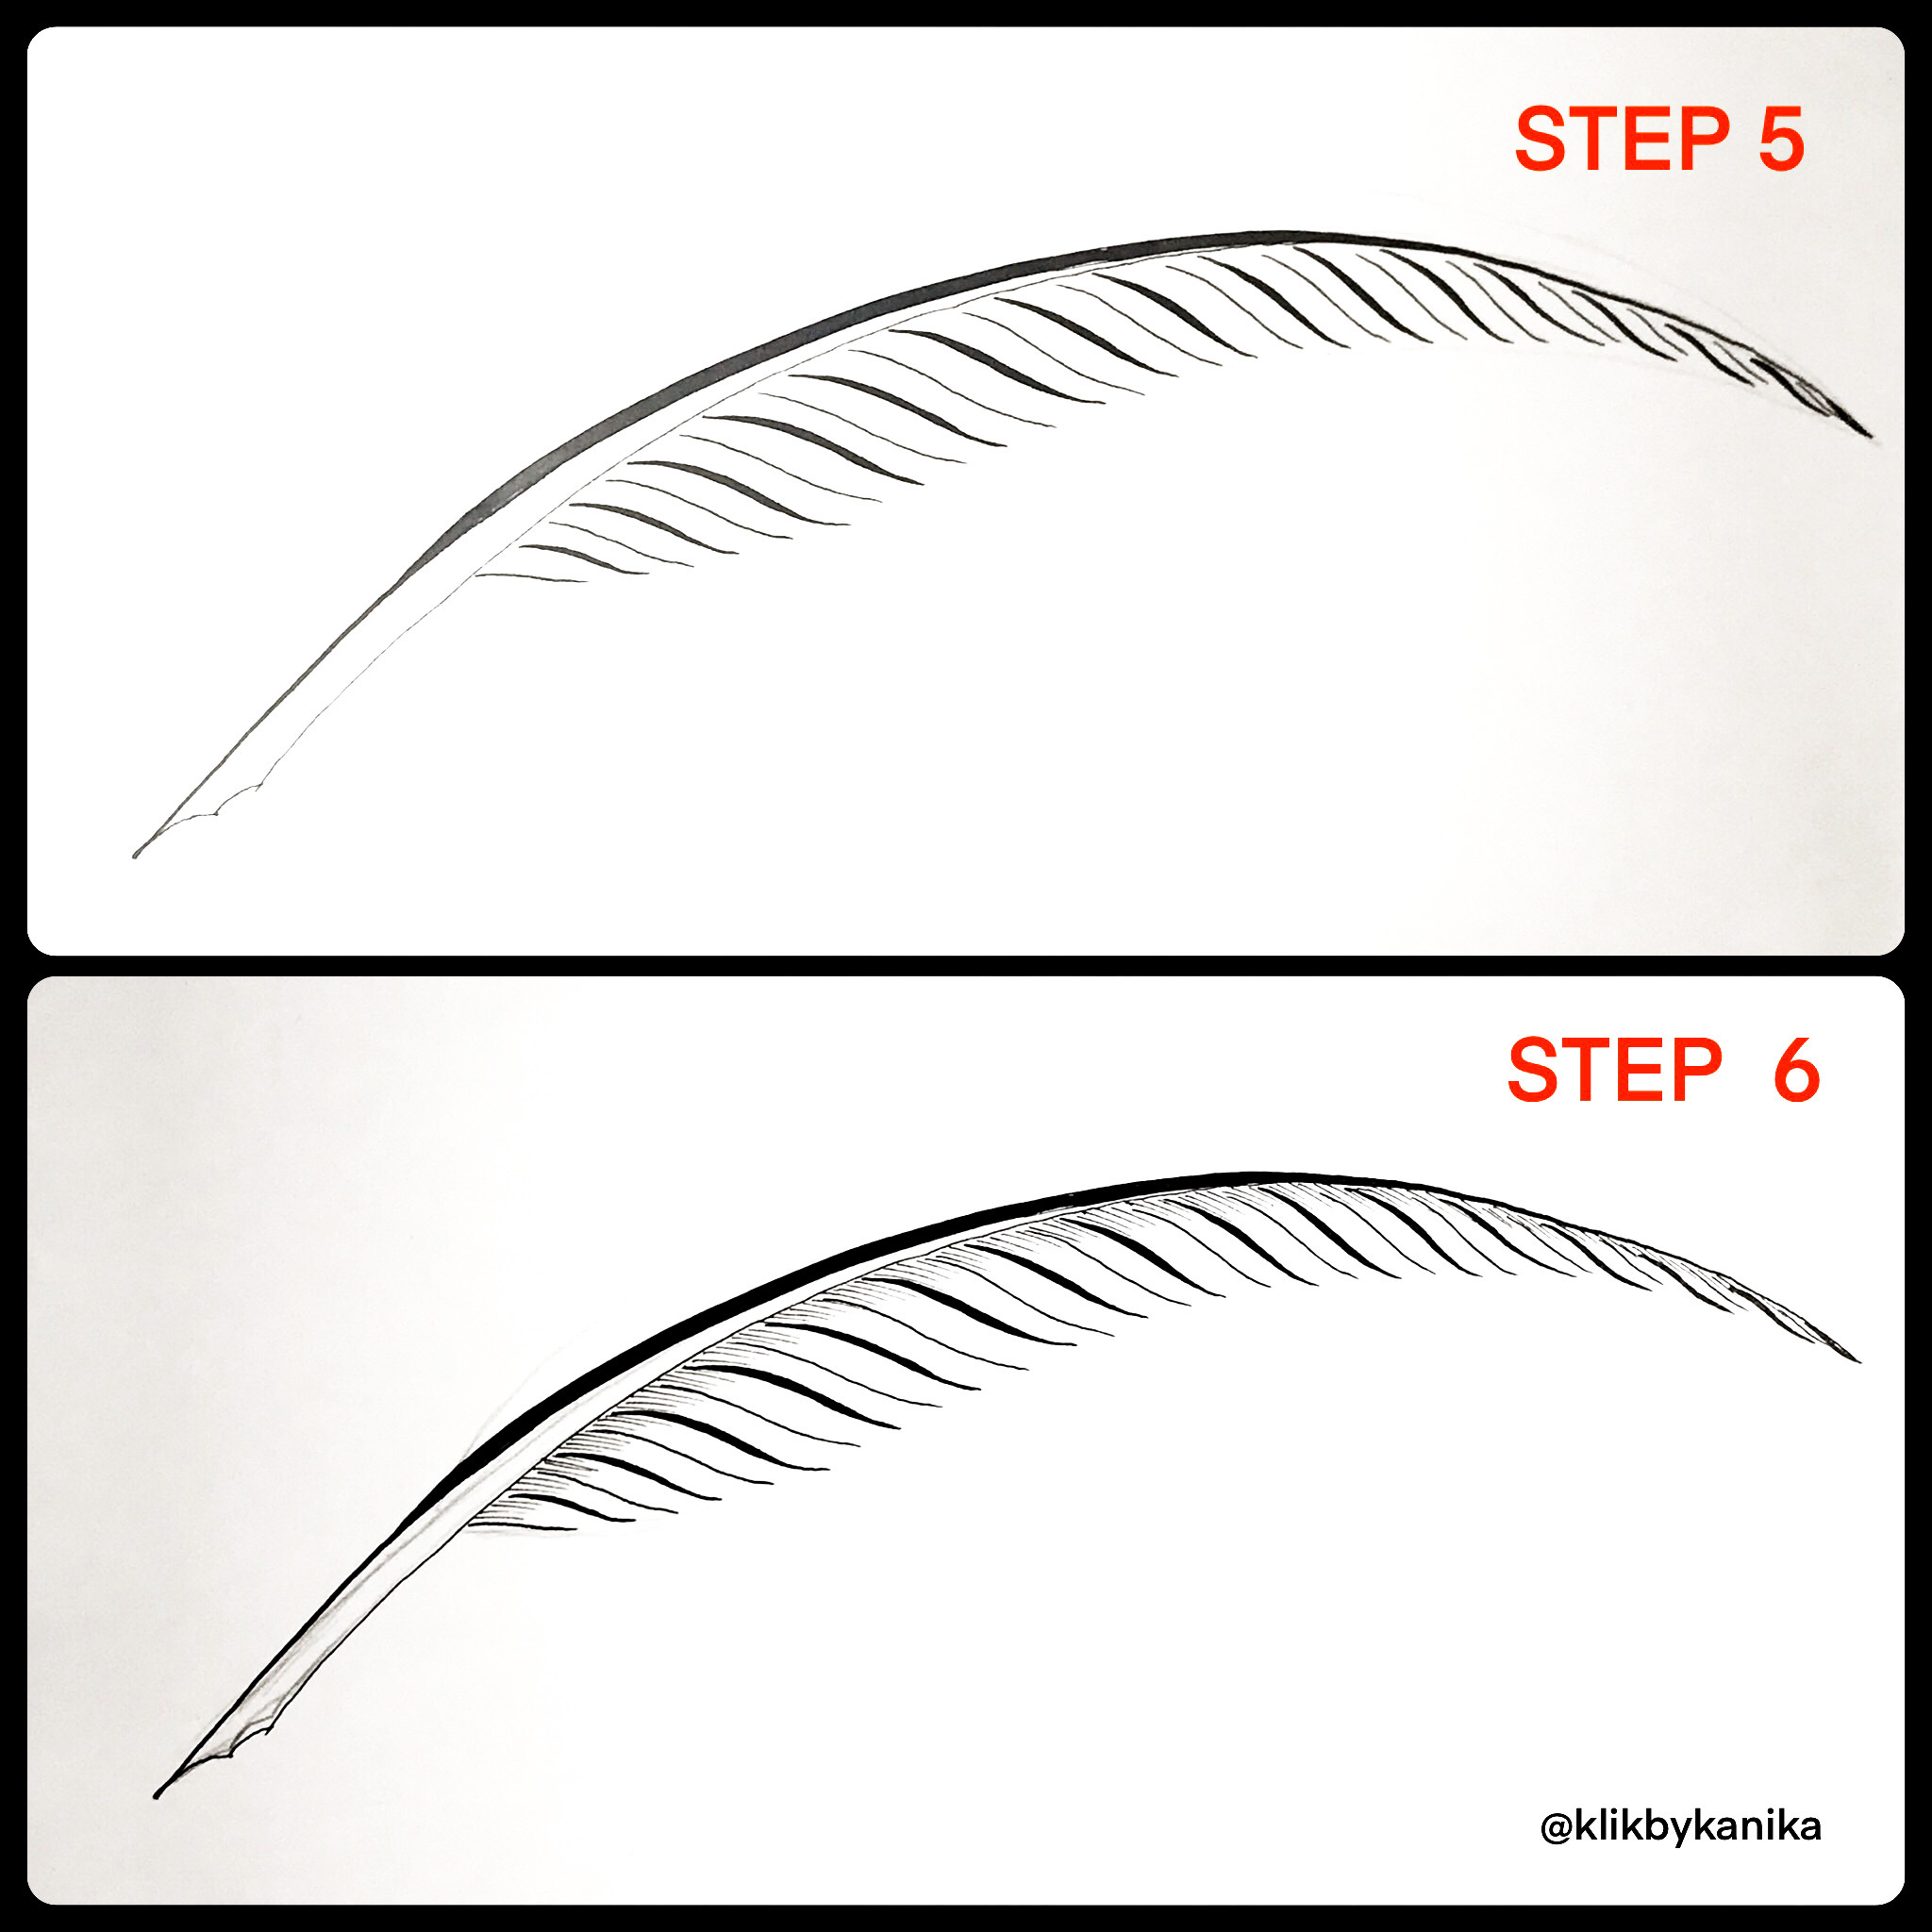
Step 6
Make small consecutive thin parallel hairline strokes along the inner edge of the right side of quill as shown in Image 4. Try to keep these strokes in the same direction and parallel to the capital stem strokes made in previous steps.
Step 7
Make small consecutive thin parallel hairline strokes along the outer edge of the right side of quill as shown in Image 5 below.
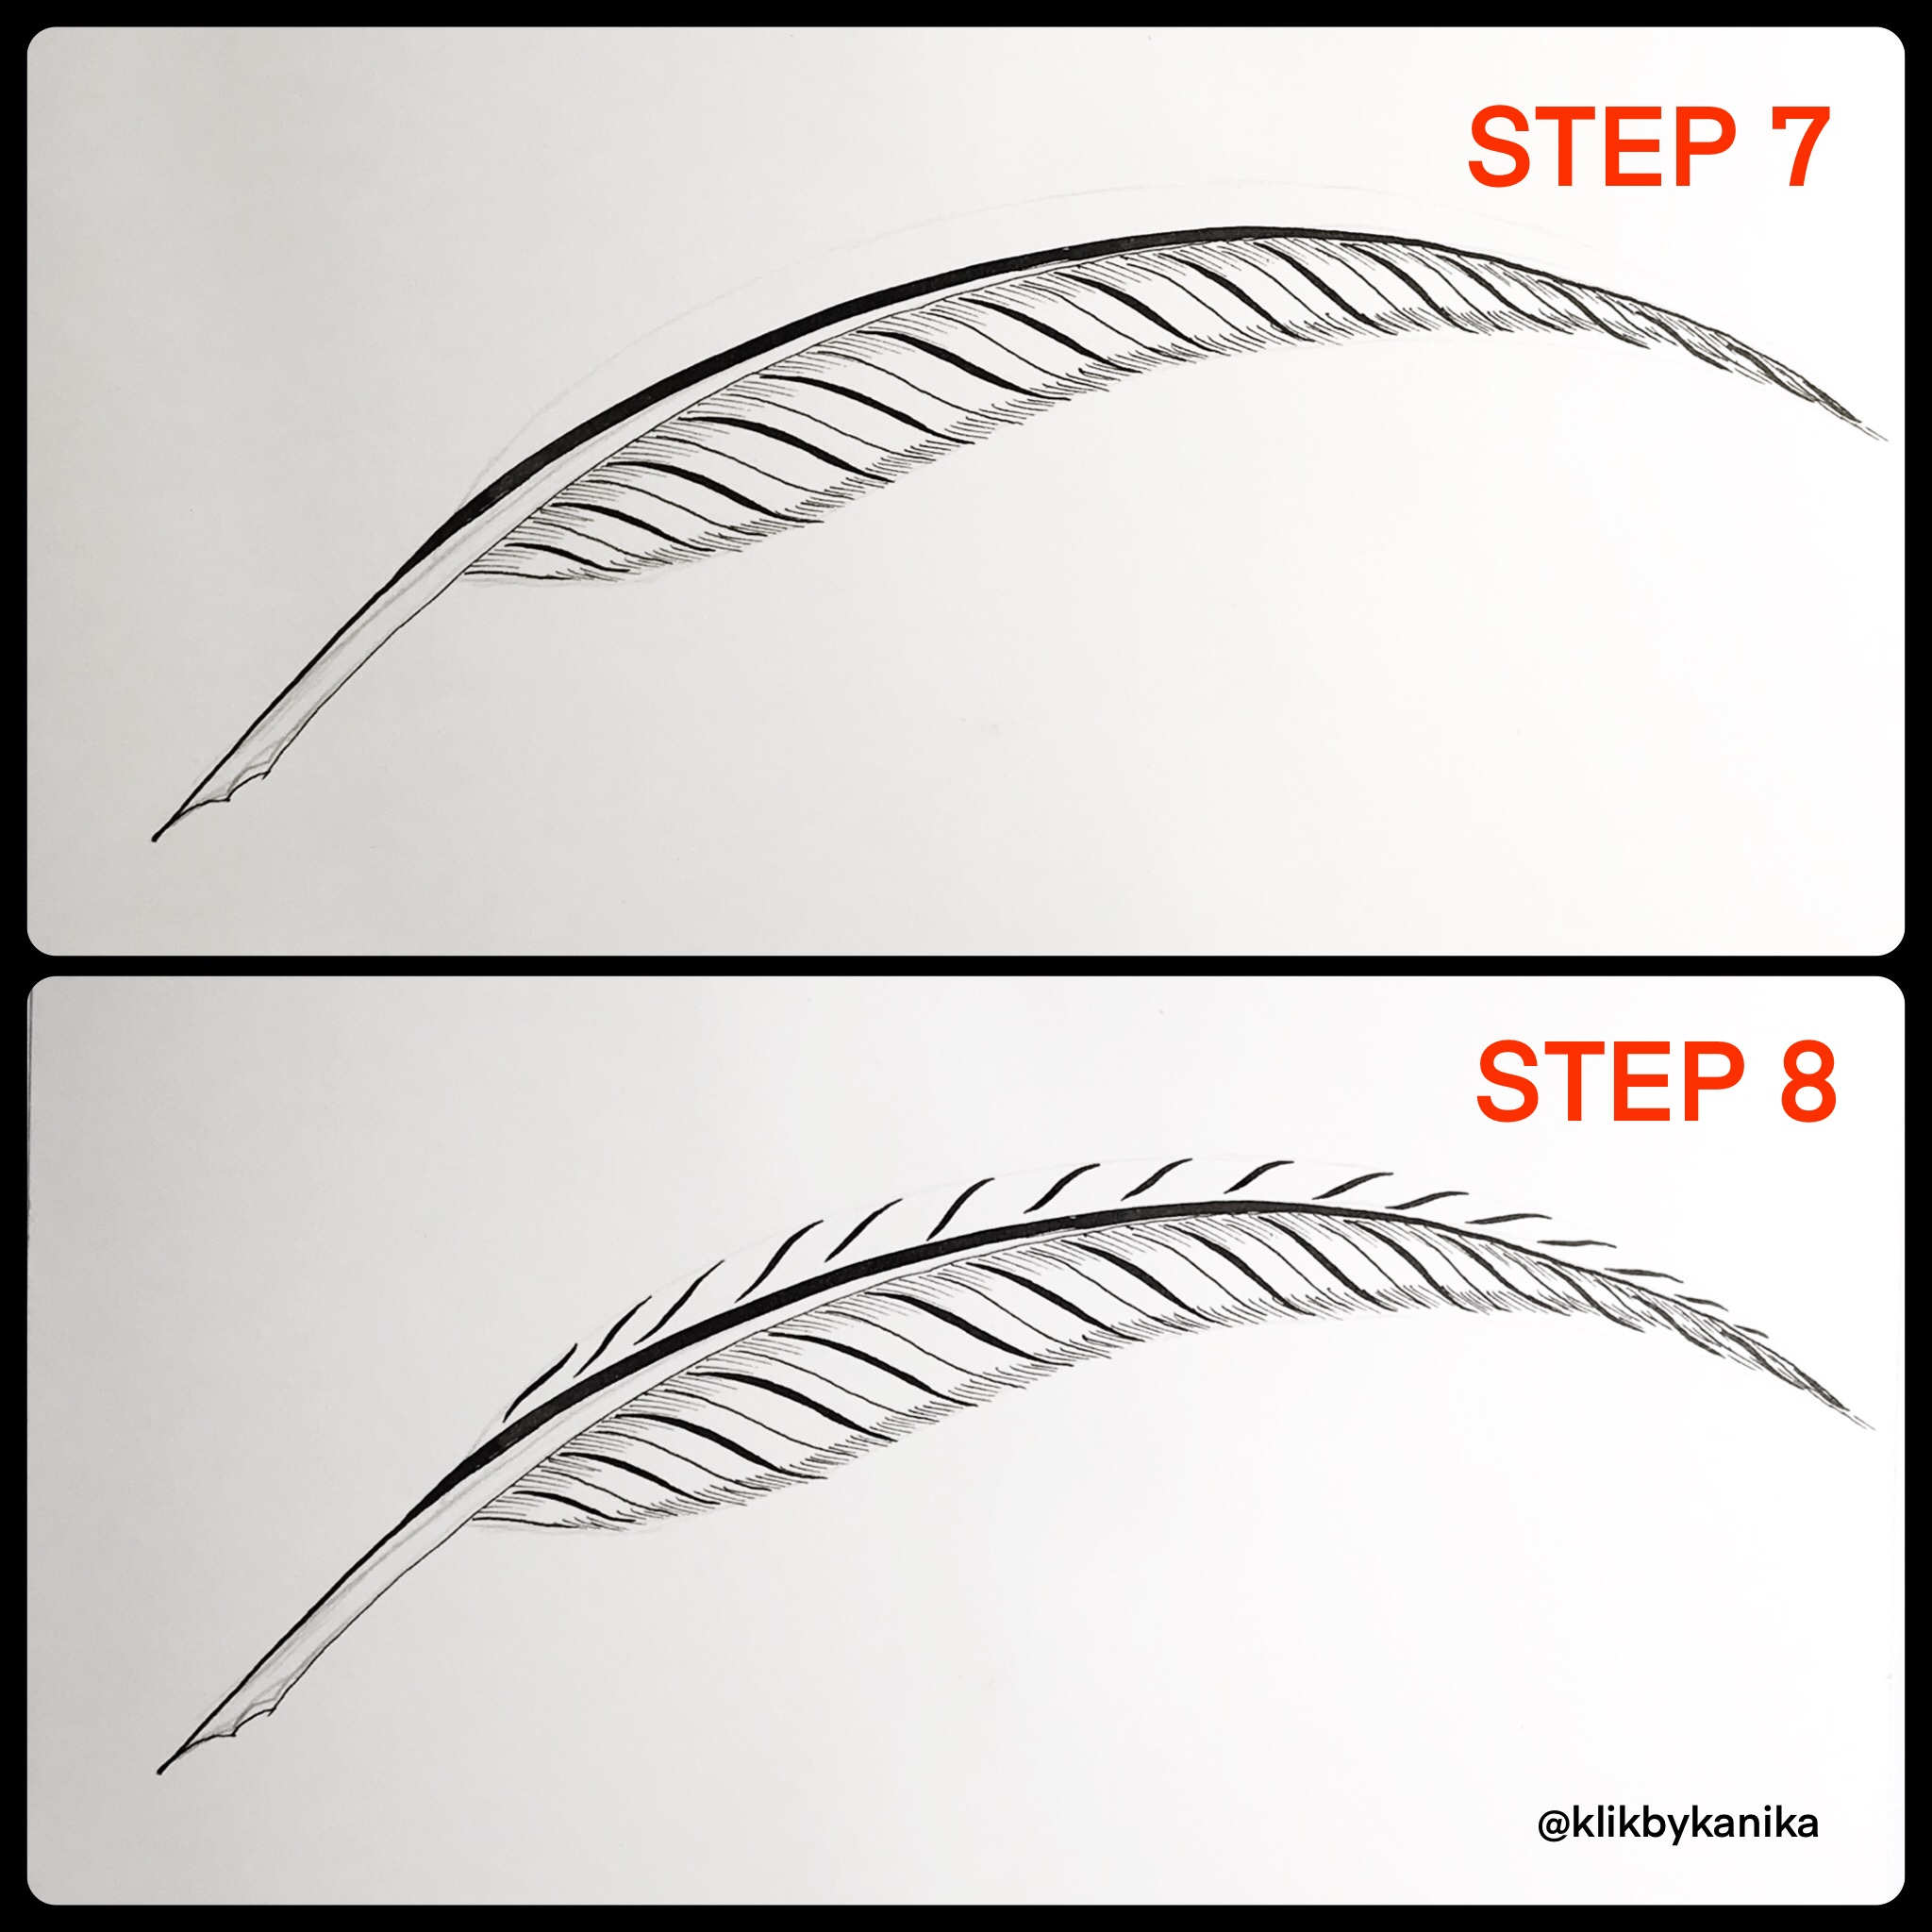
Step 8
Along the left side of the stem of the quill, make consecutive capital stem strokes gradually decreasing in size and spacing as shown in image 5.
Step 9
Make Consecutive thin capital stem strokes in the middle of the strokes made in Step 8. Make consecutive parallel thin hairline strokes along the outer edge of the left side of quill.
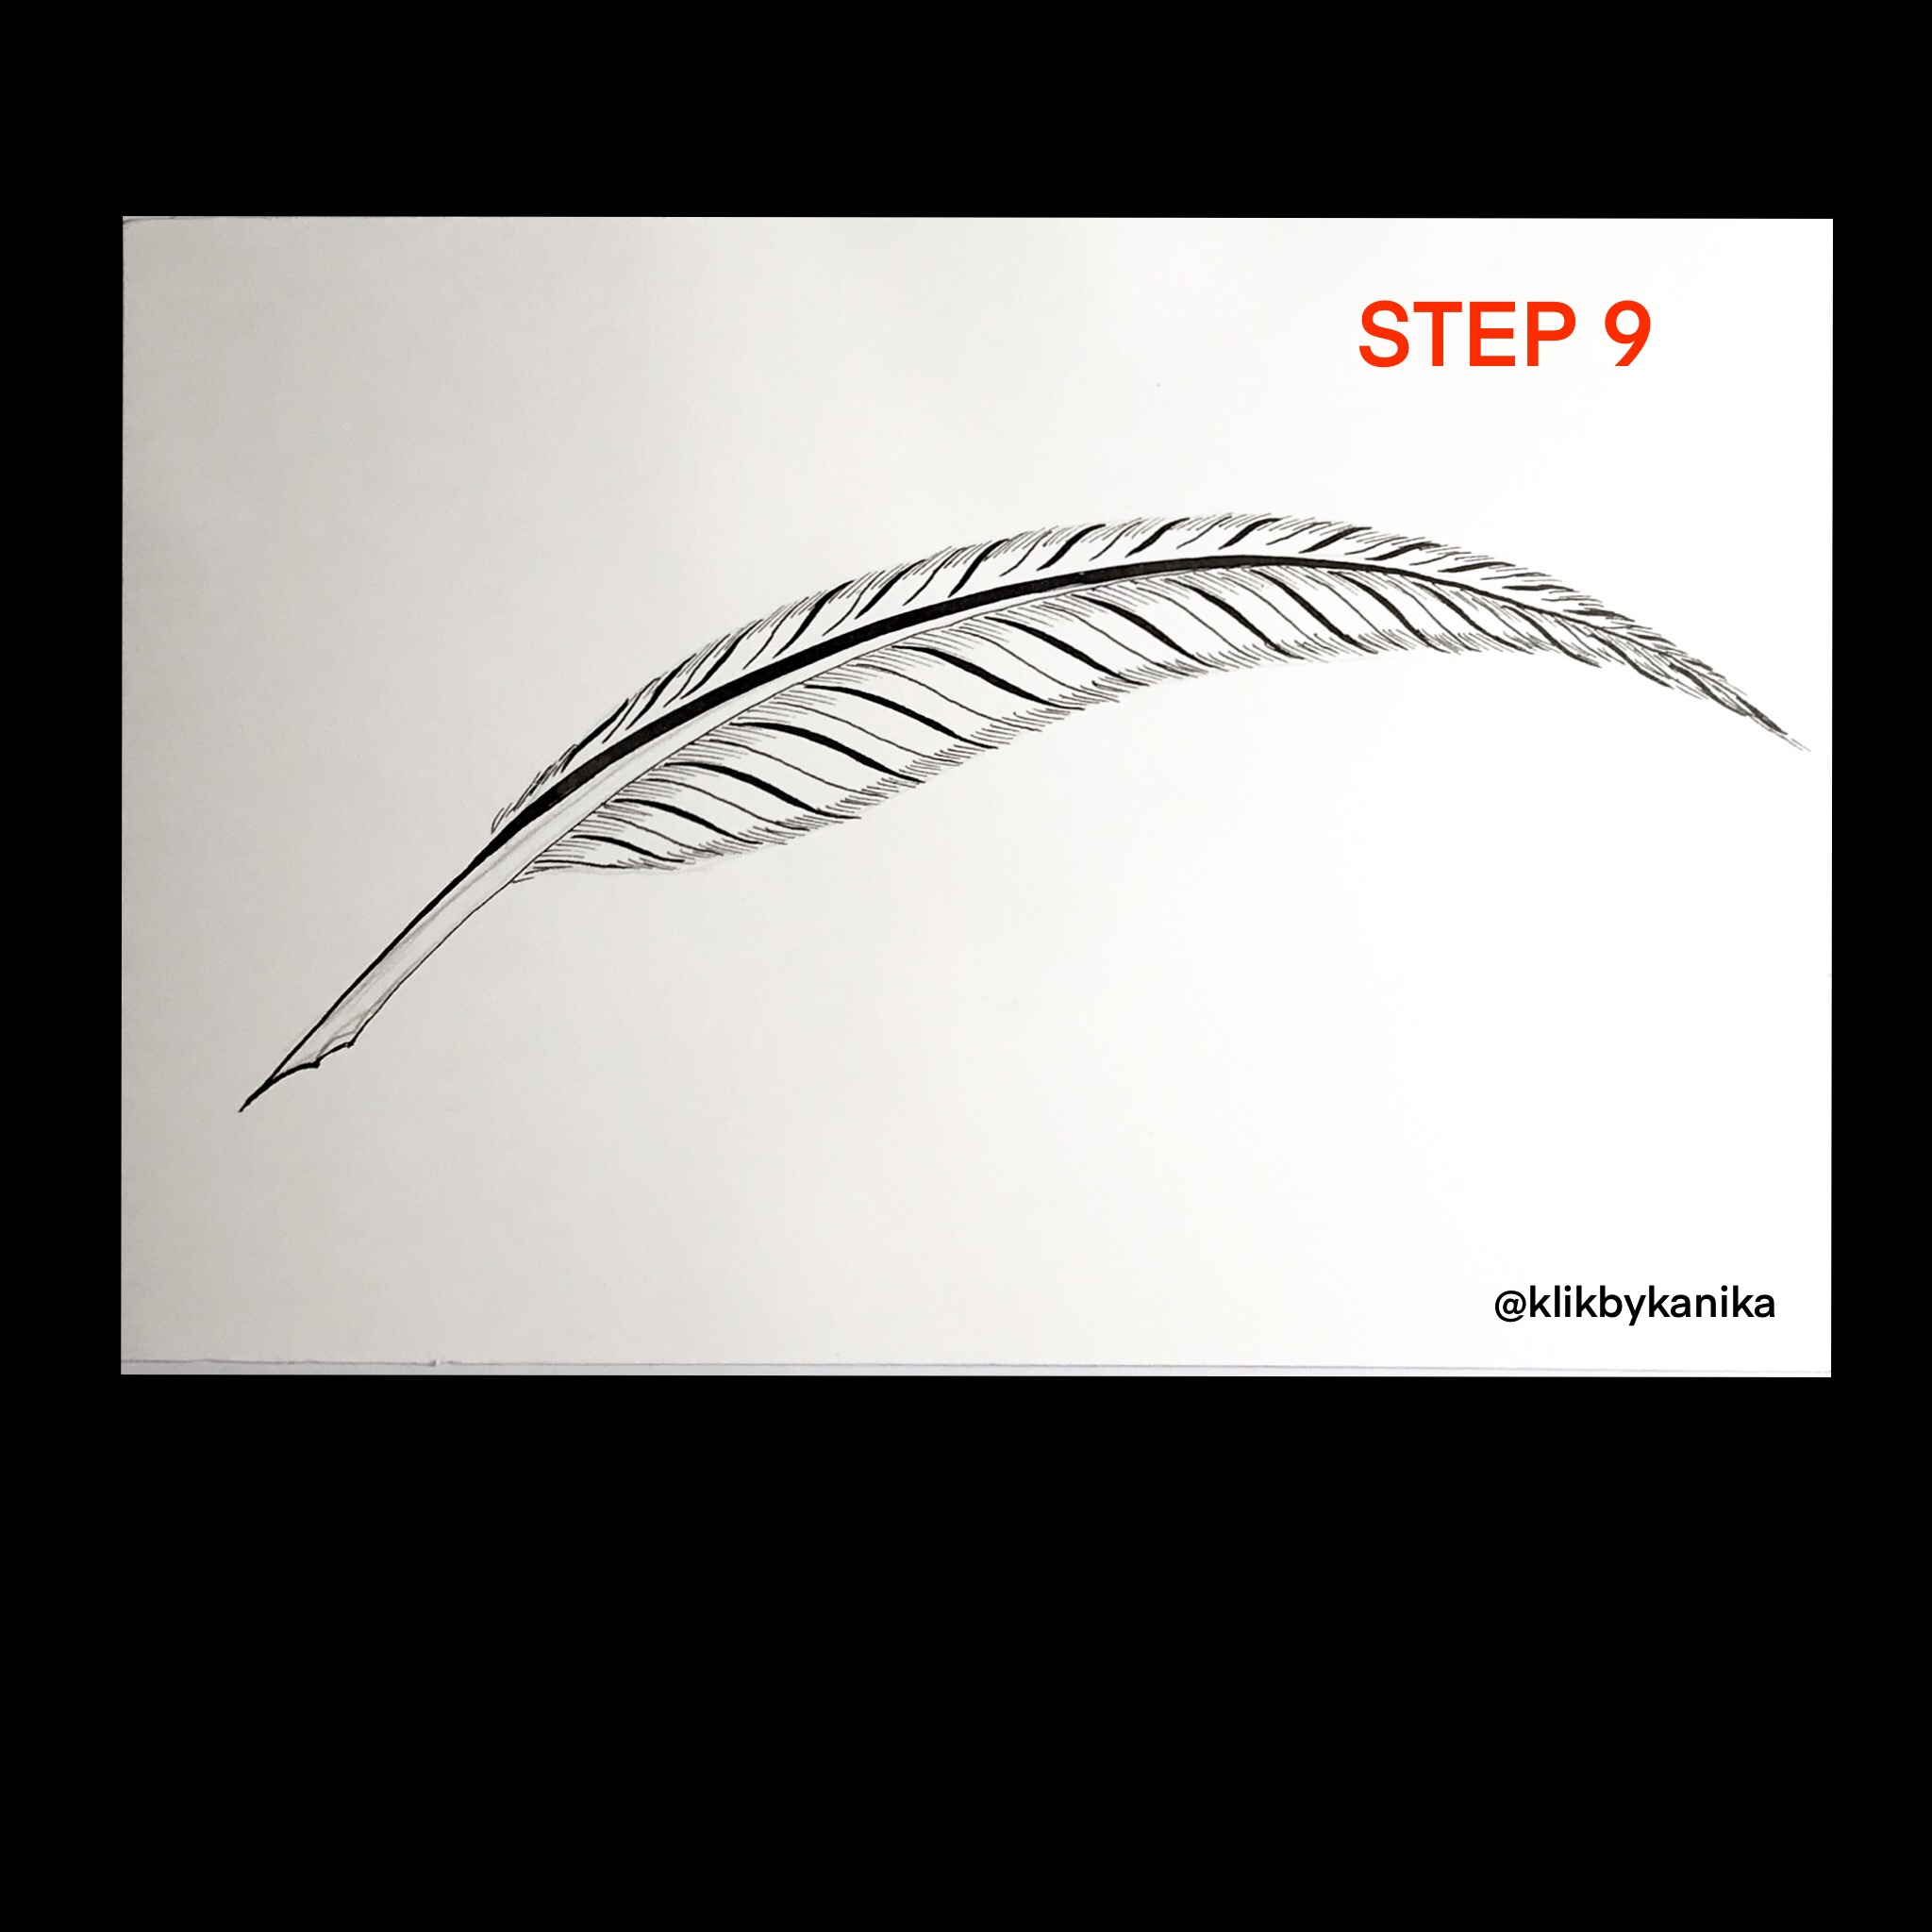
Image 6
Let your artwork dry for some minutes. Then erase the pencil lines and your quill pen flourishing design is ready.
Some points to keep in mind
- Keep rotating the paper to be able to make the strokes comfortably - you don't need to keep it in a fixed position.
- Allow the ink strokes made in each step to dry before attempting the strokes in next step in case you feel that you might have to place your hand on the strokes made in previous step. This will help prevent the smudging of ink.
- Keep breathing, take it slowly and make each stroke mindfully.
To watch my step-by-step video tutorial on how I created this project, CLICK HERE
Tag @klikbykanika and @manuscriptpenco when you attempt this design. We would love to see what you create.