We asked our Artist of the Month Uliana Popa to create a new DIY tutorial for you all and she did not disappoint! Uliana has put together this copperplate flourishing and illustration project for you that will really make your calligraphy stand out.
This tutorial is perfect for intermediate skill levels to really create the wow factor!
So, what are you waiting for? Get your pens ready and lets go!
The Tools you need to get started:
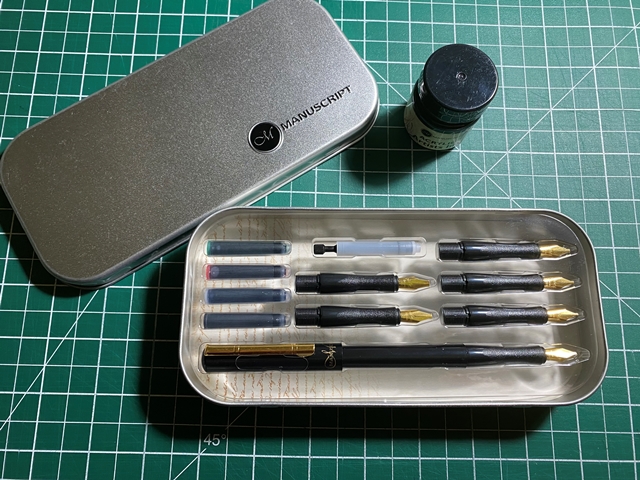
- Manuscript Modern Calligraphy Set
- Manuscript Ink of choice
- Cold pressed watercolour paper by Arches for the final piece – 300 gsm
- Deckle edge Ripper
- Mechanical pencil 0.5 mm (any will work)
- Eraser
- Ruler
- Black Fineliner pen
- A5 cut to size thick card
- An A4 page with printed guidelines of your design and some empty sheets
- Washi tape and a paper clip
Step 1 - Greate your design
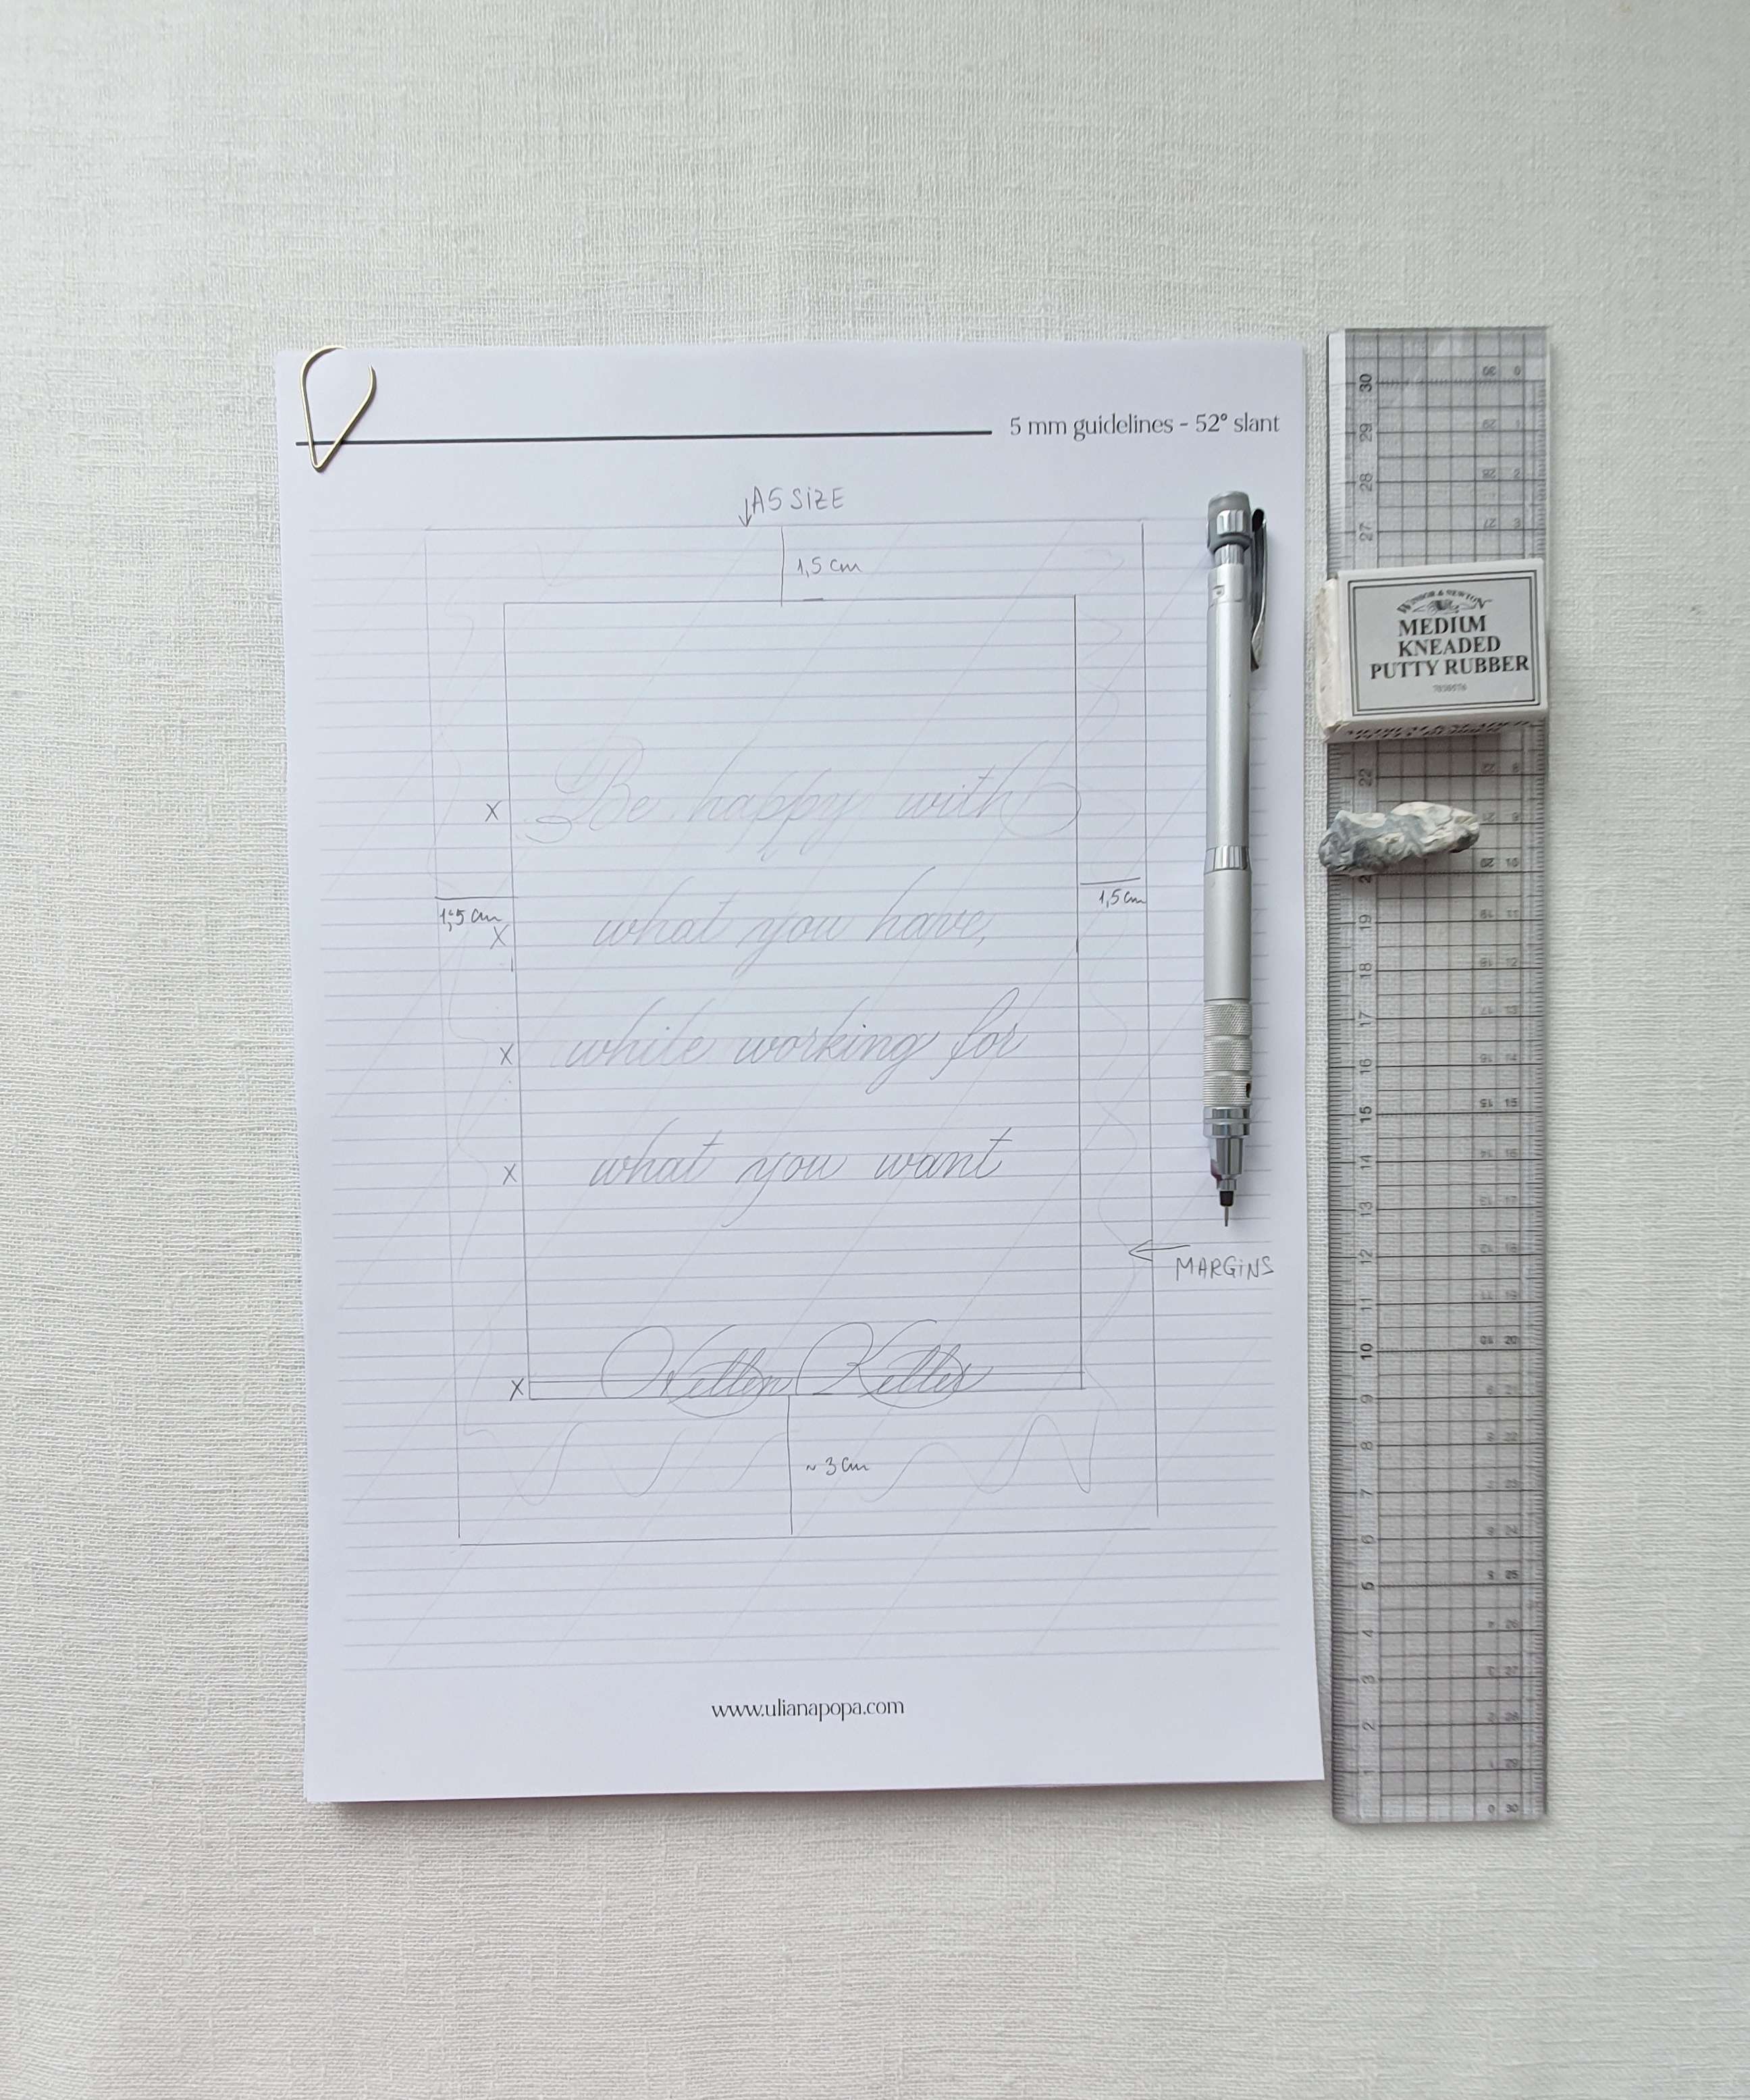
The final piece will be A5 size.
Start by designing the layout either on paper or on computer (InDesign, Illustrator). Arrange the text how you wish and print everything out on an A4 size.
Prepare your pencil, ruler, the A5 Size thick cardstock and stack together your printed guidelines with the blank sheets
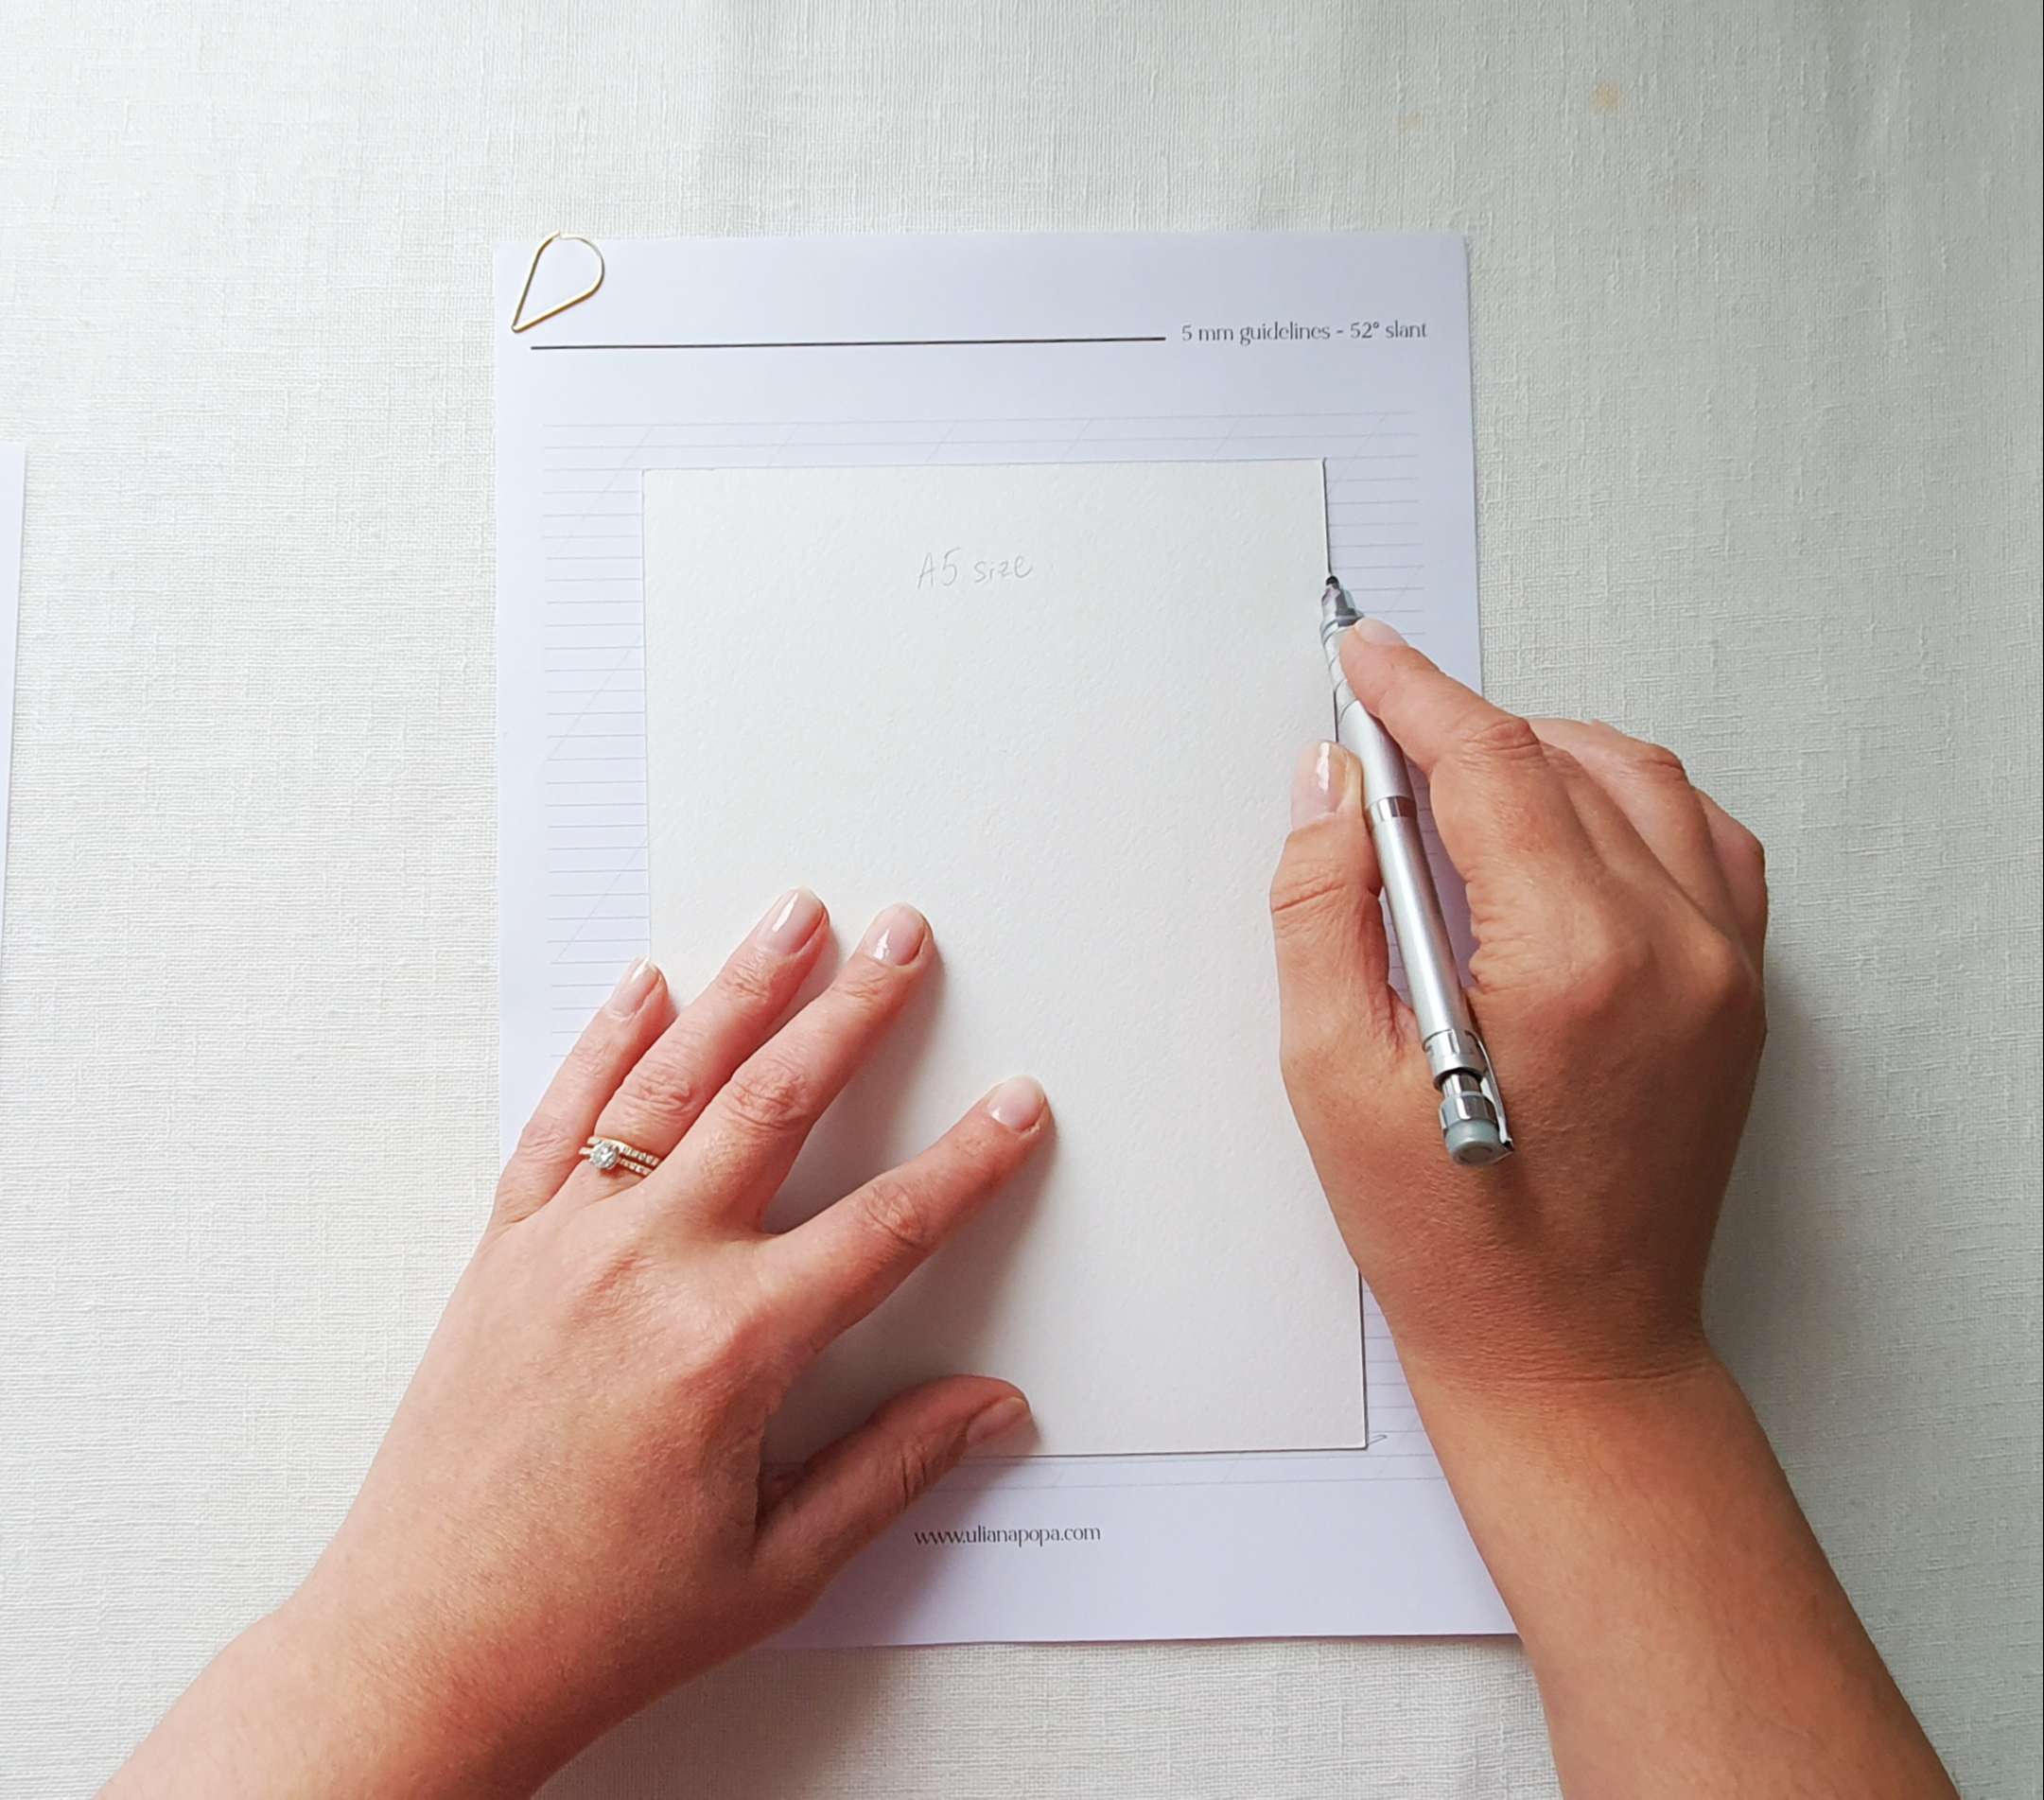
Step 2
On the guidelines sheet using the A5 cardstock and the pencil, mark out the rectangle of the A5 size.
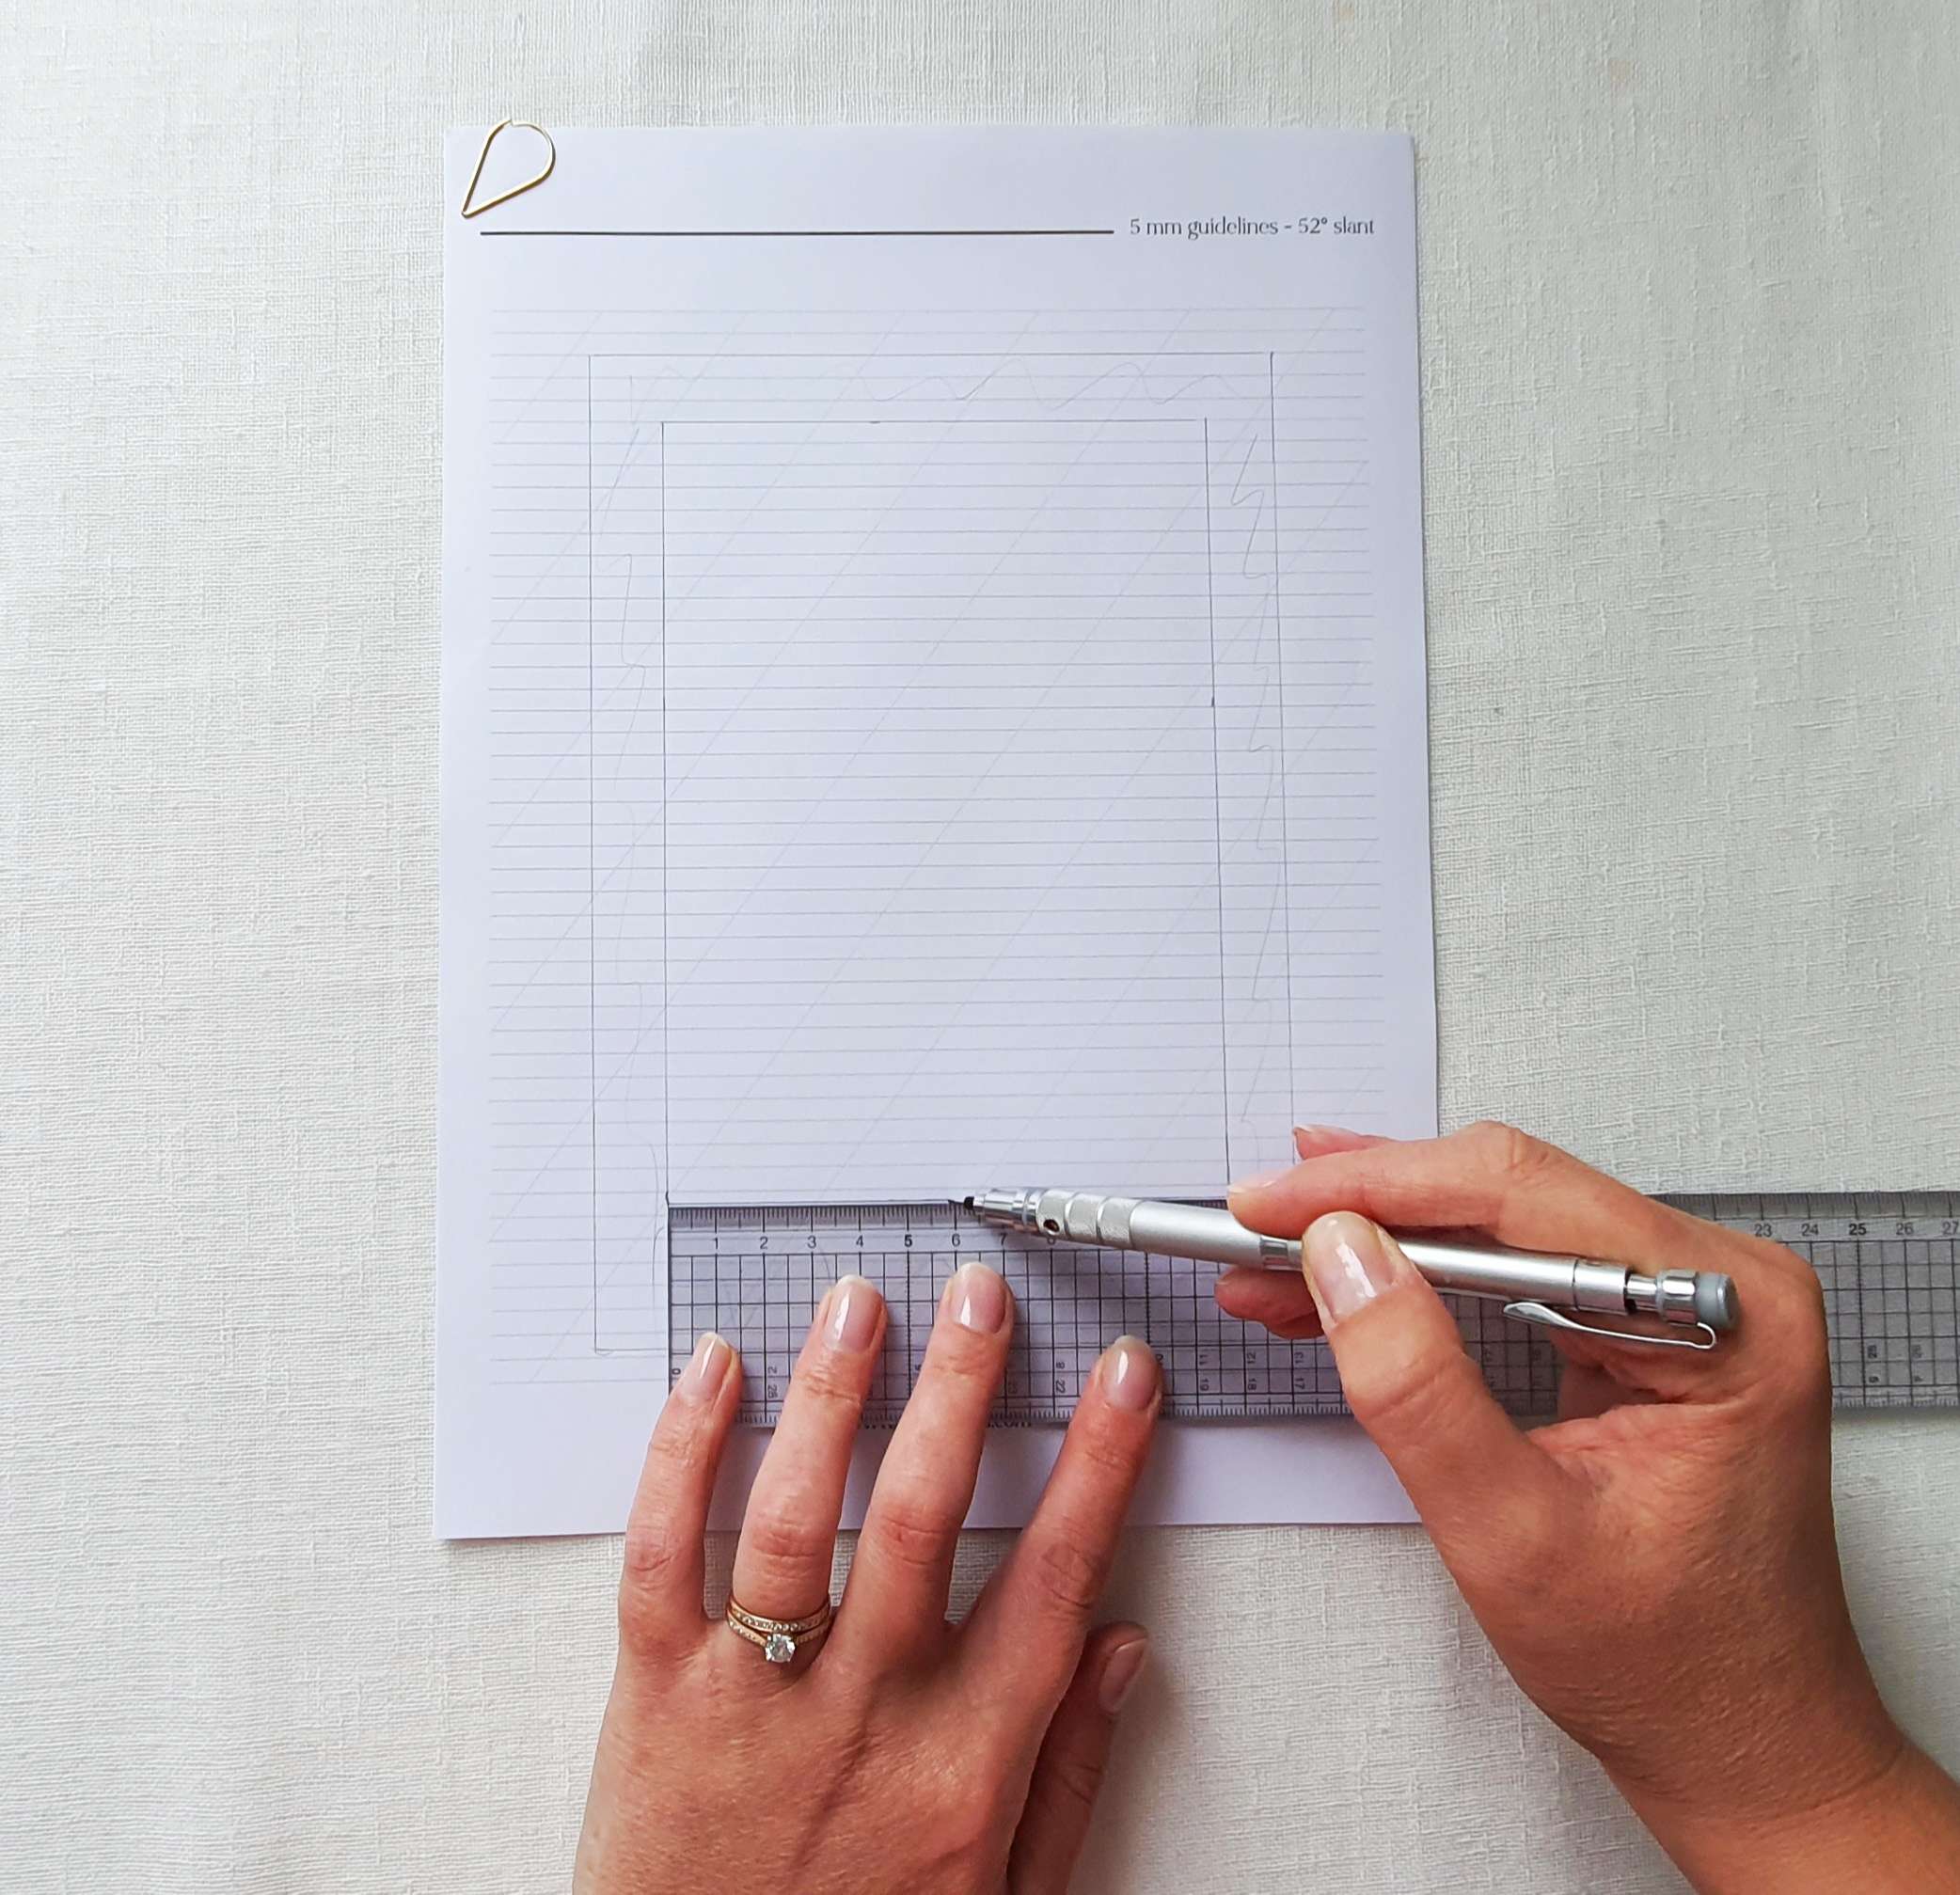
Step 3
Using the ruler and a pencil mark out the margins. For this artwork the margins are 1.5cm top, left, right and 3cm for bottom
Step 4
Then mark the x-height for the text lines.

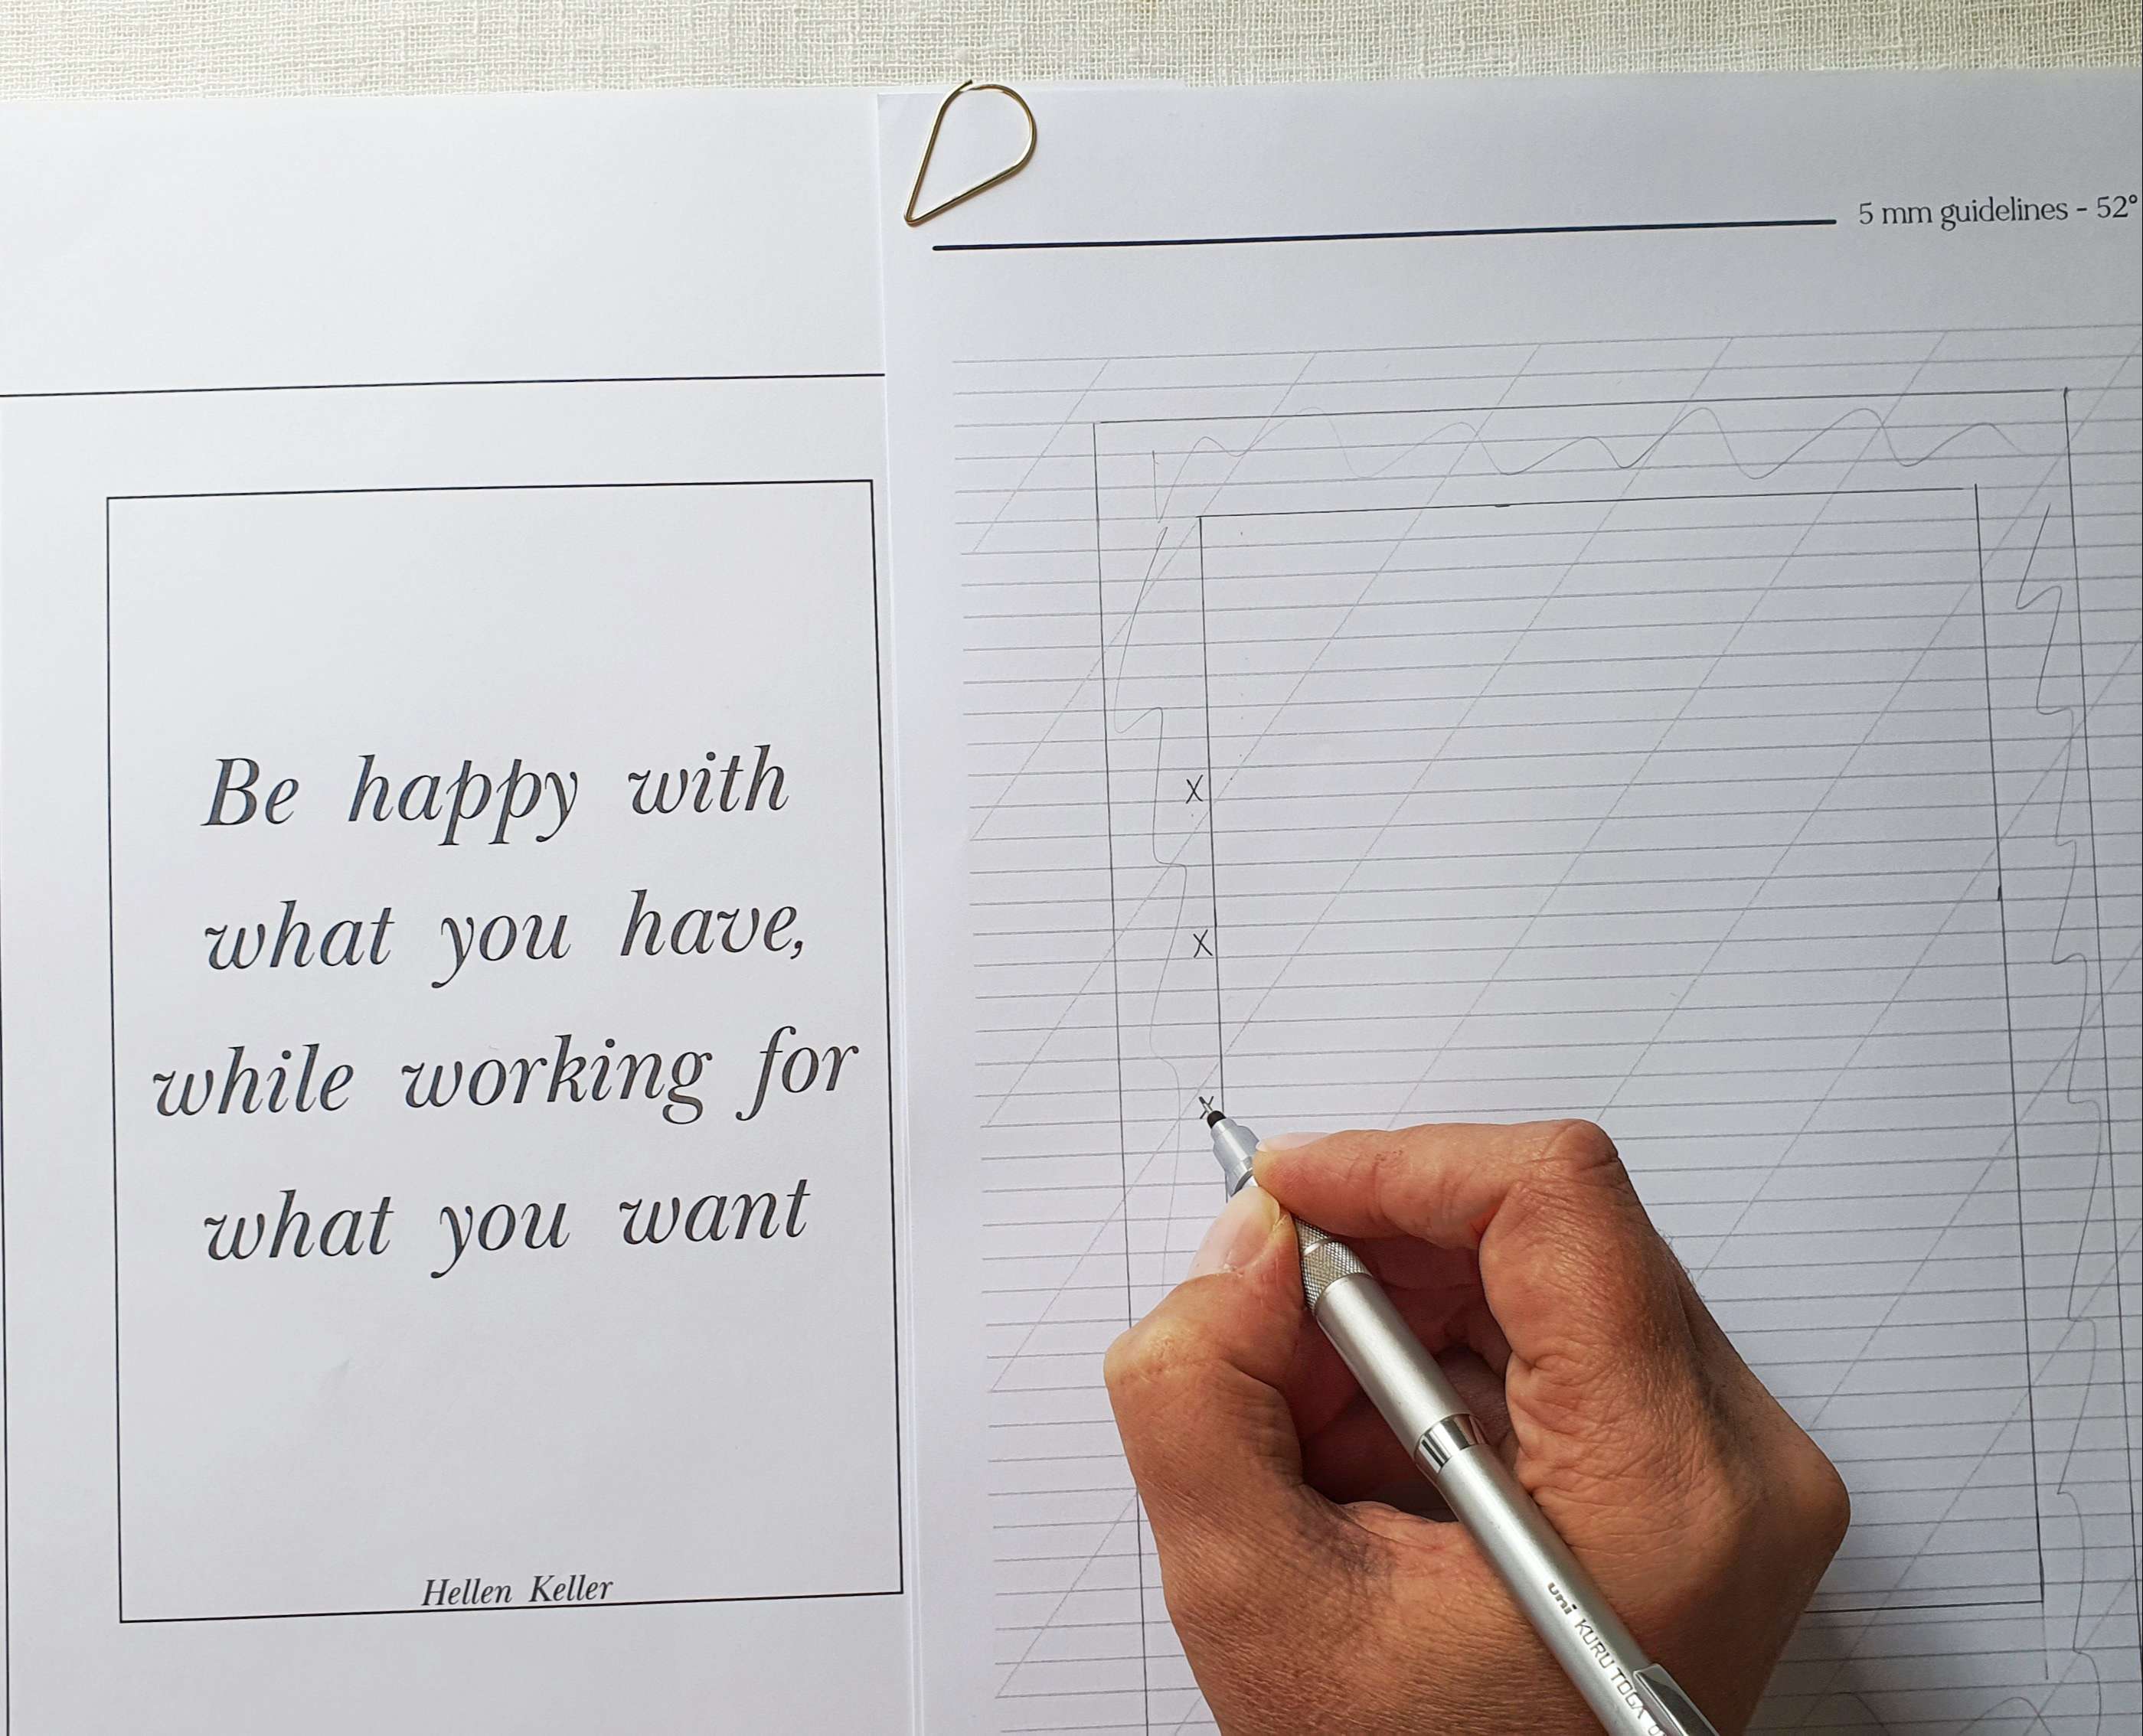
Step 5
Keep your printed quote close and start sketching your first draft. Keep ascenders and descenders short and simple and use your pencil very lightly - without pressure.
Step 6
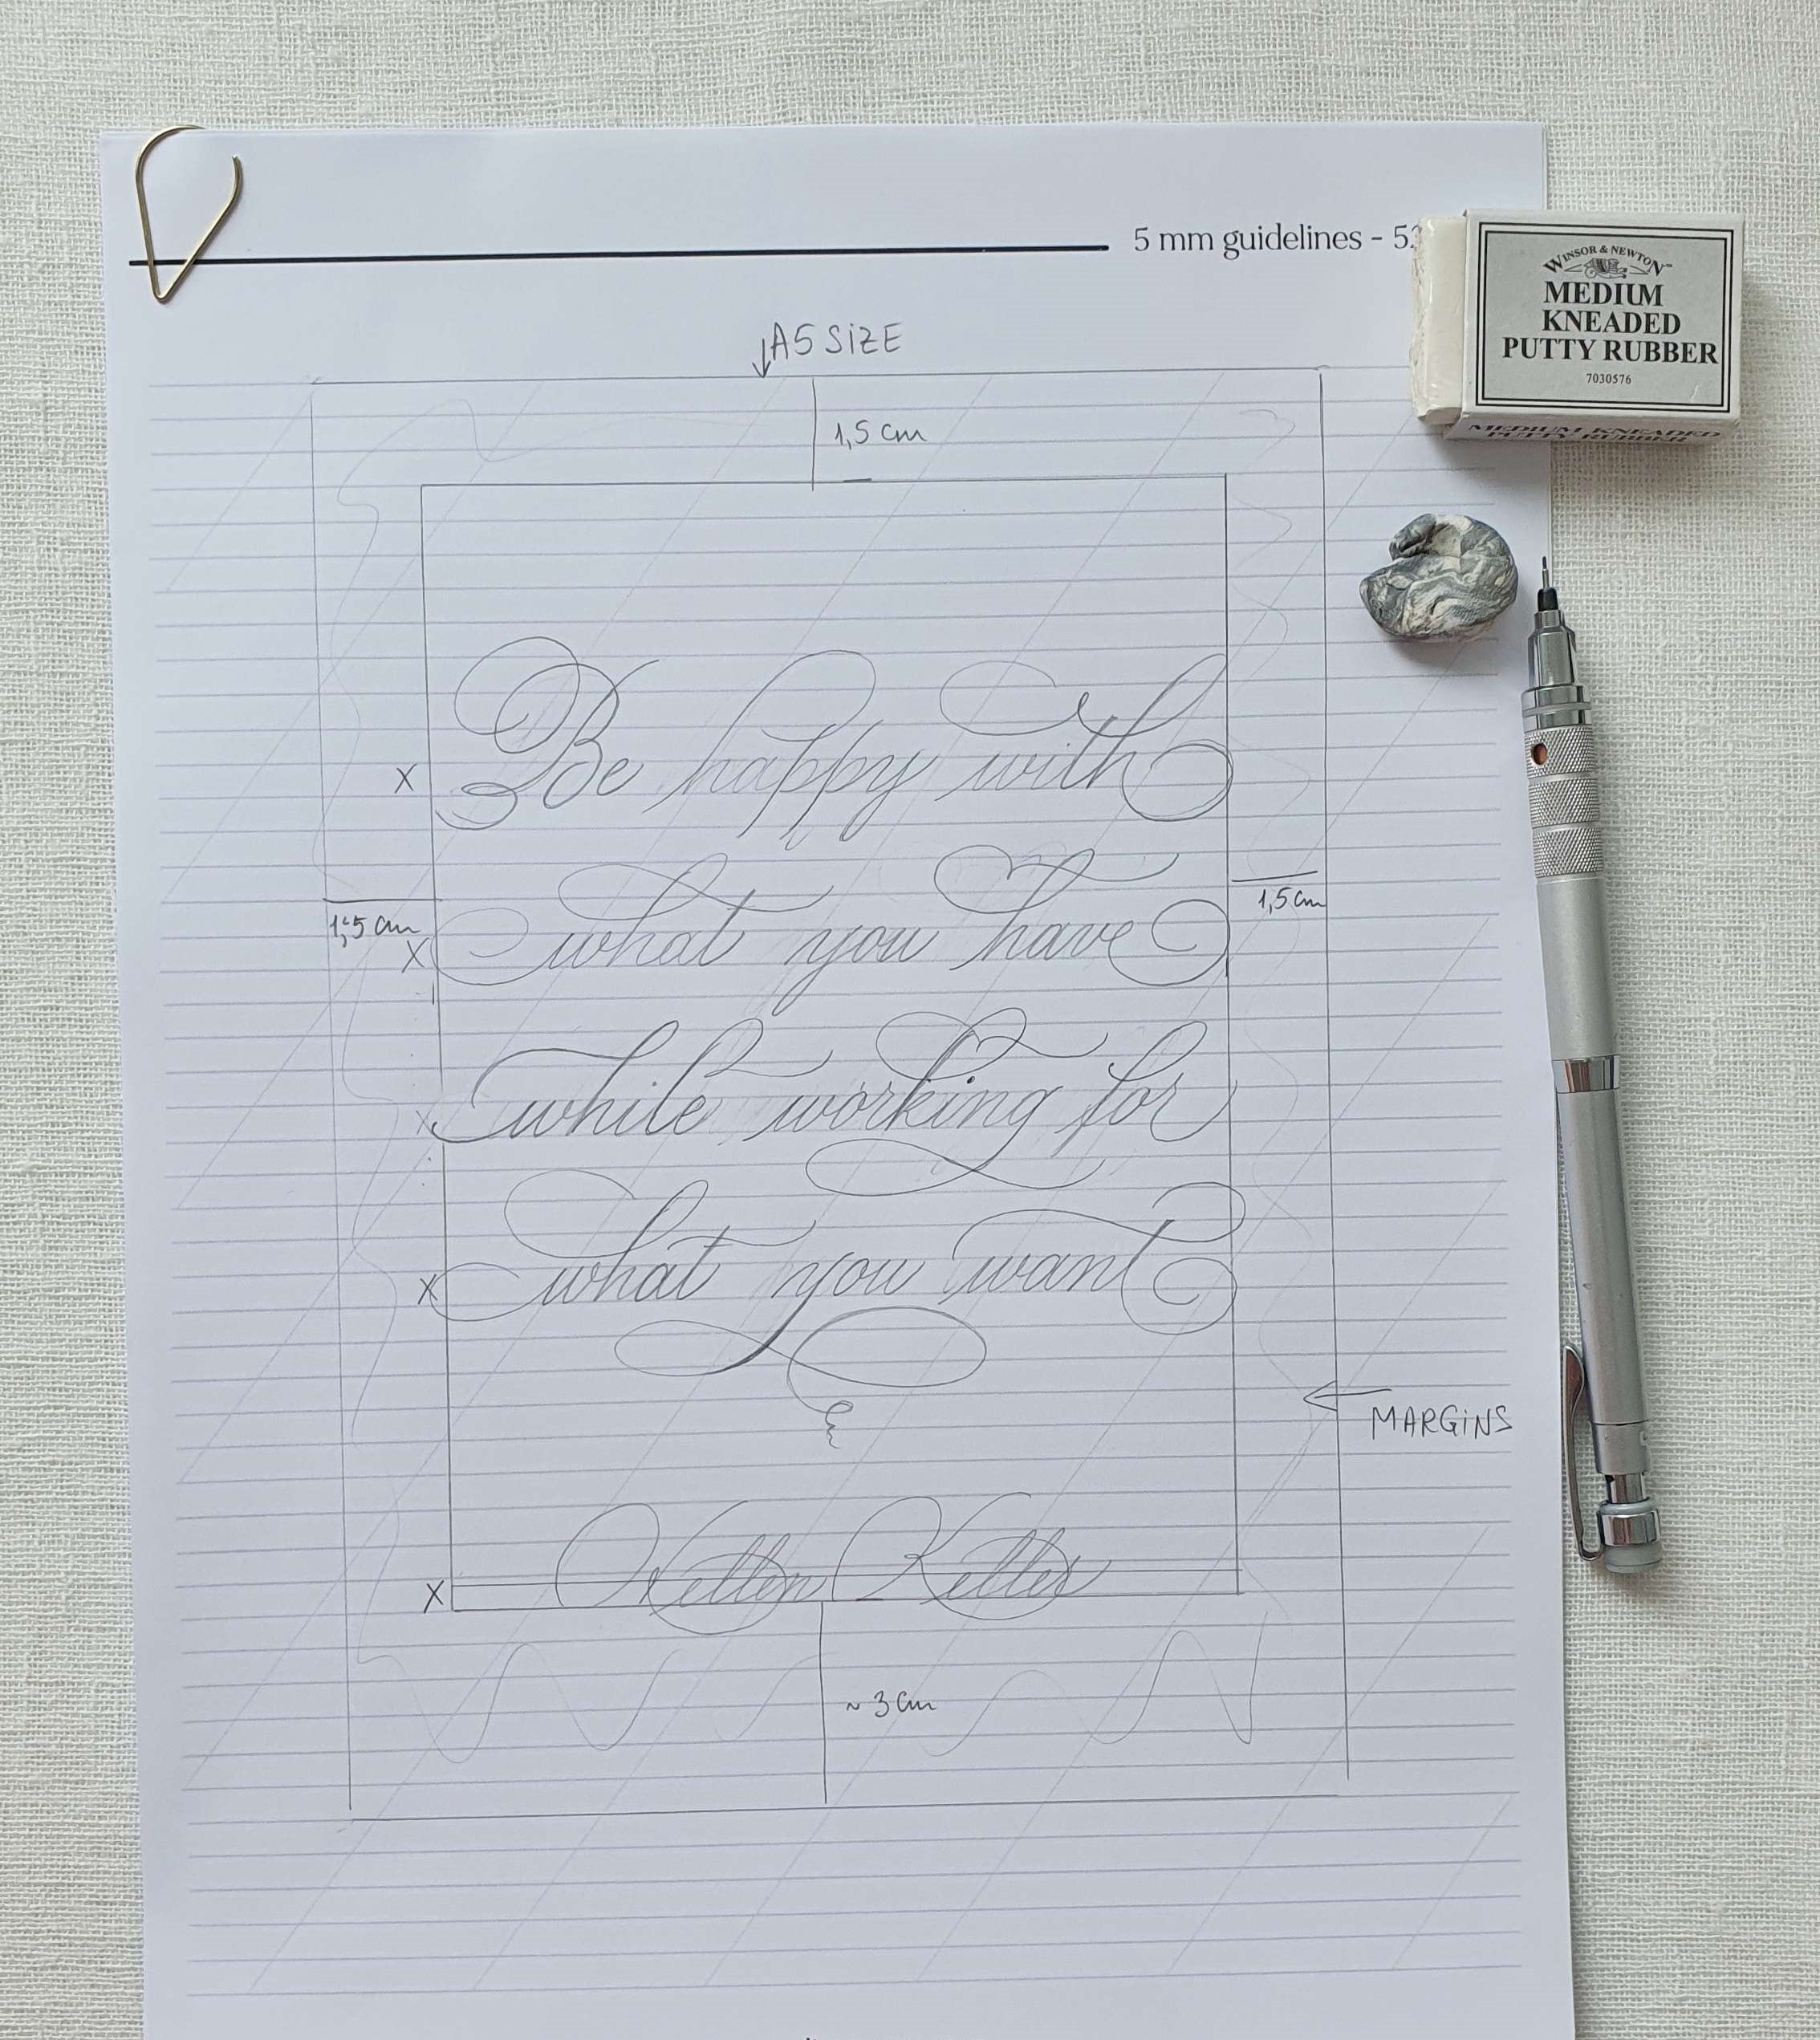
Now have your eraser on hand and start again by adding flourishes. Have fun at this step and experiment with different flourishes by erasing as much as you need until you are happy.
Step 7
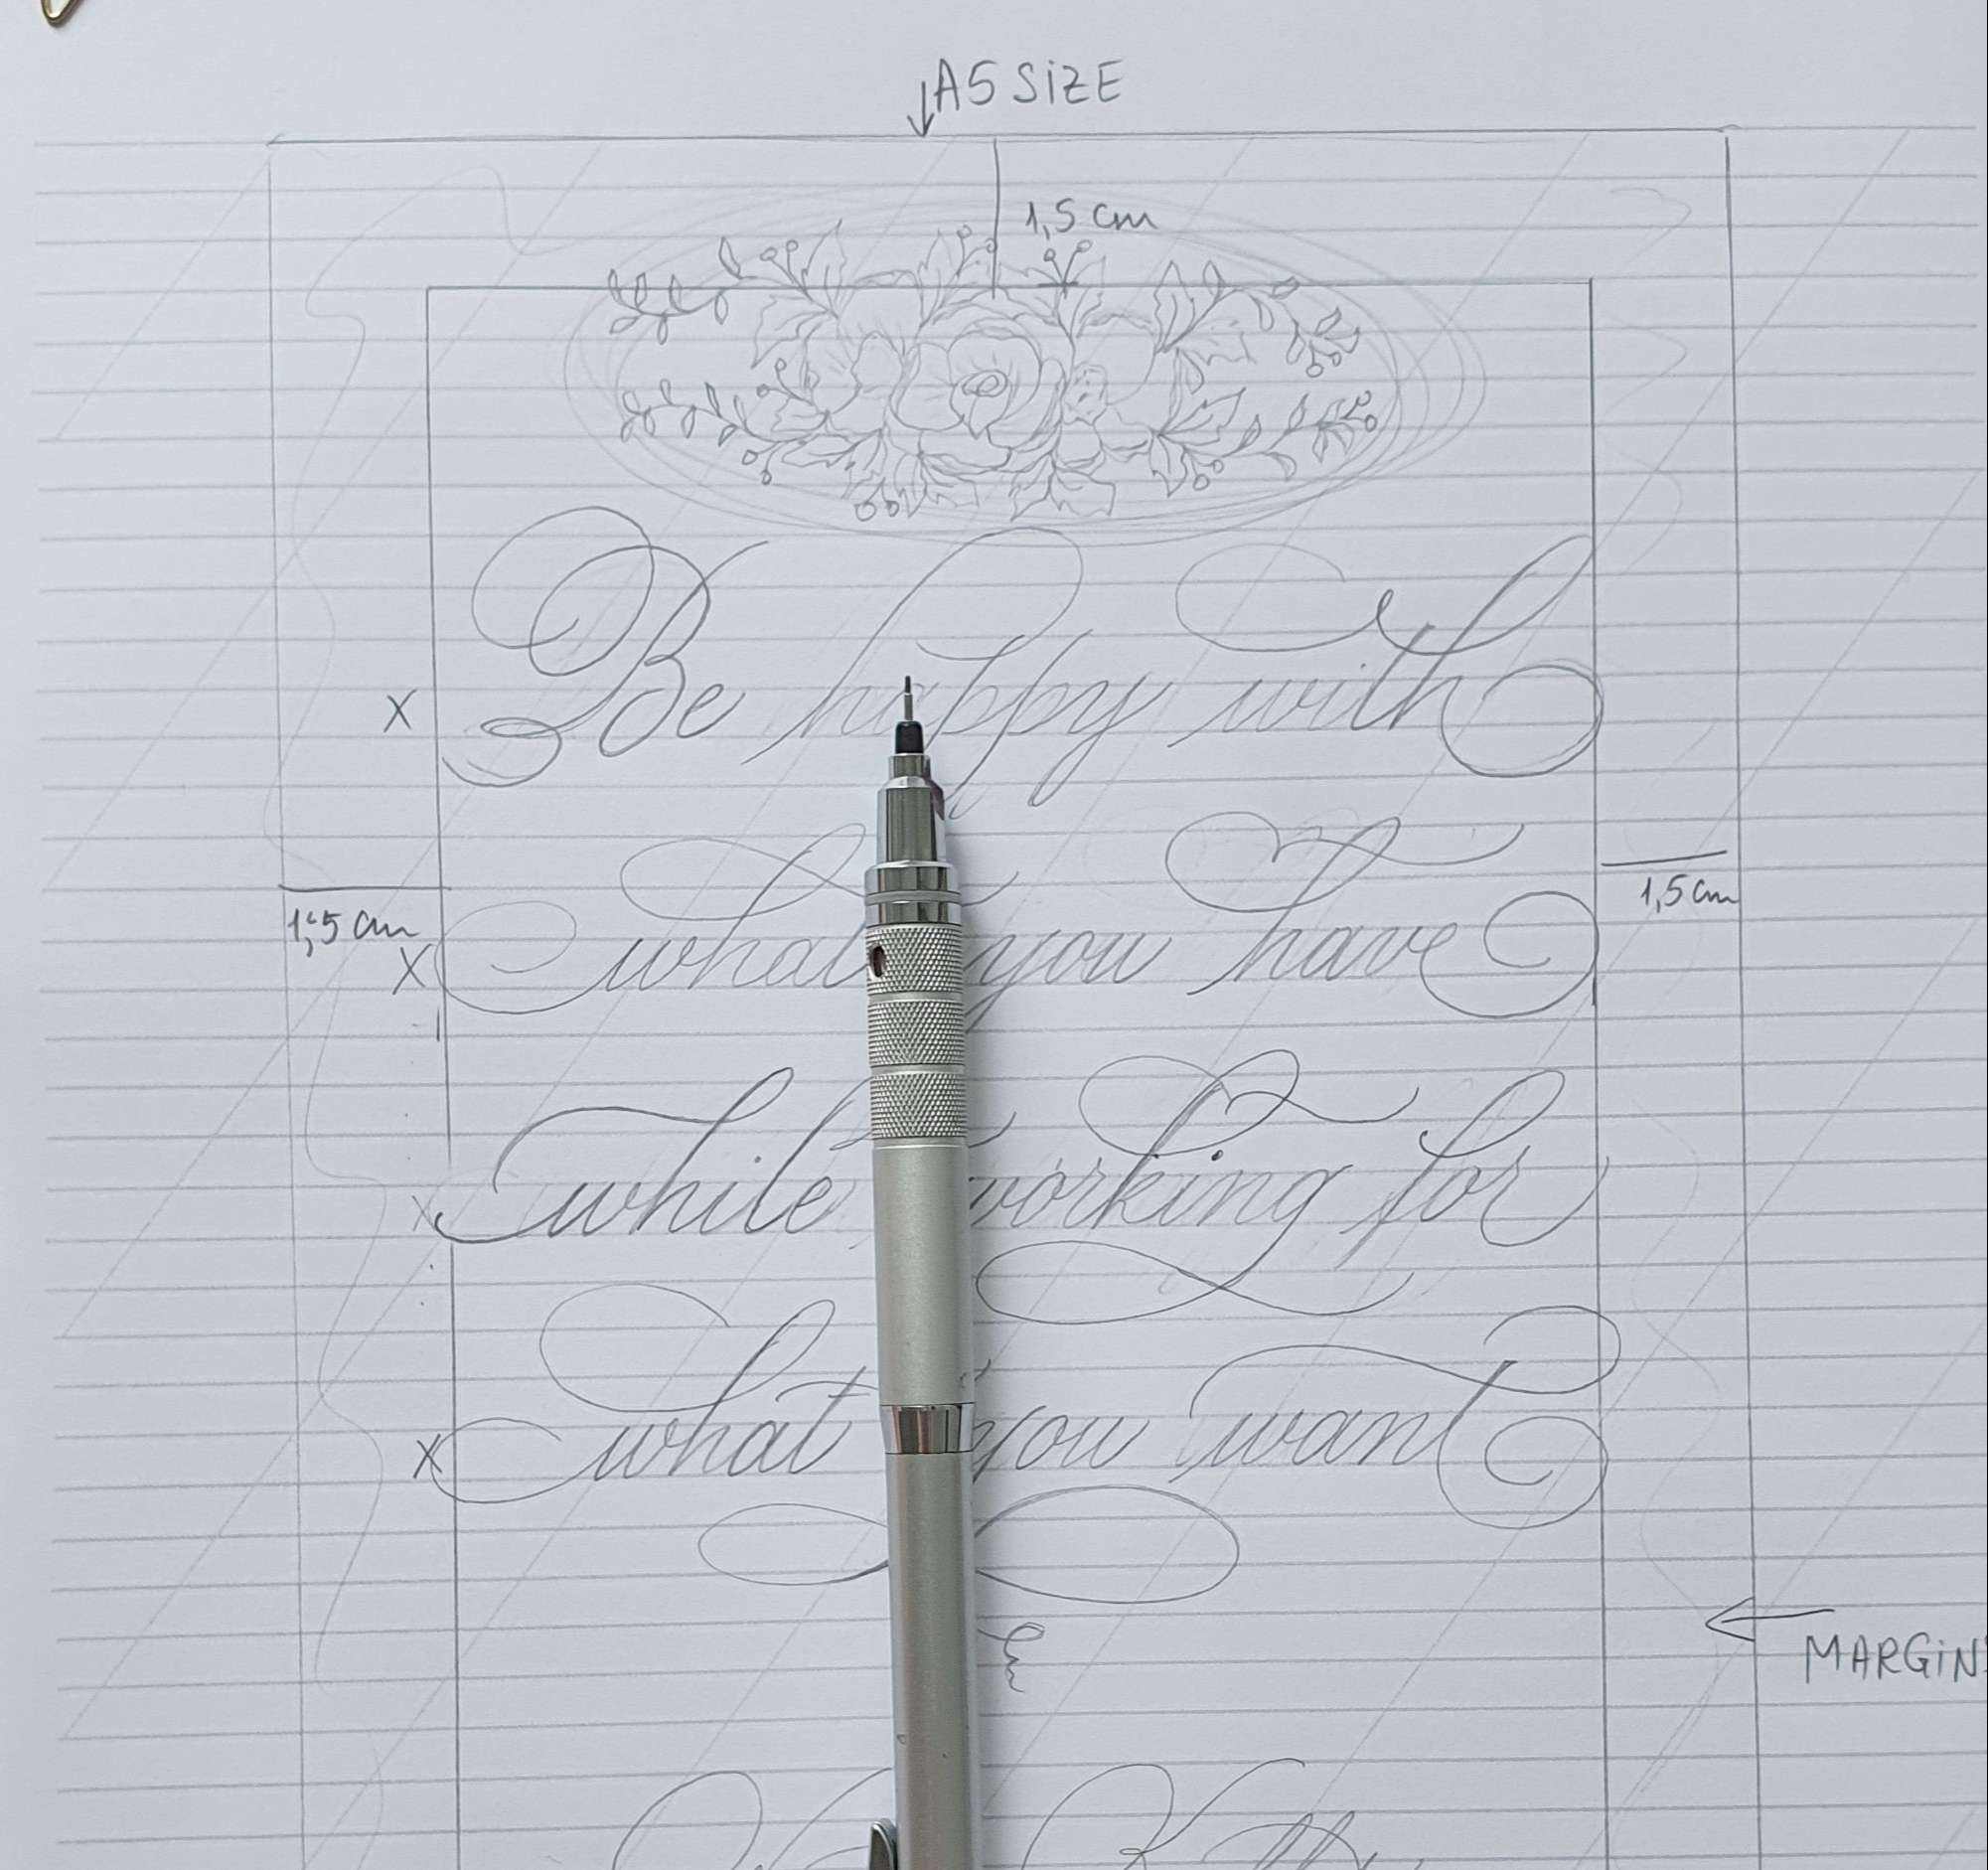
As there is a bit more space at the top we can add a floral illustration.
Step 8
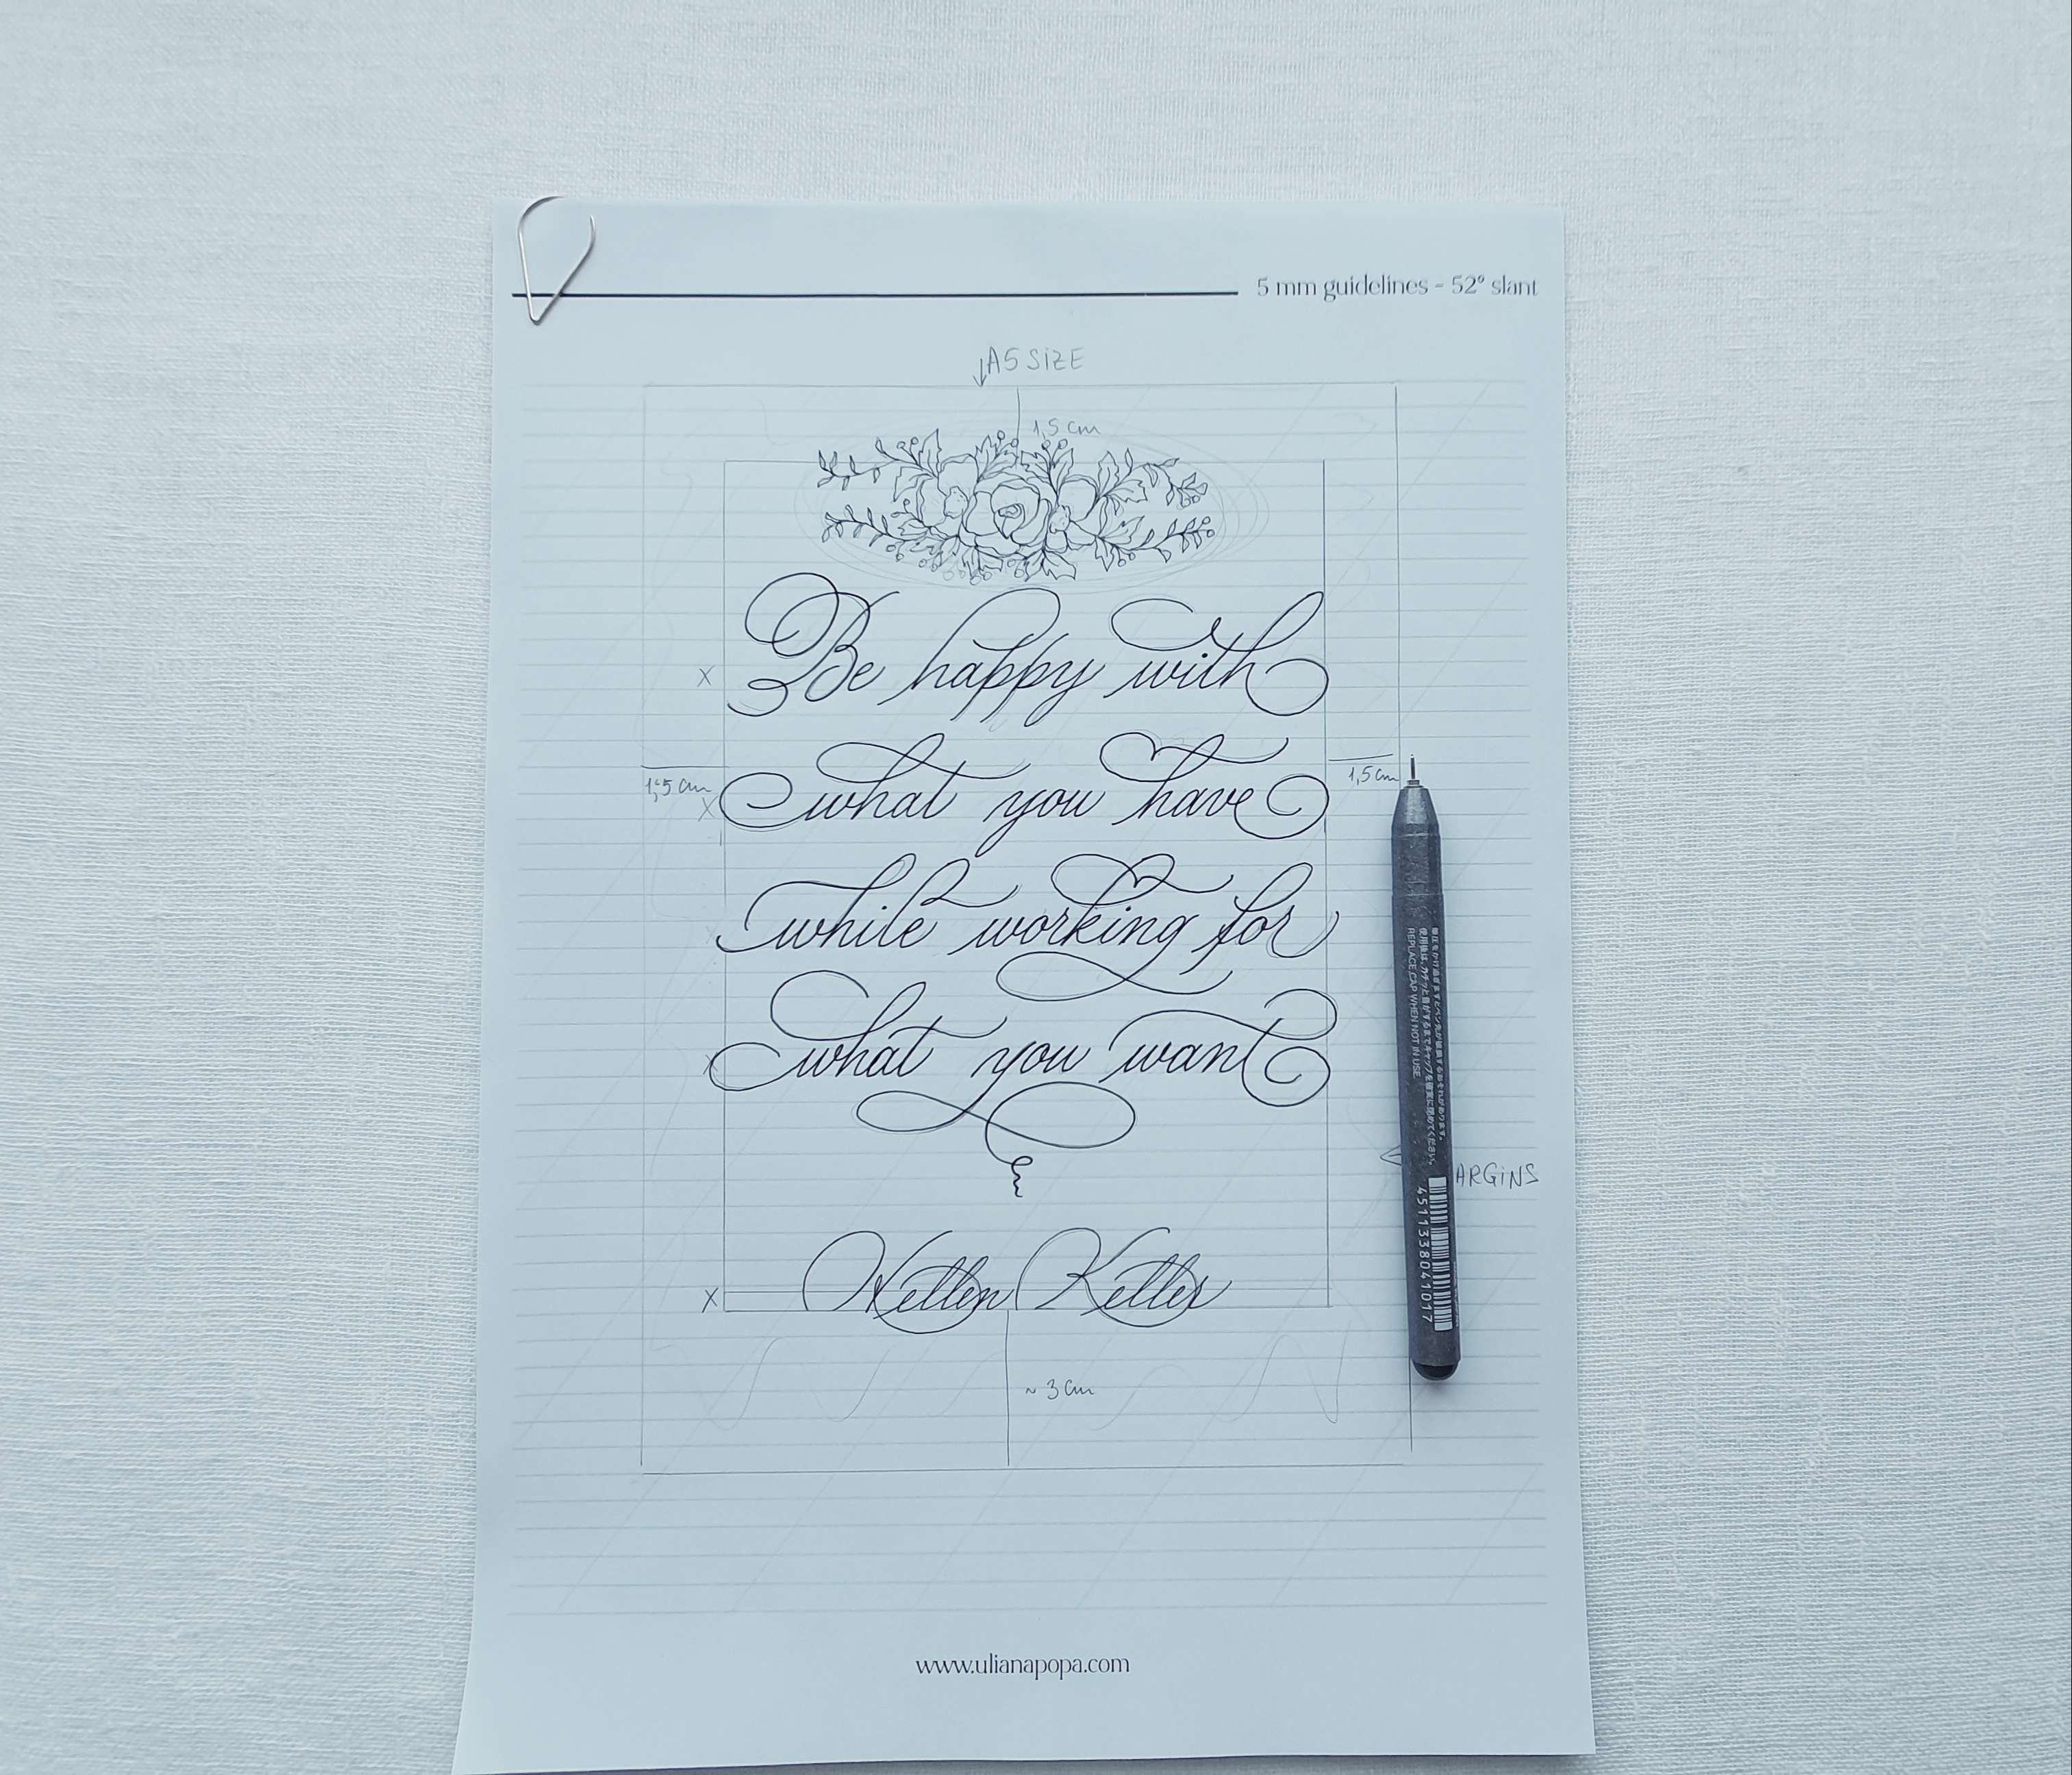
When you are happy with the overall look, use a fineliner pen on draw over your pencil outline.
Step 9
Prepare the final A5 paper by ripping off the edges using the ruler. Keep your A5 cardstock paper on top.

Step 10
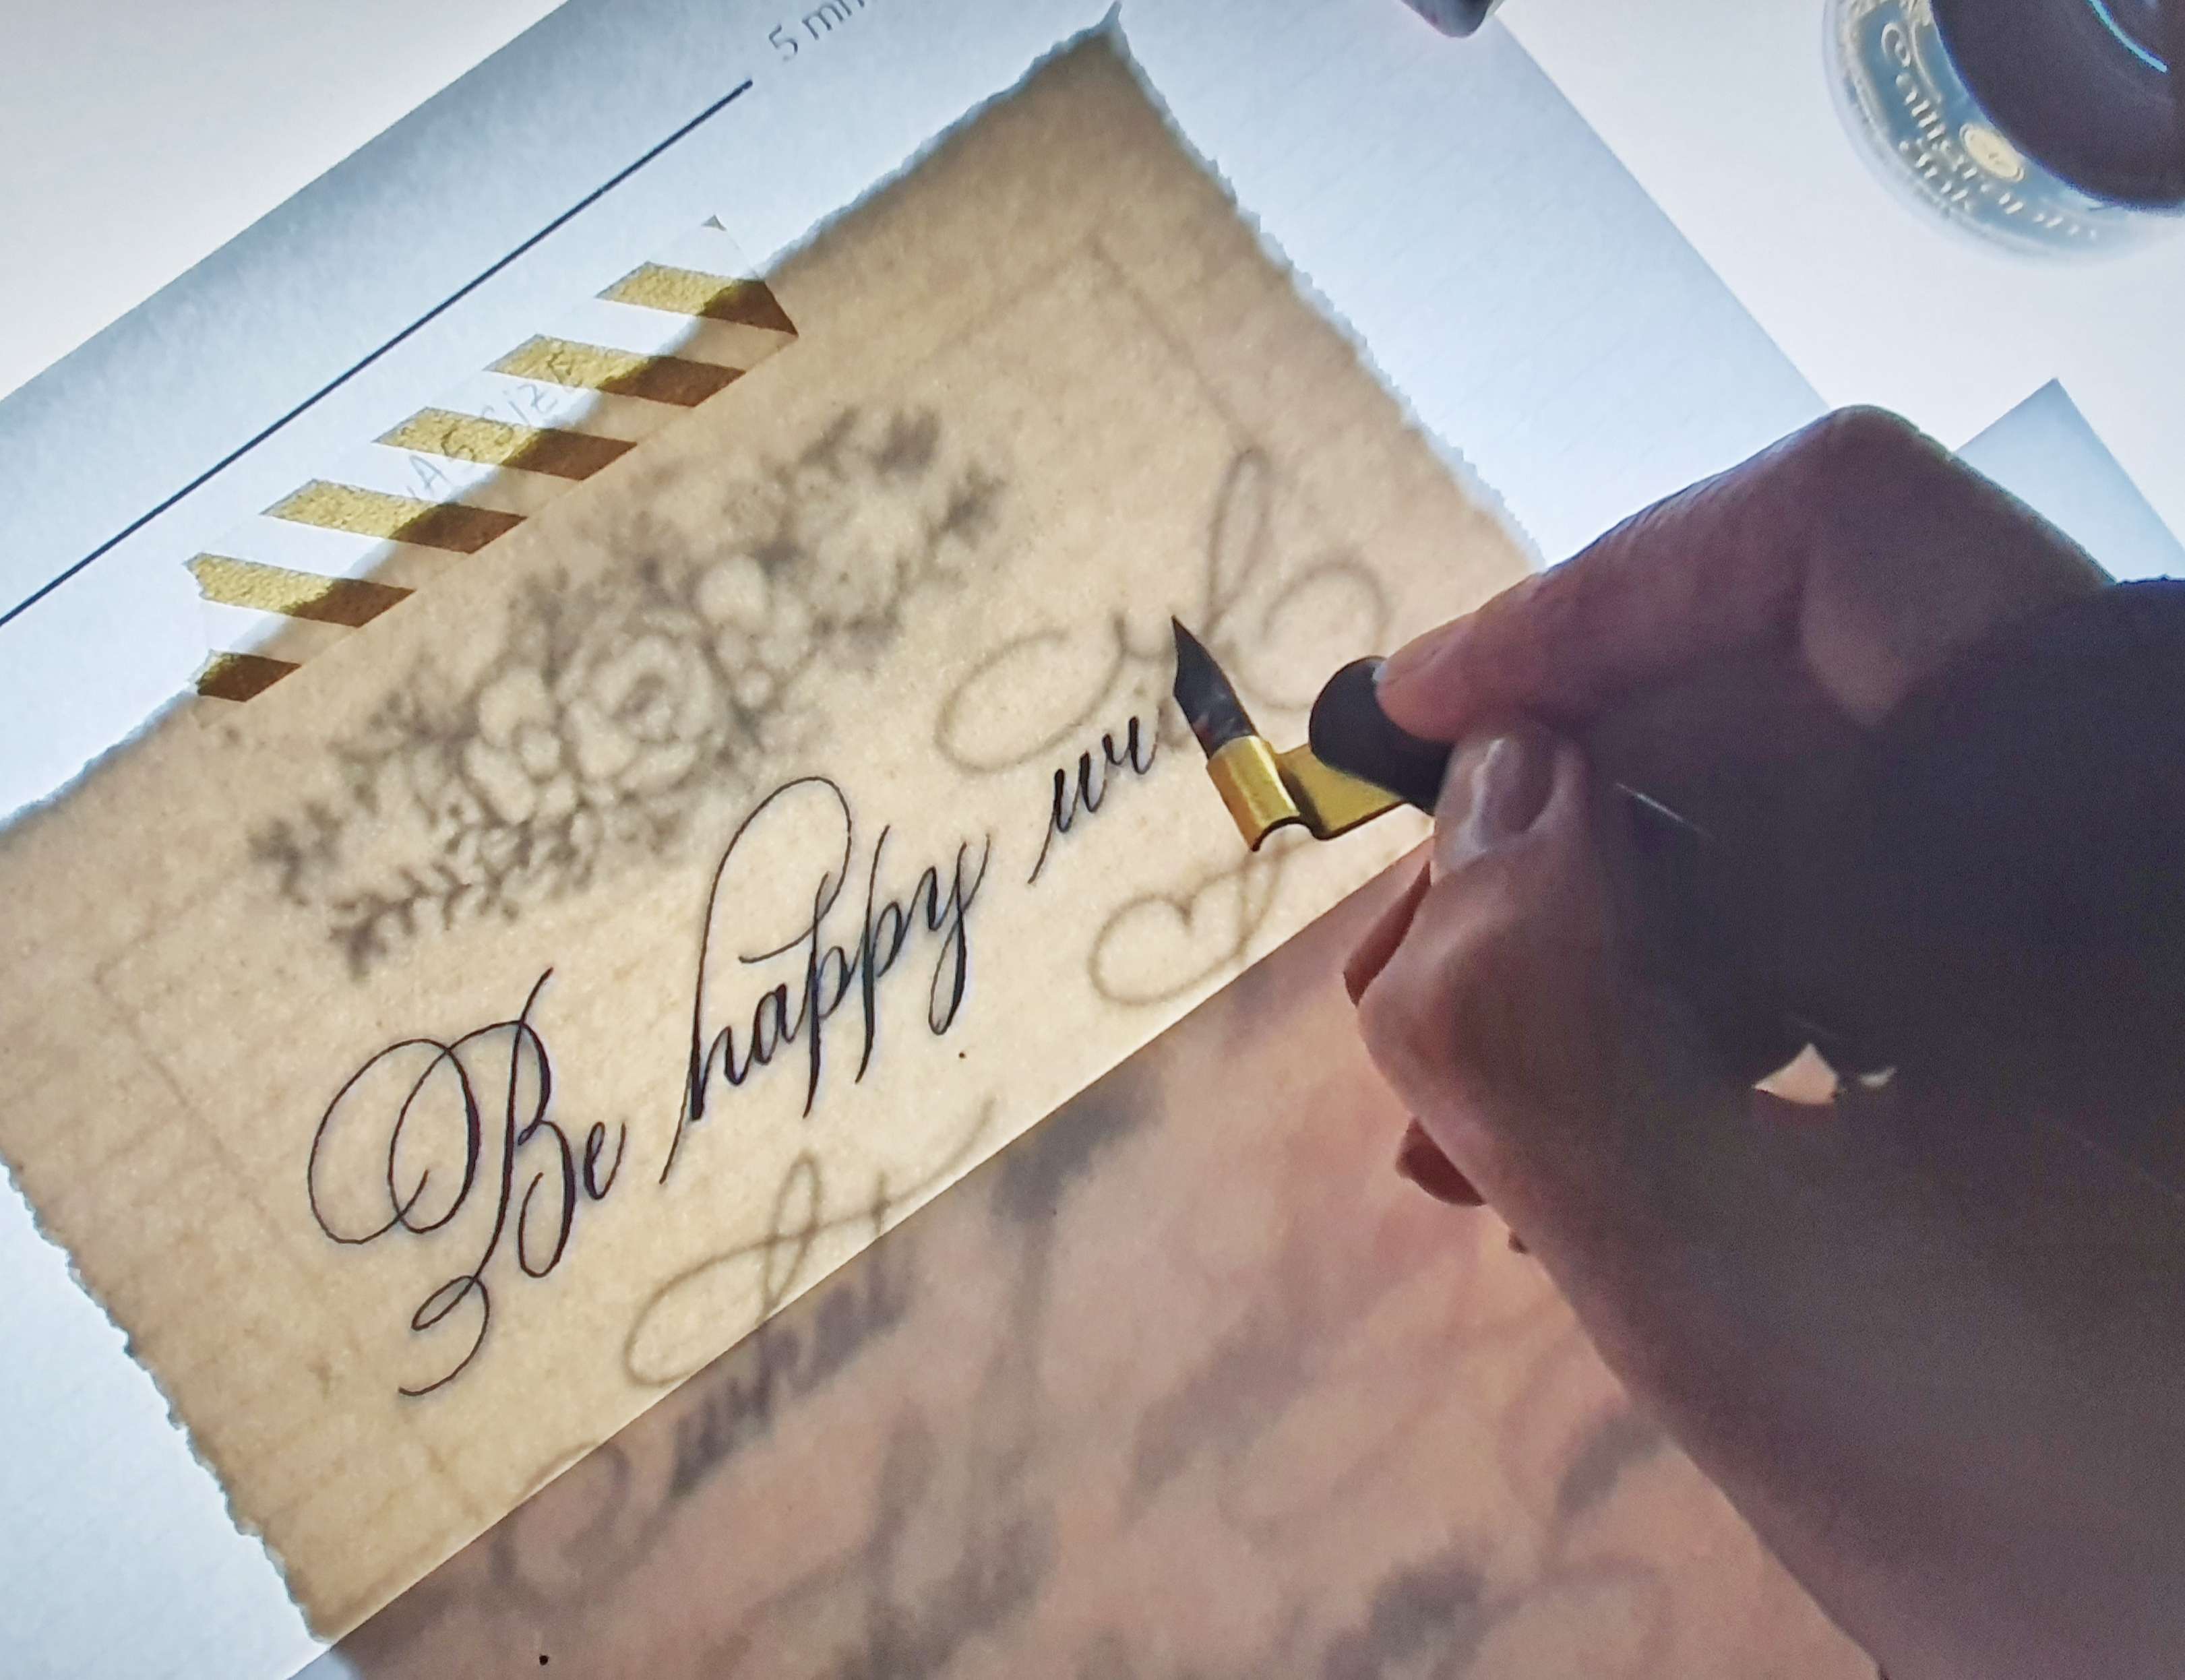
Prepare your light pad and stick your final A5 paper on top of the black ink draft paper with washi tape.
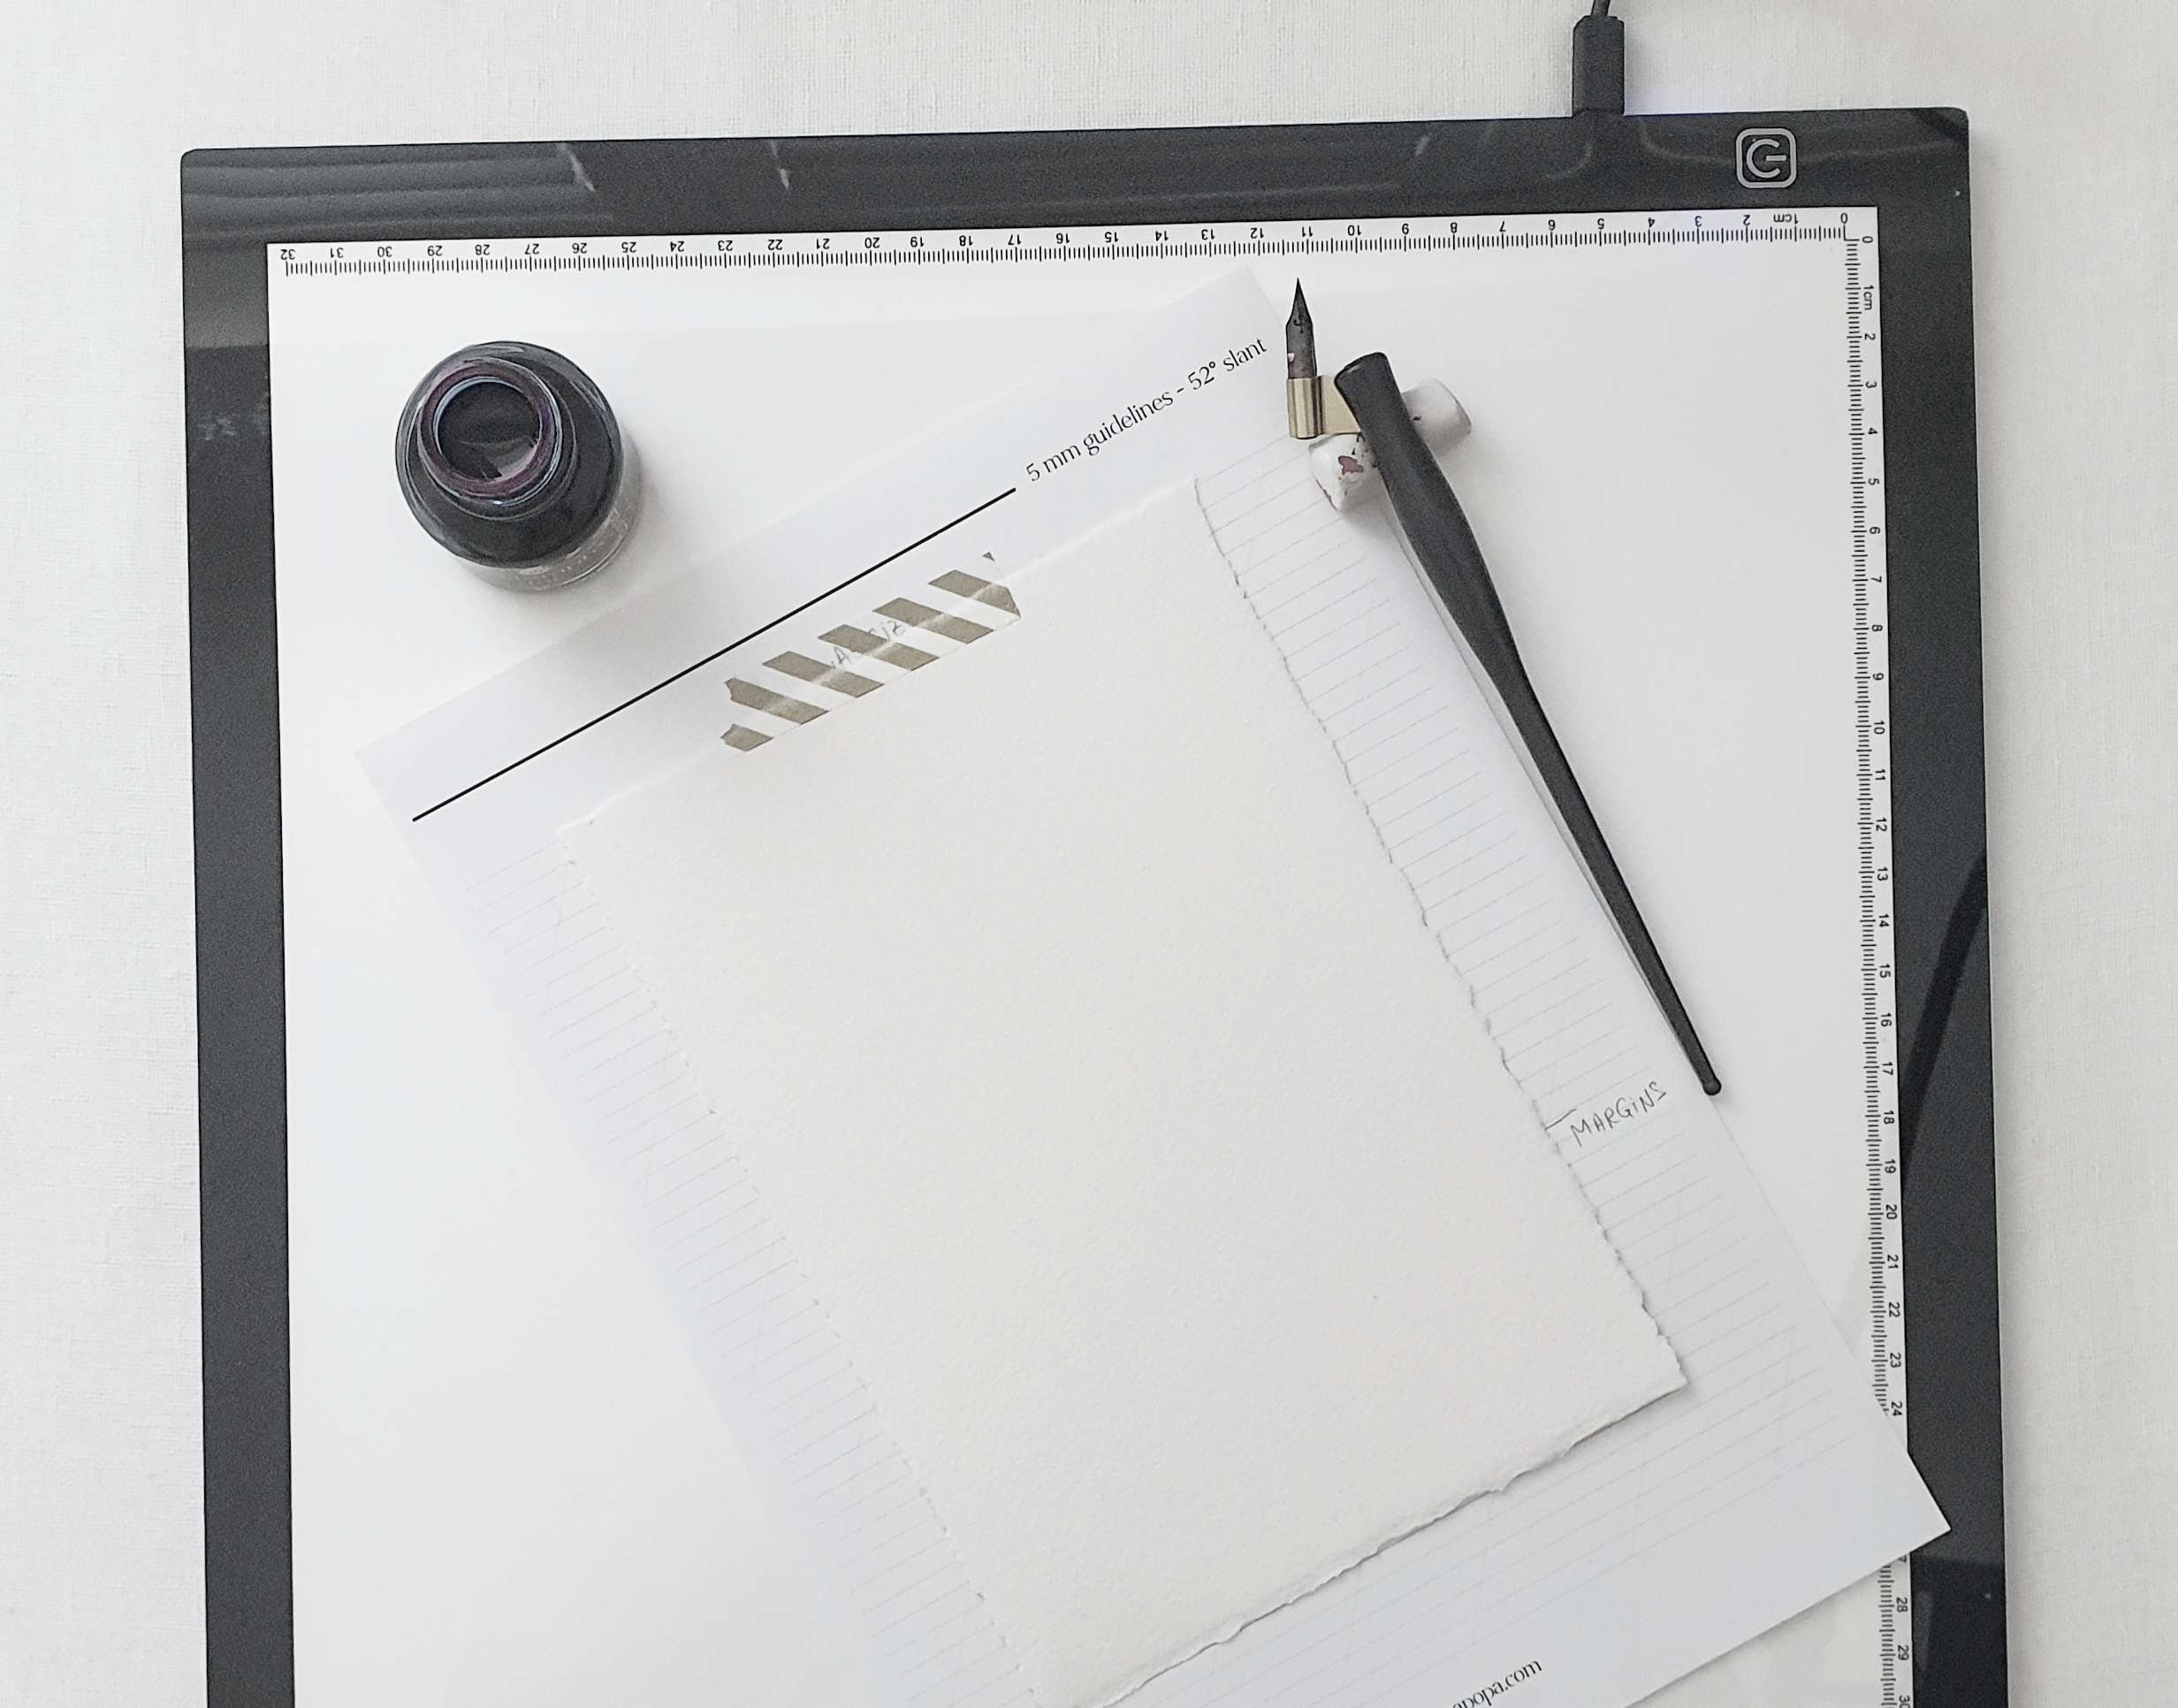
Step 11
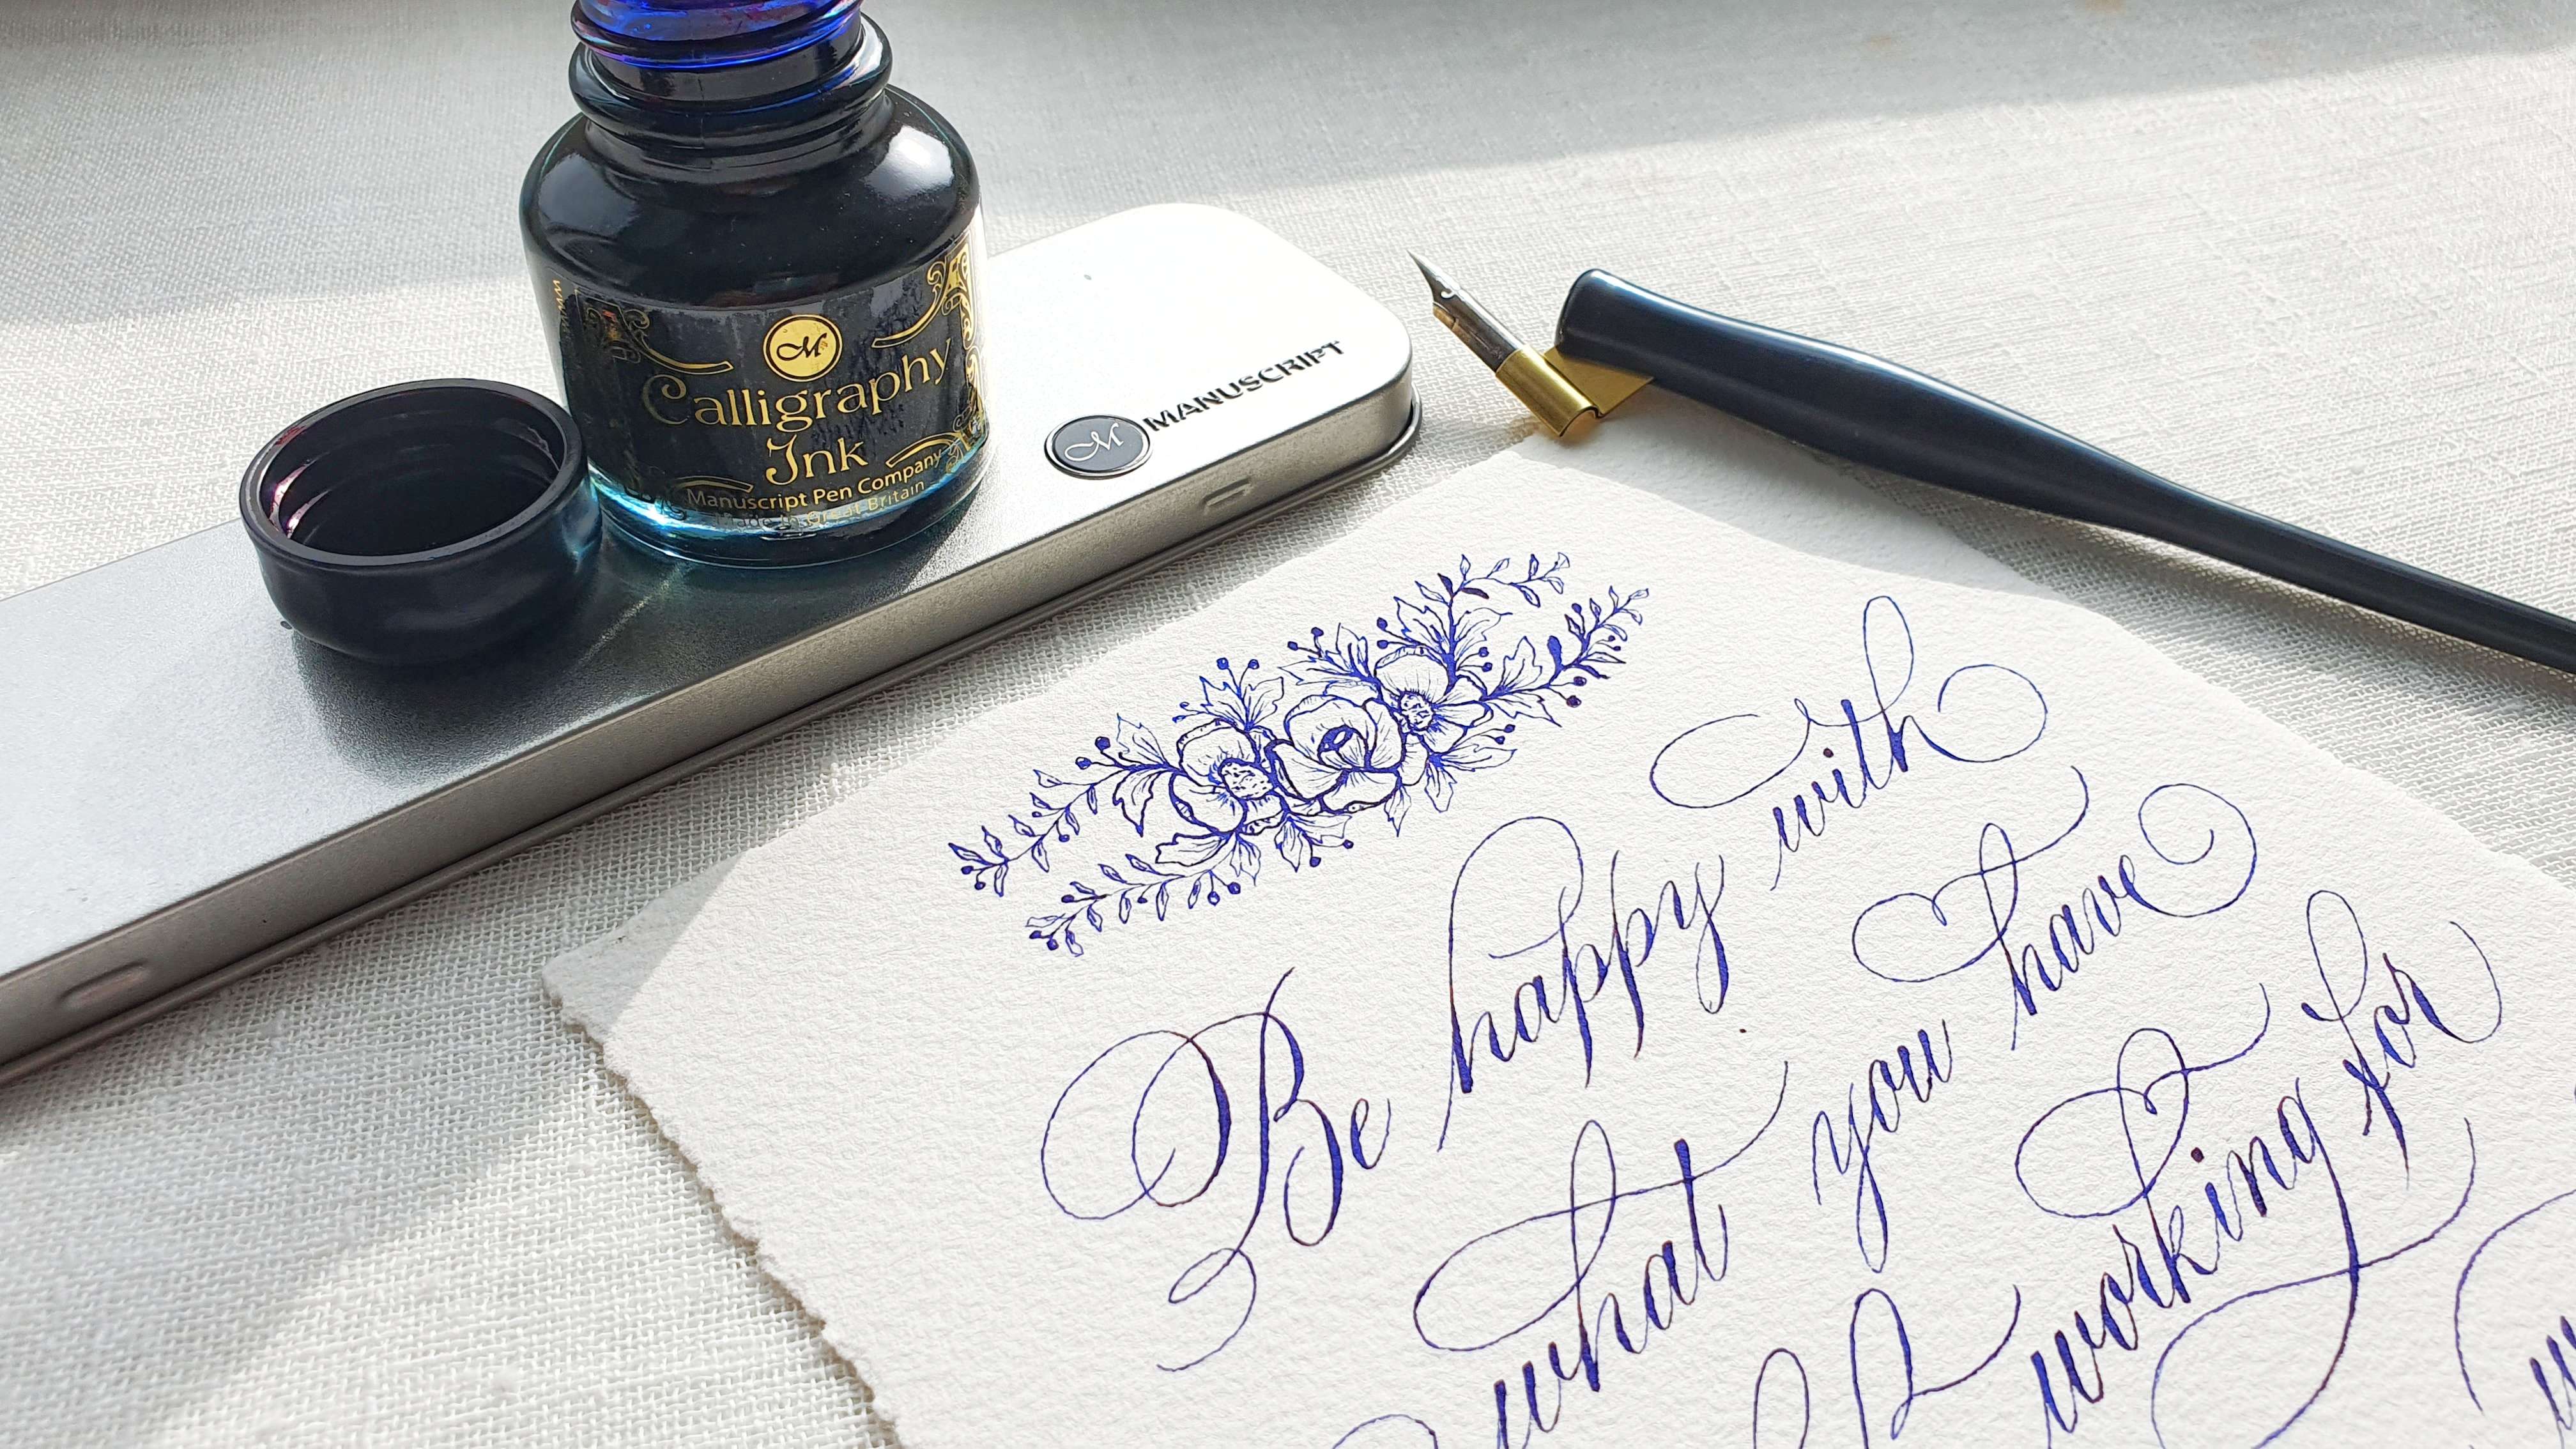
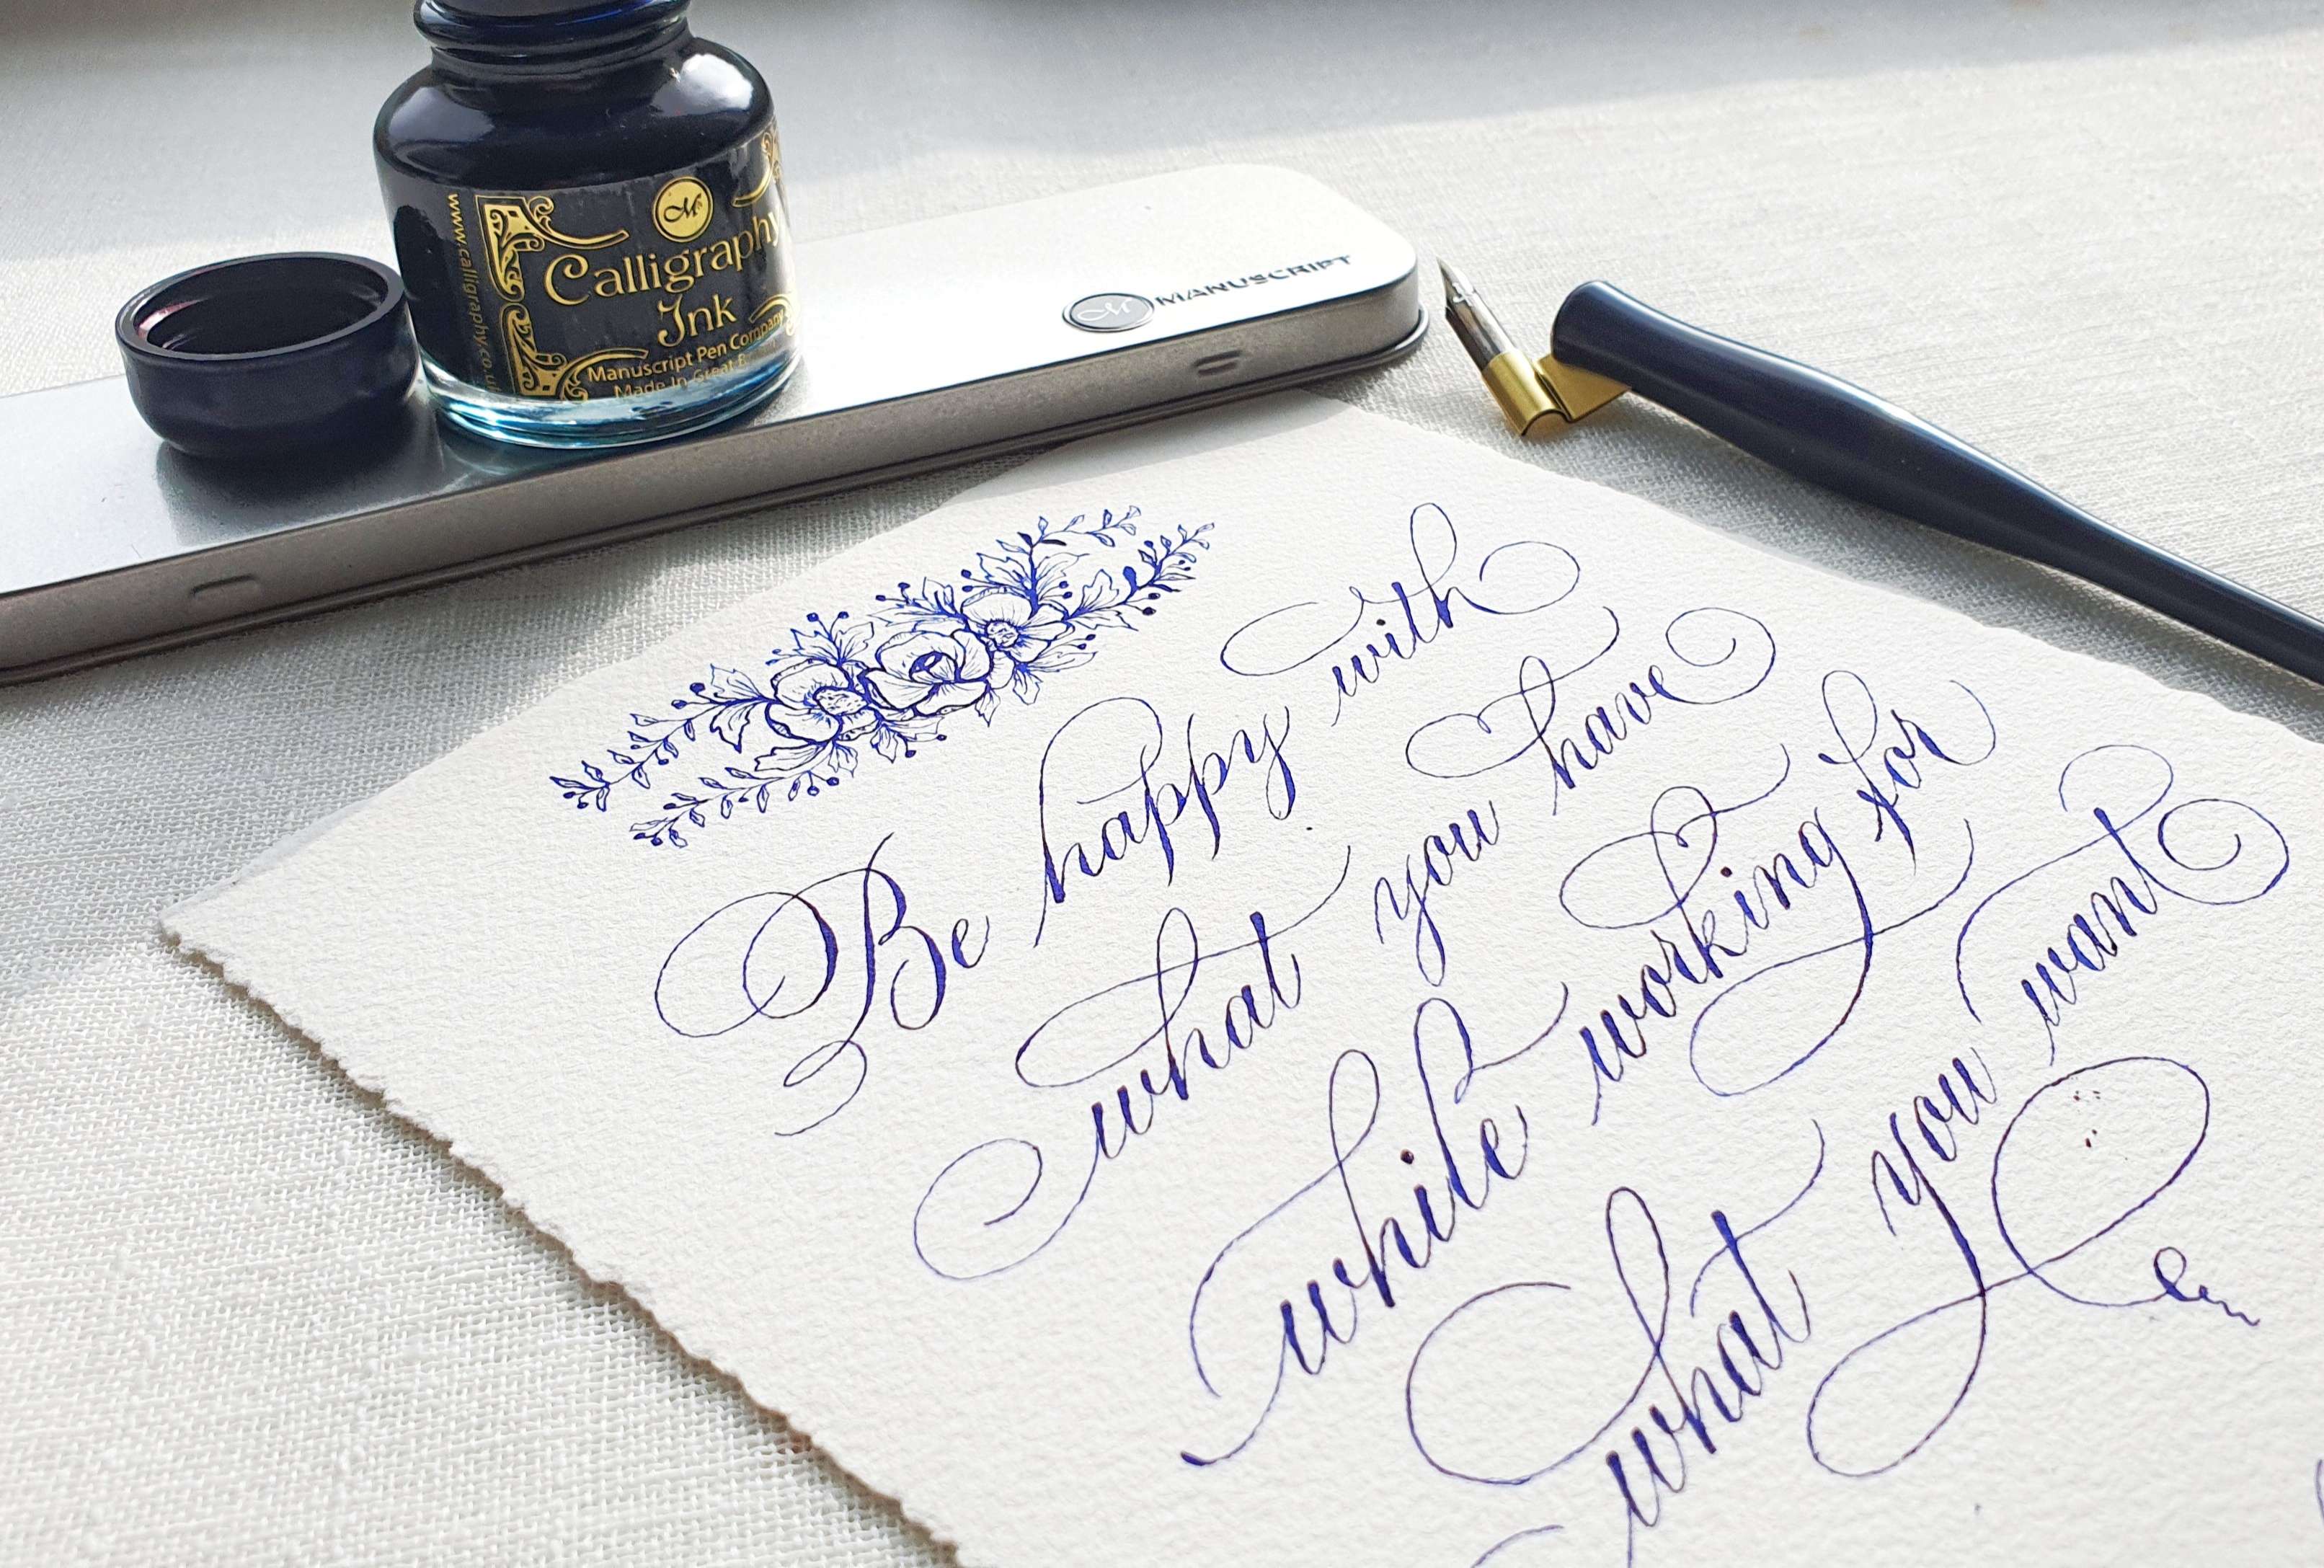
Turn on the light pad and start writing on the final paper. For the text, Leonardt Principal EF nib is used and the oblique penholder from the set with the sapphire ink. Go slowly and use a blank paper as your guard sheet
Change the nib to Leonardt 30 when doing the floral illustration.
Step 12
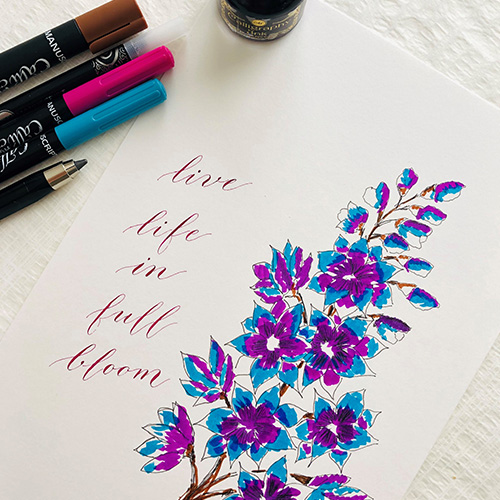
Let everything dry thoroughly and now you have the artwork ready to frame and hang on your wall.
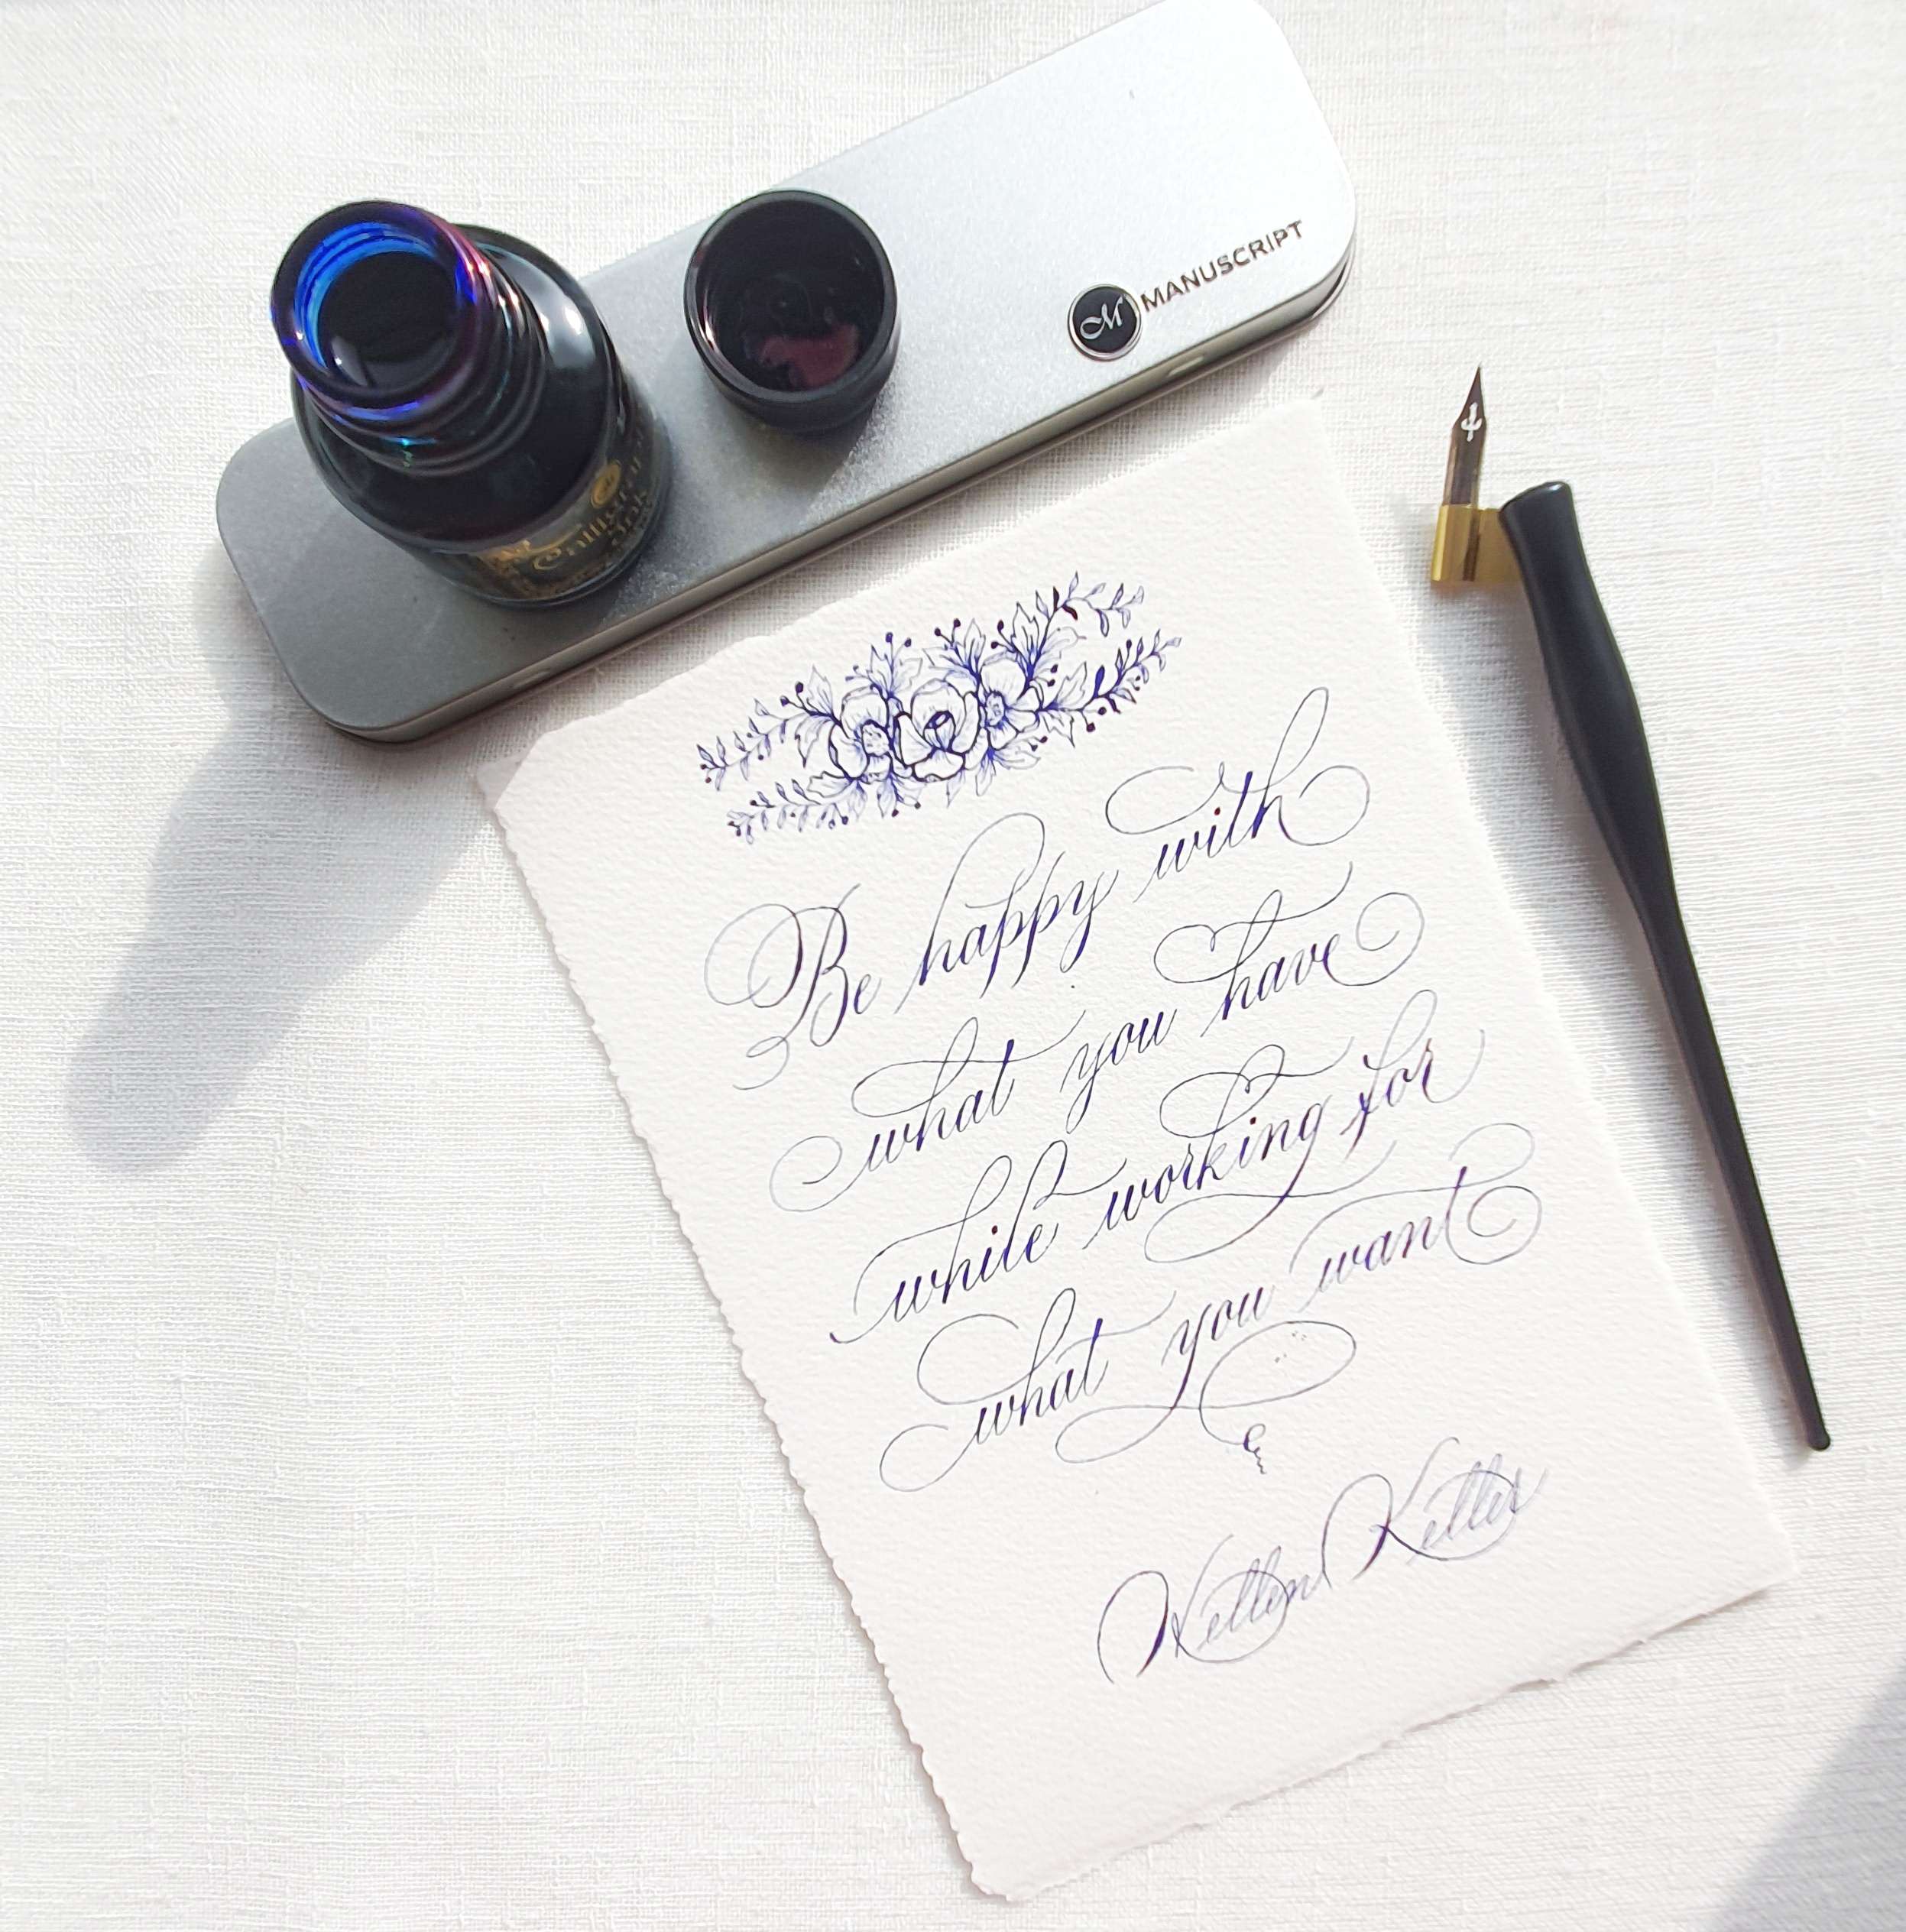
And there you have it, your completed piece. We have used a copperplate calligraphy script for our design but you can use any style whether its copperplate, italic, textura, brush or even hand lettering! Get creative and see what you come up with!
To see more of Uliana's work you can follow her on Instagram. Remember to follow @manuscriptpenco on Social Media where we will be showcasing her work throughout the month.