We asked our Artist of the Month Sharifa Shaikh to create a new step-by-step brush lettering tutorial for you all and she did not disappoint! She has put together this fun tutorial which uses two different artistic mediums, brush lettering and fine art doodling.
Follow her steps below and create your very own masterpiece! The beauty of this tutorial is that it allows you to improvise and add your own unique touch and style to your design!
So, what are you waiting for? Get your brush pens ready and lets go!
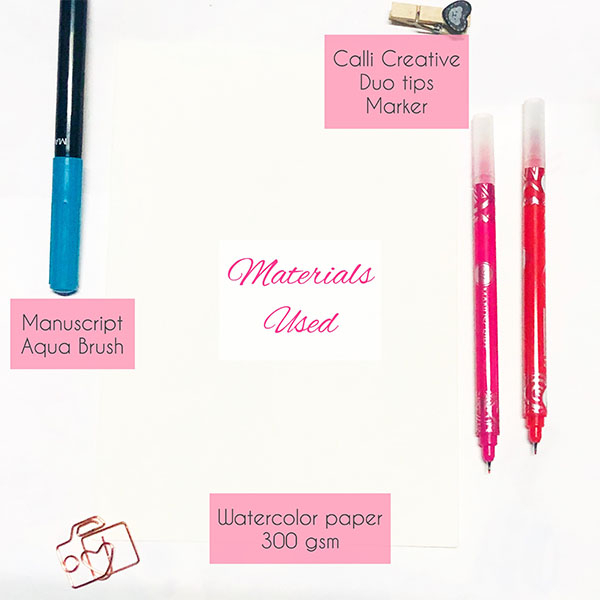
A list of products you will need:
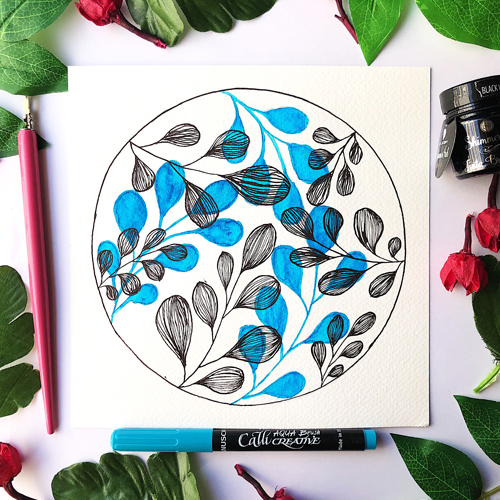
- Callicreative Aquabrush Markers
- Callicreative Duotip Markers
- Watercolour paper of your choice
Colour Selection
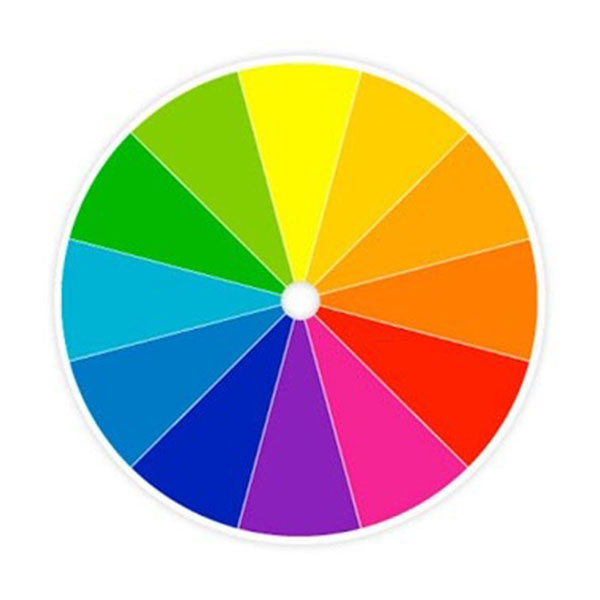
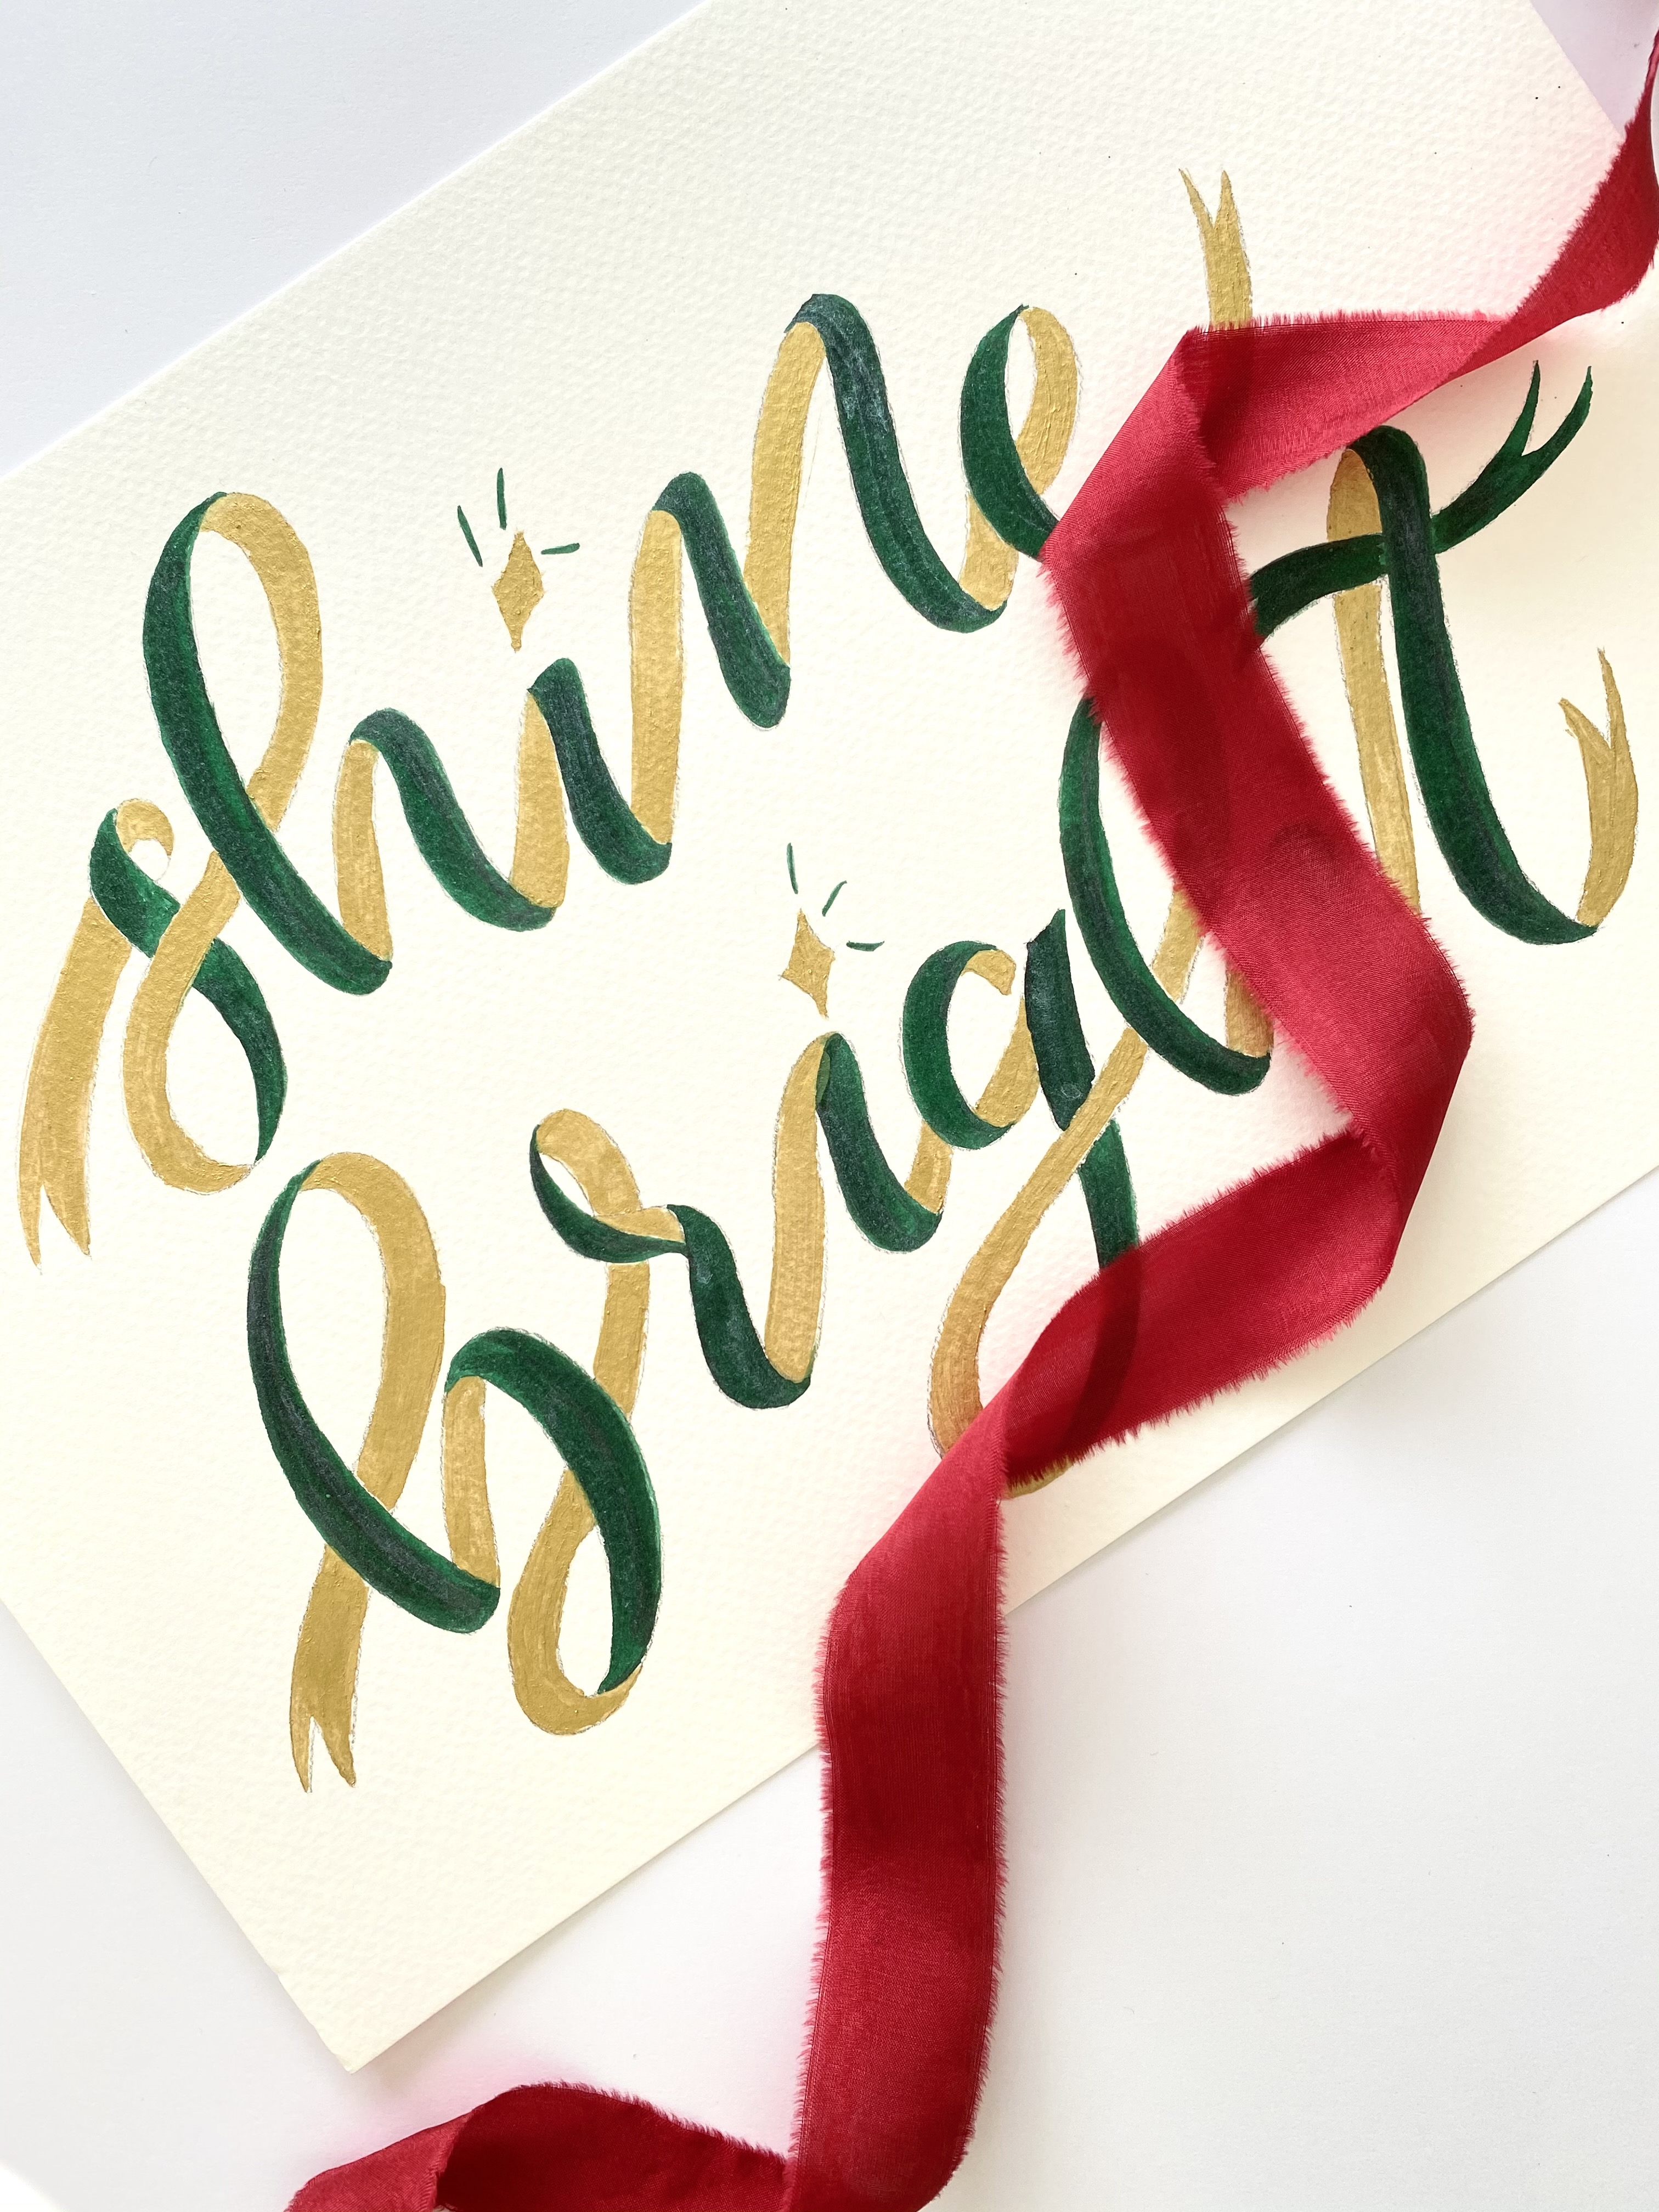
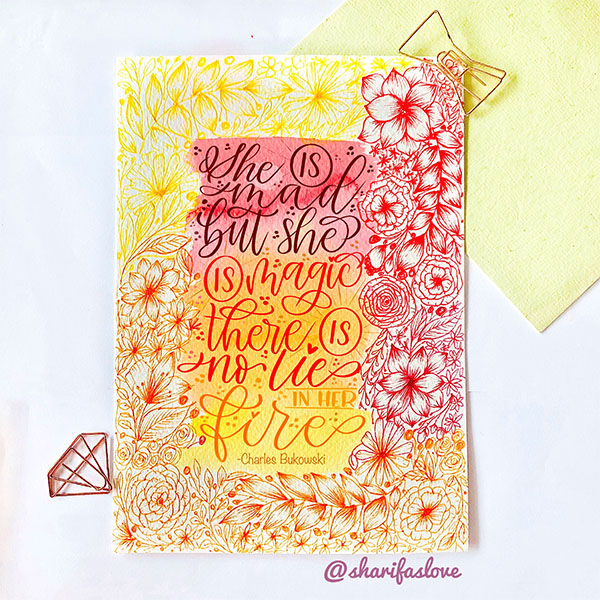
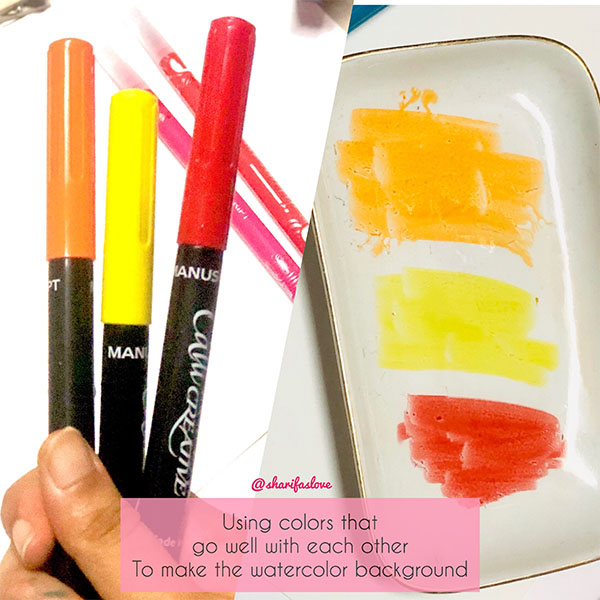
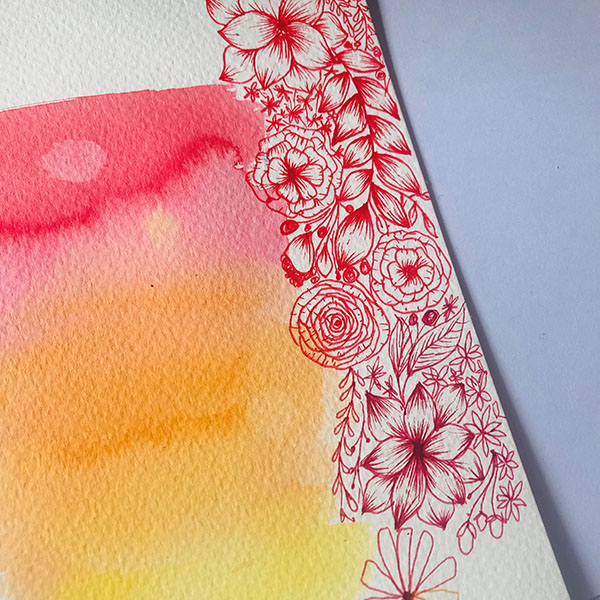
First off, its important to choose your colours. The colour wheel indicates that using colour adjacent to each other on the wheel works well as they compliment each other. The colours i have chosen are yellow, orange and red. I went with the same colour scheme while doing the floral frame and lettering as well, starting from a from deeper red to a yellow shade. These colours reminded me of Summer so I thought they would be perfect for this piece of artwork.
Step 1
Get your materials ready which includes your paper and pens. I have used Red, Yellow and Orange Aquabrush Markers and Red, Yellow and Orange Duotip Markers but you are welcome to choose the colours you want.
You can choose any Watercolour Paper of your choice.
Step 2
Remember to use colours that blend well into each other and colours of similar tones and shades of each other. To test your colours before you start dip you Aquabrush pens in some water and brush onto a plate to see what type of colour effect you get and then choose your colours after this testing.
Step 3
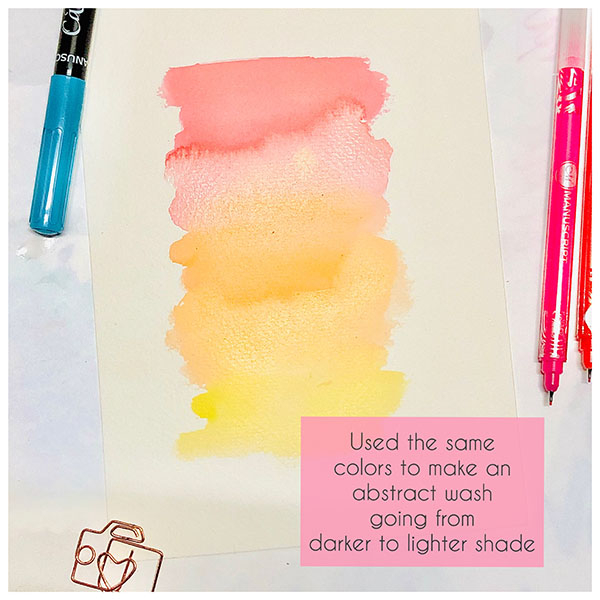
Now you have your colours ready here is where the fun starts! There are 3 ways in which you can create your watercolour background wash:
- Take your Aquabrush Markers and lay down your 3 chosen colours underneath each other. Then take the paint brush included with your marker set, dip it in some water and wash over your markers and blend your colours together
- Dip your Aquabrush Marker directly into some water and lay your colour down, you will see that will create a watercolour wash effect directly onto the paper
- Take your paintbrush and brush water down onto your canvas, then take your Aquabrush Markers and lay down directly onto the wet area of the paper creating your watercolour effect.
Step 4
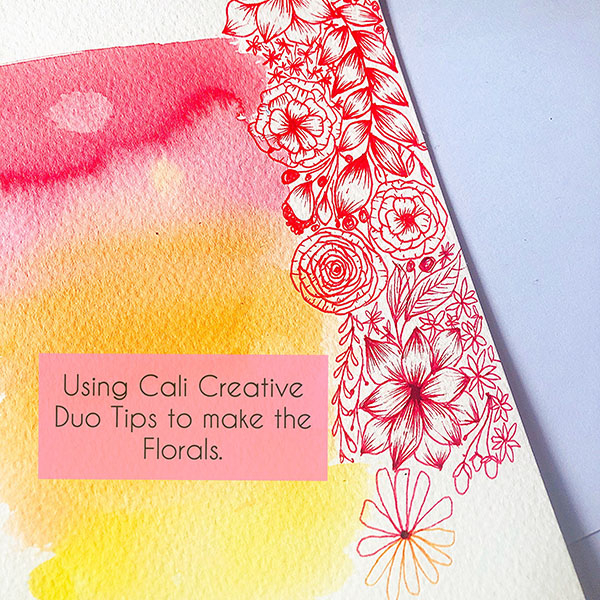
Time for the doodling! Take your Duotip Markers, using the Fine Tip start doodling some floral shapes, foliage and flourishes and create a border around the watercolour wash. Start with the colour that matches your first Aquabrush colours, working your way round to match the next colours as you reach your final shade. I start from dark to light so my doodle started with red, as I worked round I blended in an orange, finally finishing on yellow.
Step 5
Now your floral border is complete, make sure your watercolour wash is completely dry. Take an Aquabrush Marker of your choice and add your brush lettering quote! You may want to start with a light pencil outline and go over this using your brush pen. Once complete and the ink in completely dry, take a rubber and erase any visible pencil outline.
Voila, there you have your beautiful watercolour doodle ready to give to a special someone, or simply frame and hang up!
For more help and guidance with brush lettering and watercolour illustrations, CLICK HERE for free downloads and help sheets!
Tag @sharifaslove and @manuscriptpenco when you attempt this design and use #manuscriptpens. We would love to see and share what you create.